|
|
| (52 intermediate revisions by 11 users not shown) |
| Line 1: |
Line 1: |
| − | This page contains lists of all the '''miscellaneous furniture''' in the {{SER}}; furniture items that do not belong to an officially recognized [[:Category:Furniture Series|Series]], [[:Category:Furniture Themes|Theme]], [[:Category:Furniture Sets|Set]] or [[:Category:Furniture Categories|Category]]. Items are often added to or removed from these groupings from game to game, so an item may appear in one game's list, but may be missing from another. Click the appropriate game abbreviation link in the table below to access lists for older {{PG|nolink}} games.
| + | {{DISPLAYTITLE:List of furniture in {{NL|short|nolink}}}} |
| | + | The following is a '''directory of all [[furniture]] list pages''' for {{NL}}. A list of all furniture items in {{NL|short|nolink}} can be found [[/All furniture|here]]. |
| | | | |
| − | ==Item list== | + | ==By color== |
| − | <div class="mw-collapsible" style="margin:auto; width:80%; background:#FFDD66; border: 4px solid #FFDD66; text-align:center; {{roundy}}"> | + | <gallery> |
| − | {| width="90%" align="center" style="background:transparent;"
| + | Blue Vase NL Model.png|[[Furniture/New Leaf/Aqua|{{Color|Aqua|center=yes}}]]|link=Furniture/New Leaf/Aqua |
| − | ! width="55%" style="line-height:25px;" | Miscellaneous furniture in {{NL|nolink}}
| + | Paulownia Closet NL Model.png|[[Furniture/New Leaf/Beige|{{Color|Beige|center=yes}}]]|link=Furniture/New Leaf/Beige |
| − | ! width="200px" |
| + | Flat-Screen TV NL Model.png|[[Furniture/New Leaf/Black|{{Color|Black|center=yes}}]]|link=Furniture/New Leaf/Black |
| − | {| align="right" style="background:#fff; border: 2px solid #FFFFCC;" class="roundy"
| + | Garbage Pail NL Model.png|[[Furniture/New Leaf/Blue|{{Color|Blue|center=yes}}]]|link=Furniture/New Leaf/Blue |
| − | ! style="padding:2px 0px 0px 5px;" | <small>Other games:</small>
| + | Cardboard Chair NL Model.png|[[Furniture/New Leaf/Brown|{{Color|Brown|center=yes}}]]|link=Furniture/New Leaf/Brown |
| − | ! style="padding:2px 5px 0px 5px;" | [[{{{1|{{PAGENAME}}/Doubutsu no Mori}}}|DnM]] [[{{{2|{{PAGENAME}}/Doubutsu no Mori+}}}|DnM+]] [[{{{1|{{PAGENAME}}/Animal Crossing}}}|ACGC]] [[{{{1|{{PAGENAME}}/Doubutsu no Mori e+}}}|DnMe+]] [[{{{1|{{PAGENAME}}/Animal Crossing: Wild World}}}|ACWW]] [[{{{1|{{PAGENAME}}/Animal Crossing: City Folk}}}|ACCF]]
| + | Balloon Lamp NL Model.png|[[Furniture/New Leaf/Colorful|{{Color|Colorful|center=yes}}]]|link=Furniture/New Leaf/Colorful |
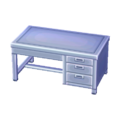
| − | |} | + | Office Desk NL Model.png|[[Furniture/New Leaf/Gray|{{Color|Gray|center=yes}}]]|link=Furniture/New Leaf/Gray |
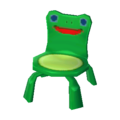
| − | |} | + | Froggy Chair (Green Frog) NL Model.png|[[Furniture/New Leaf/Green|{{Color|Green|center=yes}}]]|link=Furniture/New Leaf/Green |
| − | <div class="mw-collapsible-content">
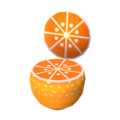
| + | Tangerine Chair (Orange) NL Model.png|[[Furniture/New Leaf/Orange|{{Color|Orange|center=yes}}]]|link=Furniture/New Leaf/Orange |
| − | {| class="sortable" align="center" width="100%" cellspacing="0px" cellpadding="1px" style="background:#FFDD66; text-align:center; {{roundy}}" | + | Piggy Bank (Pink Pig) NL Model.png|[[Furniture/New Leaf/Pink|{{Color|Pink|center=yes}}]]|link=Furniture/New Leaf/Pink |
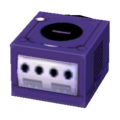
| − | |- | + | GameCube Drawer NL Model.png|[[Furniture/New Leaf/Purple|{{Color|Purple|center=yes}}]]|link=Furniture/New Leaf/Purple |
| − | | style="padding:3px;" | | + | Orange Cone NL Model.png|[[Furniture/New Leaf/Red|{{Color|Red|center=yes}}]]|link=Furniture/New Leaf/Red |
| − | {| class="sortable roundCorners" width=100% style="text-align: center; color: #333; background:#FFDD66; {{roundy}};" | + | Nine Lamp (White) NL Model.png|[[Furniture/New Leaf/White|{{Color|White|center=yes}}]]|link=Furniture/New Leaf/White |
| − | ! height=20px width=65px style="background-color: #FFFFCC; color:#666; {{roundyleft}};"| Item
| + | Bucket NL Model.png|[[Furniture/New Leaf/Yellow|{{Color|Yellow|center=yes}}]]|link=Furniture/New Leaf/Yellow |
| − | ! style="background-color: #FFFFCC; color:#666;" | Image
| + | </gallery> |
| − | ! style="background-color: #FFFFCC; color:#666;" | Buy Price
| |
| − | ! style="background-color: #FFFFCC; color:#666;" | Sell Price
| |
| − | ! style="background-color: #FFFFCC; color:#666;" | Available From
| |
| − | ! style="background-color: #FFFFCC; color:#666;" | Color(s)
| |
| − | ! style="background-color: #FFFFCC; color:#666;" | HHA Theme
| |
| − | ! style="background-color: #FFFFCC; color:#666;" | Style
| |
| − | ! style="background-color: #FFFFCC; color:#666;" | Size
| |
| − | ! style="background-color: #FFFFCC; color:#666;" | Info
| |
| − | ! style="background-color: #FFFFCC; color:#666; {{roundyright}};" | Customize
| |
| − | |-
| |
| − | | style="background:#fff"| World Map
| |
| − | | style="background:#fff"| [[File:World Map HHD Icon.png]]
| |
| − | | style="background:#fff"| - | |
| − | | style="background:#fff"| 300 | |
| − | | style="background:#fff"| [[Katie]]
| |
| − | | style="background:#fff"| {{aqua}} / {{aqua}}
| |
| − | | style="background:#fff"| None | |
| − | | style="background:#fff"| Iconic | |
| − | | style="background:#fff"| {{medium}}
| |
| − | | style="background:#fff"| Wall furniture | |
| − | | style="background:#fff"| Yes
| |
| − | |- | |
| − | | style="background:#fff"| Ayers Rock | |
| − | | style="background:#fff"| [[File:Ayers Rock HHD Icon.png]] | |
| − | | style="background:#fff"| 1,200 | |
| − | | style="background:#fff"| 300 | |
| − | | style="background:#fff"| [[Gulliver]] | |
| − | | style="background:#fff"| {{brown}} / {{brown}} | |
| − | | style="background:#fff"| None
| |
| − | | style="background:#fff"| Historical
| |
| − | | style="background:#fff"| {{large}}
| |
| − | | style="background:#fff"| -
| |
| − | | style="background:#fff"| No
| |
| − | |-
| |
| − | | style="background:#fff"| Tribal Mask
| |
| − | | style="background:#fff"| [[File:Tribal Mask HHD Icon.png]]
| |
| − | | style="background:#fff"| 4,400
| |
| − | | style="background:#fff"| 1,100
| |
| − | | style="background:#fff"| [[Gulliver]]
| |
| − | | style="background:#fff"| {{brown}} / {{brown}}
| |
| − | | style="background:#fff"| Antique<br>Quirky
| |
| − | | style="background:#fff"| Iconic
| |
| − | | style="background:#fff"| {{small}}
| |
| − | | style="background:#fff"| -
| |
| − | | style="background:#fff"| No
| |
| − | |-
| |
| − | | style="background:#fff"| Jomon Pottery
| |
| − | | style="background:#fff"| [[File:Jomon Pottery HHD Icon.png]]
| |
| − | | style="background:#fff"| 800
| |
| − | | style="background:#fff"| 200
| |
| − | | style="background:#fff"| [[Timmy and Tommy's store|Timmy & Tommy]]
| |
| − | | style="background:#fff"| {{brown}} / {{brown}}
| |
| − | | style="background:#fff"| Harmonious<br>Antique<br>Quirky
| |
| − | | style="background:#fff"| Historical
| |
| − | | style="background:#fff"| {{small}}
| |
| − | | style="background:#fff"| -
| |
| − | | style="background:#fff"| No
| |
| − | |-
| |
| − | | style="background:#fff"| Clay Furnace
| |
| − | | style="background:#fff"| [[File:Clay Furnace HHD Icon.png]]
| |
| − | | style="background:#fff"| 1,800
| |
| − | | style="background:#fff"| 450
| |
| − | | style="background:#fff"| [[Timmy and Tommy's store|Timmy & Tommy]]
| |
| − | | style="background:#fff"| {{brown}} / {{gray}}
| |
| − | | style="background:#fff"| Harmonious
| |
| − | | style="background:#fff"| Historical
| |
| − | | style="background:#fff"| {{small}}
| |
| − | | style="background:#fff"| -
| |
| − | | style="background:#fff"| No
| |
| − | |-
| |
| − | | style="background:#fff"| Brown Pot
| |
| − | | style="background:#fff"| [[File:Brown Pot HHD Icon.png]]
| |
| − | | style="background:#fff"| 800
| |
| − | | style="background:#fff"| 200
| |
| − | | style="background:#fff"| [[Timmy and Tommy's store|Timmy & Tommy]]
| |
| − | | style="background:#fff"| {{brown}} / {{brown}}
| |
| − | | style="background:#fff"| None
| |
| − | | style="background:#fff"| Basic
| |
| − | | style="background:#fff"| {{small}}
| |
| − | | style="background:#fff"| Can place on table
| |
| − | | style="background:#fff"| Yes
| |
| − | |-
| |
| − | | style="background:#fff"| White Pot
| |
| − | | style="background:#fff"| [[File:White Pot HHD Icon.png]]
| |
| − | | style="background:#fff"| 1,200
| |
| − | | style="background:#fff"| 300
| |
| − | | style="background:#fff"| [[Timmy and Tommy's store|Timmy & Tommy]]
| |
| − | | style="background:#fff"| {{white}} / {{white}}
| |
| − | | style="background:#fff"| None
| |
| − | | style="background:#fff"| Basic
| |
| − | | style="background:#fff"| {{small}}
| |
| − | | style="background:#fff"| Can place on table
| |
| − | | style="background:#fff"| Yes
| |
| − | |-
| |
| − | | style="background:#fff"| Pyramid
| |
| − | | style="background:#fff"| [[File:Pyramid HHD Icon.png]]
| |
| − | | style="background:#fff"| 3,800
| |
| − | | style="background:#fff"| 950
| |
| − | | style="background:#fff"| [[Timmy and Tommy's store|Timmy & Tommy]]
| |
| − | | style="background:#fff"| {{brown}} / {{yellow}}
| |
| − | | style="background:#fff"| Antique<br>Quirky
| |
| − | | style="background:#fff"| Historical
| |
| − | | style="background:#fff"| {{large}}
| |
| − | | style="background:#fff"| -
| |
| − | | style="background:#fff"| No
| |
| − | |-
| |
| − | | style="background:#fff"| Sphinx
| |
| − | | style="background:#fff"| [[File:Sphinx HHD Icon.png]]
| |
| − | | style="background:#fff"| 3,200
| |
| − | | style="background:#fff"| 800
| |
| − | | style="background:#fff"| [[Timmy and Tommy's store|Timmy & Tommy]]
| |
| − | | style="background:#fff"| {{brown}} / {{yellow}}
| |
| − | | style="background:#fff"| Antique<br>Quirky
| |
| − | | style="background:#fff"| Historical
| |
| − | | style="background:#fff"| {{medium}}
| |
| − | | style="background:#fff"| -
| |
| − | | style="background:#fff"| No
| |
| − | |-
| |
| − | | style="background:#fff"| Mummy's Casket
| |
| − | | style="background:#fff"| [[File:Mummy's Casket HHD Icon.png]]
| |
| − | | style="background:#fff"| 4,400
| |
| − | | style="background:#fff"| 1,100
| |
| − | | style="background:#fff"| [[Gulliver]]
| |
| − | | style="background:#fff"| {{colorful}} / {{yellow}}
| |
| − | | style="background:#fff"| Antique<br>Quirky
| |
| − | | style="background:#fff"| Historical
| |
| − | | style="background:#fff"| {{small}}
| |
| − | | style="background:#fff"| Storage
| |
| − | | style="background:#fff"| No
| |
| − | |-
| |
| − | | style="background:#fff"| Moai Statue
| |
| − | | style="background:#fff"| [[File:Moai Statue HHD Icon.png]]
| |
| − | | style="background:#fff"| 7,600
| |
| − | | style="background:#fff"| 1,900
| |
| − | | style="background:#fff"| [[Gulliver]]
| |
| − | | style="background:#fff"| {{gray}} / {{gray}}
| |
| − | | style="background:#fff"| Quirky
| |
| − | | style="background:#fff"| Iconic
| |
| − | | style="background:#fff"| {{small}}
| |
| − | | style="background:#fff"| -
| |
| − | | style="background:#fff"| No
| |
| − | |-
| |
| − | | style="background:#fff"| Mouth of Truth
| |
| − | | style="background:#fff"| [[File:Mouth of Truth HHD Icon.png]]
| |
| − | | style="background:#fff"| 7,600
| |
| − | | style="background:#fff"| 1,900
| |
| − | | style="background:#fff"| [[Gulliver]]
| |
| − | | style="background:#fff"| {{gray}} / {{gray}}
| |
| − | | style="background:#fff"| Quirky
| |
| − | | style="background:#fff"| Iconic
| |
| − | | style="background:#fff"| {{medium}}
| |
| − | | style="background:#fff"| Can use
| |
| − | | style="background:#fff"| No
| |
| − | |-
| |
| − | | style="background:#fff"| Tapestry
| |
| − | | style="background:#fff"| [[File:Tapestry HHD Icon.png]]
| |
| − | | style="background:#fff"| 800
| |
| − | | style="background:#fff"| 200
| |
| − | | style="background:#fff"| [[Gulliver]]
| |
| − | | style="background:#fff"| {{brown}} / {{red}}
| |
| − | | style="background:#fff"| Antique
| |
| − | | style="background:#fff"| Iconic
| |
| − | | style="background:#fff"| {{small}}
| |
| − | | style="background:#fff"| Wall furniture
| |
| − | | style="background:#fff"| No
| |
| − | |-
| |
| − | | style="background:#fff"| Pantheon Post
| |
| − | | style="background:#fff"| [[File:Pantheon Post HHD Icon.png]]
| |
| − | | style="background:#fff"| 3,600
| |
| − | | style="background:#fff"| 900
| |
| − | | style="background:#fff"| [[Timmy and Tommy's store|Timmy & Tommy]]
| |
| − | | style="background:#fff"| {{gray}} / {{gray}}
| |
| − | | style="background:#fff"| Antique<br>Quirky
| |
| − | | style="background:#fff"| Historical
| |
| − | | style="background:#fff"| {{small}}
| |
| − | | style="background:#fff"| -
| |
| − | | style="background:#fff"| No
| |
| − | |-
| |
| − | | style="background:#fff"| Ionian Post
| |
| − | | style="background:#fff"| [[File:Ionian Post HHD Icon.png]]
| |
| − | | style="background:#fff"| 3,600
| |
| − | | style="background:#fff"| 900
| |
| − | | style="background:#fff"| [[Timmy and Tommy's store|Timmy & Tommy]]
| |
| − | | style="background:#fff"| {{gray}} / {{gray}}
| |
| − | | style="background:#fff"| Antique<br>Quirky
| |
| − | | style="background:#fff"| Historical
| |
| − | | style="background:#fff"| {{small}}
| |
| − | | style="background:#fff"| -
| |
| − | | style="background:#fff"| No
| |
| − | |-
| |
| − | | style="background:#fff"| Corinthian Post
| |
| − | | style="background:#fff"| [[File:Corinthian Post HHD Icon.png]]
| |
| − | | style="background:#fff"| 3,600
| |
| − | | style="background:#fff"| 900
| |
| − | | style="background:#fff"| [[Timmy and Tommy's store|Timmy & Tommy]]
| |
| − | | style="background:#fff"| {{gray}} / {{gray}}
| |
| − | | style="background:#fff"| Antique<br>Quirky
| |
| − | | style="background:#fff"| Historical
| |
| − | | style="background:#fff"| {{small}}
| |
| − | | style="background:#fff"| -
| |
| − | | style="background:#fff"| No
| |
| − | |-
| |
| − | | style="background:#fff"| Broken Post
| |
| − | | style="background:#fff"| [[File:Broken Post HHD Icon.png]]
| |
| − | | style="background:#fff"| 1,800
| |
| − | | style="background:#fff"| 450
| |
| − | | style="background:#fff"| [[Timmy and Tommy's store|Timmy & Tommy]]
| |
| − | | style="background:#fff"| {{gray}} / {{gray}}
| |
| − | | style="background:#fff"| Antique<br>Quirky
| |
| − | | style="background:#fff"| Historical
| |
| − | | style="background:#fff"| {{small}}
| |
| − | | style="background:#fff"| -
| |
| − | | style="background:#fff"| No
| |
| − | |-
| |
| − | | style="background:#fff"| Merlion
| |
| − | | style="background:#fff"| [[File:Merlion HHD Icon.png]]
| |
| − | | style="background:#fff"| 9,200
| |
| − | | style="background:#fff"| 2,300
| |
| − | | style="background:#fff"| [[Gulliver]]
| |
| − | | style="background:#fff"| {{white}} / {{white}}
| |
| − | | style="background:#fff"| Harmonious
| |
| − | | style="background:#fff"| Iconic
| |
| − | | style="background:#fff"| {{small}}
| |
| − | | style="background:#fff"| Can use
| |
| − | | style="background:#fff"| No
| |
| − | |-
| |
| − | | style="background:#fff"| Mermaid Statue
| |
| − | | style="background:#fff"| [[File:Mermaid Statue HHD Icon.png]]
| |
| − | | style="background:#fff"| 7,600
| |
| − | | style="background:#fff"| 1,900
| |
| − | | style="background:#fff"| [[Gulliver]]
| |
| − | | style="background:#fff"| {{gray}} / {{gray}}
| |
| − | | style="background:#fff"| None
| |
| − | | style="background:#fff"| Iconic
| |
| − | | style="background:#fff"| {{small}}
| |
| − | | style="background:#fff"| -
| |
| − | | style="background:#fff"| No
| |
| − | |-
| |
| − | | style="background:#fff"| Mannekin Pis
| |
| − | | style="background:#fff"| [[File:Mannekin Pis HHD Icon.png]]
| |
| − | | style="background:#fff"| 5,200
| |
| − | | style="background:#fff"| 1,300
| |
| − | | style="background:#fff"| [[Gulliver]]
| |
| − | | style="background:#fff"| {{gray}} / {{gray}}
| |
| − | | style="background:#fff"| None
| |
| − | | style="background:#fff"| Iconic
| |
| − | | style="background:#fff"| {{small}}
| |
| − | | style="background:#fff"| Can use
| |
| − | | style="background:#fff"| No
| |
| − | |-
| |
| − | | style="background:#fff"| Plate Armor
| |
| − | | style="background:#fff"| [[File:Plate Armor HHD Icon.png]]
| |
| − | | style="background:#fff"| 6,400
| |
| − | | style="background:#fff"| 1,600
| |
| − | | style="background:#fff"| [[Spotlight]] / [[Wishy]]
| |
| − | | style="background:#fff"| {{gray}} / {{gray}}
| |
| − | | style="background:#fff"| Antique<br>Quirky
| |
| − | | style="background:#fff"| Historical
| |
| − | | style="background:#fff"| {{small}}
| |
| − | | style="background:#fff"| -
| |
| − | | style="background:#fff"| Yes
| |
| − | |-
| |
| − | | style="background:#fff"| Statue of Liberty
| |
| − | | style="background:#fff"| [[File:Statue of Liberty HHD Icon.png]]
| |
| − | | style="background:#fff"| 1,200
| |
| − | | style="background:#fff"| 300
| |
| − | | style="background:#fff"| [[Gulliver]]
| |
| − | | style="background:#fff"| {{gray}} / {{gray}}
| |
| − | | style="background:#fff"| None
| |
| − | | style="background:#fff"| Iconic
| |
| − | | style="background:#fff"| {{small}}
| |
| − | | style="background:#fff"| -
| |
| − | | style="background:#fff"| No
| |
| − | |-
| |
| − | | style="background:#fff"| Phone Box
| |
| − | | style="background:#fff"| [[File:Phone Box HHD Icon.png]]
| |
| − | | style="background:#fff"| 2,400
| |
| − | | style="background:#fff"| 600
| |
| − | | style="background:#fff"| [[Timmy and Tommy's store|Timmy & Tommy]]
| |
| − | | style="background:#fff"| {{red}} / {{red}}
| |
| − | | style="background:#fff"| None
| |
| − | | style="background:#fff"| Iconic
| |
| − | | style="background:#fff"| {{small}}
| |
| − | | style="background:#fff"| -
| |
| − | | style="background:#fff"| No
| |
| − | |-
| |
| − | | style="background:#fff"| Barber's Pole
| |
| − | | style="background:#fff"| [[File:Barber's Pole HHD Icon.png]]
| |
| − | | style="background:#fff"| 1,600
| |
| − | | style="background:#fff"| 400
| |
| − | | style="background:#fff"| [[Timmy and Tommy's store|Timmy & Tommy]]
| |
| − | | style="background:#fff"| {{colorful}} / {{colorful}}
| |
| − | | style="background:#fff"| None
| |
| − | | style="background:#fff"| Cute
| |
| − | | style="background:#fff"| {{small}}
| |
| − | | style="background:#fff"| -
| |
| − | | style="background:#fff"| No
| |
| − | |-
| |
| − | | style="background:#fff"| Fire Hydrant
| |
| − | | style="background:#fff"| [[File:Fire Hydrant HHD Icon.png]]
| |
| − | | style="background:#fff"| 960
| |
| − | | style="background:#fff"| 240
| |
| − | | style="background:#fff"| [[Timmy and Tommy's store|Timmy & Tommy]]
| |
| − | | style="background:#fff"| {{red}} / {{red}}
| |
| − | | style="background:#fff"| None
| |
| − | | style="background:#fff"| Basic
| |
| − | | style="background:#fff"| {{small}}
| |
| − | | style="background:#fff"| -
| |
| − | | style="background:#fff"| No
| |
| − | |-
| |
| − | | style="background:#fff"| Gas Pump
| |
| − | | style="background:#fff"| [[File:Gas Pump HHD Icon.png]]
| |
| − | | style="background:#fff"| 1,280
| |
| − | | style="background:#fff"| 320
| |
| − | | style="background:#fff"| [[Timmy and Tommy's store|Timmy & Tommy]]
| |
| − | | style="background:#fff"| {{red}} / {{red}}
| |
| − | | style="background:#fff"| Sci-Fi
| |
| − | | style="background:#fff"| Basic
| |
| − | | style="background:#fff"| {{small}}
| |
| − | | style="background:#fff"| Can use
| |
| − | | style="background:#fff"| No
| |
| − | |-
| |
| − | | style="background:#fff"| Tuk-Tuk
| |
| − | | style="background:#fff"| [[File:Tuk-Tuk HHD Icon.png]]
| |
| − | | style="background:#fff"| 1,200
| |
| − | | style="background:#fff"| 300
| |
| − | | style="background:#fff"| [[Gulliver]]
| |
| − | | style="background:#fff"| {{black}} / {{blue}}
| |
| − | | style="background:#fff"| Harmonious
| |
| − | | style="background:#fff"| Iconic
| |
| − | | style="background:#fff"| {{medium}}
| |
| − | | style="background:#fff"| -
| |
| − | | style="background:#fff"| No
| |
| − | |-
| |
| − | | style="background:#fff"| Dream Catcher
| |
| − | | style="background:#fff"| [[File:Dream Catcher HHD Icon.png]]
| |
| − | | style="background:#fff"| 1,600
| |
| − | | style="background:#fff"| 400
| |
| − | | style="background:#fff"| [[Gulliver]]
| |
| − | | style="background:#fff"| {{brown}} / {{red}}
| |
| − | | style="background:#fff"| Toy Shop
| |
| − | | style="background:#fff"| Iconic
| |
| − | | style="background:#fff"| {{small}}
| |
| − | | style="background:#fff"| Wall furniture
| |
| − | | style="background:#fff"| No
| |
| − | |-
| |
| − | | style="background:#fff"| Boomerang
| |
| − | | style="background:#fff"| [[File:Boomerang HHD Icon.png]]
| |
| − | | style="background:#fff"| 1,200
| |
| − | | style="background:#fff"| 300
| |
| − | | style="background:#fff"| [[Timmy and Tommy's store|Timmy & Tommy]]
| |
| − | | style="background:#fff"| {{aqua}} / {{brown}}
| |
| − | | style="background:#fff"| None
| |
| − | | style="background:#fff"| Iconic
| |
| − | | style="background:#fff"| {{small}}
| |
| − | | style="background:#fff"| Wall furniture
| |
| − | | style="background:#fff"| No
| |
| − | |-
| |
| − | | style="background:#fff"| Genie's Lamp
| |
| − | | style="background:#fff"| [[File:Genie's Lamp HHD Icon.png]]
| |
| − | | style="background:#fff"| 1,500
| |
| − | | style="background:#fff"| 375
| |
| − | | style="background:#fff"| [[Timmy and Tommy's store|Timmy & Tommy]]
| |
| − | | style="background:#fff"| {{yellow}} / {{yellow}}
| |
| − | | style="background:#fff"| Antique<br>Fairy Tale<br>Quirky
| |
| − | | style="background:#fff"| Historical
| |
| − | | style="background:#fff"| {{small}}
| |
| − | | style="background:#fff"| Can place on table
| |
| − | | style="background:#fff"| No
| |
| − | |-
| |
| − | | style="background:#fff"| Rooster of Barcelos
| |
| − | | style="background:#fff"| [[File:Rooster of Barcelos HHD Icon.png]]
| |
| − | | style="background:#fff"| 1,200
| |
| − | | style="background:#fff"| 300
| |
| − | | style="background:#fff"| [[Gulliver]]
| |
| − | | style="background:#fff"| {{black}} / {{colorful}}
| |
| − | | style="background:#fff"| Toy Shop
| |
| − | | style="background:#fff"| Iconic
| |
| − | | style="background:#fff"| {{small}}
| |
| − | | style="background:#fff"| Can place on table
| |
| − | | style="background:#fff"| No
| |
| − | |-
| |
| − | | style="background:#fff"| Dala Horse
| |
| − | | style="background:#fff"| [[File:Dala Horse HHD Icon.png]]
| |
| − | | style="background:#fff"| 1,200
| |
| − | | style="background:#fff"| 300
| |
| − | | style="background:#fff"| [[Gulliver]]
| |
| − | | style="background:#fff"| {{colorful}} / {{red}}
| |
| − | | style="background:#fff"| Rustic<br>Toy Shop
| |
| − | | style="background:#fff"| Iconic
| |
| − | | style="background:#fff"| {{small}}
| |
| − | | style="background:#fff"| Can place on table
| |
| − | | style="background:#fff"| No
| |
| − | |-
| |
| − | | style="background:#fff"| Gaudí's Lizard
| |
| − | | style="background:#fff"| [[File:Gaudi's Lizard HHD Icon.png]]
| |
| − | | style="background:#fff"| 1,200
| |
| − | | style="background:#fff"| 300
| |
| − | | style="background:#fff"| [[Gulliver]]
| |
| − | | style="background:#fff"| {{aqua}} / {{colorful}}
| |
| − | | style="background:#fff"| Trendy
| |
| − | | style="background:#fff"| Modern
| |
| − | | style="background:#fff"| {{medium}}
| |
| − | | style="background:#fff"| -
| |
| − | | style="background:#fff"| No
| |
| − | |-
| |
| − | | style="background:#fff"| Skeleton Figurine
| |
| − | | style="background:#fff"| [[File:Skeleton Figurine HHD Icon.png]]
| |
| − | | style="background:#fff"| 1,680
| |
| − | | style="background:#fff"| 420
| |
| − | | style="background:#fff"| [[Gulliver]]
| |
| − | | style="background:#fff"| {{black}} / {{white}}
| |
| − | | style="background:#fff"| Toy Shop / Quirky
| |
| − | | style="background:#fff"| Iconic
| |
| − | | style="background:#fff"| {{small}}
| |
| − | | style="background:#fff"| Can place on table
| |
| − | | style="background:#fff"| No
| |
| − | |-
| |
| − | | style="background:#fff"| Matryoshka
| |
| − | | style="background:#fff"| [[File:Matryoshka HHD Icon.png]]
| |
| − | | style="background:#fff"| 3,920
| |
| − | | style="background:#fff"| 980
| |
| − | | style="background:#fff"| [[Gulliver]]
| |
| − | | style="background:#fff"| {{colorful}} / {{colorful}}
| |
| − | | style="background:#fff"| Fairy Tale<br>Toy Shop
| |
| − | | style="background:#fff"| Iconic
| |
| − | | style="background:#fff"| {{medium}}
| |
| − | | style="background:#fff"| Can use
| |
| − | | style="background:#fff"| Yes
| |
| − | |-
| |
| − | | style="background:#fff"| Digital-Photo Frame
| |
| − | | style="background:#fff"| [[File:Digital-Photo Frame HHD Icon.png]]
| |
| − | | style="background:#fff"| -
| |
| − | | style="background:#fff"| 300
| |
| − | | style="background:#fff"| [[Katie]]
| |
| − | | style="background:#fff"| {{black}} / {{black}}
| |
| − | | style="background:#fff"| Trendy
| |
| − | | style="background:#fff"| Modern
| |
| − | | style="background:#fff"| {{small}}
| |
| − | | style="background:#fff"| Can use, can place on table
| |
| − | | style="background:#fff"| No
| |
| − | |-
| |
| − | | style="background:#fff"| Small LED Display
| |
| − | | style="background:#fff"| [[File:Small LED Display HHD Icon.png]]
| |
| − | | style="background:#fff"| 2,500
| |
| − | | style="background:#fff"| 625
| |
| − | | style="background:#fff"| [[Timmy and Tommy's store|Timmy & Tommy]]
| |
| − | | style="background:#fff"| None / {{yellow}}
| |
| − | | style="background:#fff"| Sci-Fi<br>Toy Shop
| |
| − | | style="background:#fff"| Flashy
| |
| − | | style="background:#fff"| {{small}}
| |
| − | | style="background:#fff"| -
| |
| − | | style="background:#fff"| Yes
| |
| − | |-
| |
| − | | style="background:#fff"| LED Display
| |
| − | | style="background:#fff"| [[File:LED Display HHD Icon.png]]
| |
| − | | style="background:#fff"| 3,000
| |
| − | | style="background:#fff"| 750
| |
| − | | style="background:#fff"| [[Timmy and Tommy's store|Timmy & Tommy]]
| |
| − | | style="background:#fff"| None / {{yellow}}
| |
| − | | style="background:#fff"| Toy Shop
| |
| − | | style="background:#fff"| Flashy
| |
| − | | style="background:#fff"| {{medium}}
| |
| − | | style="background:#fff"| Wall furniture
| |
| − | | style="background:#fff"| Yes
| |
| − | |-
| |
| − | | style="background:#fff"| Hospital TV
| |
| − | | style="background:#fff"| [[File:Hospital TV HHD Icon.png]]
| |
| − | | style="background:#fff"| 1,000
| |
| − | | style="background:#fff"| 250
| |
| − | | style="background:#fff"| [[Timmy and Tommy's store|Timmy & Tommy]]
| |
| − | | style="background:#fff"| {{brown}} / {{red}}
| |
| − | | style="background:#fff"| None
| |
| − | | style="background:#fff"| Iconic
| |
| − | | style="background:#fff"| {{medium}}
| |
| − | | style="background:#fff"| TV, wall furniture
| |
| − | | style="background:#fff"| No
| |
| − | |-
| |
| − | | style="background:#fff"| Retro TV
| |
| − | | style="background:#fff"| [[File:Retro TV HHD Icon.png]]
| |
| − | | style="background:#fff"| 1,600
| |
| − | | style="background:#fff"| 400
| |
| − | | style="background:#fff"| [[Timmy and Tommy's store|Timmy & Tommy]]
| |
| − | | style="background:#fff"| {{brown}} / {{gray}}
| |
| − | | style="background:#fff"| Antique
| |
| − | | style="background:#fff"| Historical
| |
| − | | style="background:#fff"| {{small}}
| |
| − | | style="background:#fff"| TV
| |
| − | | style="background:#fff"| No
| |
| − | |-
| |
| − | | style="background:#fff"| Karaoke System
| |
| − | | style="background:#fff"| [[File:Karaoke System HHD Icon.png]]
| |
| − | | style="background:#fff"| 2,400
| |
| − | | style="background:#fff"| 600
| |
| − | | style="background:#fff"| [[Timmy and Tommy's store|Timmy & Tommy]]
| |
| − | | style="background:#fff"| {{gray}} / {{gray}}
| |
| − | | style="background:#fff"| None
| |
| − | | style="background:#fff"| Rock 'n' Roll
| |
| − | | style="background:#fff"| {{small}}
| |
| − | | style="background:#fff"| Can use
| |
| − | | style="background:#fff"| No
| |
| − | |-
| |
| − | | style="background:#fff"| TV with VCR
| |
| − | | style="background:#fff"| [[File:TV with VCR HHD Icon.png]]
| |
| − | | style="background:#fff"| 2,000
| |
| − | | style="background:#fff"| 500
| |
| − | | style="background:#fff"| [[Timmy and Tommy's store|Timmy & Tommy]]
| |
| − | | style="background:#fff"| {{black}} / {{gray}}
| |
| − | | style="background:#fff"| Sci-Fi
| |
| − | | style="background:#fff"| Historical
| |
| − | | style="background:#fff"| {{small}}
| |
| − | | style="background:#fff"| TV, can place on table
| |
| − | | style="background:#fff"| No
| |
| − | |-
| |
| − | | style="background:#fff"| Wide-Screen TV
| |
| − | | style="background:#fff"| [[File:Wide-Screen TV HHD Icon.png]]
| |
| − | | style="background:#fff"| 2,200
| |
| − | | style="background:#fff"| 550
| |
| − | | style="background:#fff"| [[Timmy and Tommy's store|Timmy & Tommy]]
| |
| − | | style="background:#fff"| {{black}} / {{brown}}
| |
| − | | style="background:#fff"| Sci-Fi
| |
| − | | style="background:#fff"| Modern
| |
| − | | style="background:#fff"| {{medium}}
| |
| − | | style="background:#fff"| TV
| |
| − | | style="background:#fff"| Yes
| |
| − | |-
| |
| − | | style="background:#fff"| Flat-Screen TV
| |
| − | | style="background:#fff"| [[File:Flat-Screen TV HHD Icon.png]]
| |
| − | | style="background:#fff"| 4,800
| |
| − | | style="background:#fff"| 1,200
| |
| − | | style="background:#fff"| [[Timmy and Tommy's store|Timmy & Tommy]]
| |
| − | | style="background:#fff"| {{black}} / {{black}}
| |
| − | | style="background:#fff"| Trendy<br>Sci-Fi
| |
| − | | style="background:#fff"| Modern
| |
| − | | style="background:#fff"| {{medium}}
| |
| − | | style="background:#fff"| TV
| |
| − | | style="background:#fff"| No
| |
| − | |-
| |
| − | | style="background:#fff"| Kitchen Sink
| |
| − | | style="background:#fff"| [[File:Kitchen Sink HHD Icon.png]]
| |
| − | | style="background:#fff"| 2,400
| |
| − | | style="background:#fff"| 600
| |
| − | | style="background:#fff"| [[Timmy and Tommy's store|Timmy & Tommy]]
| |
| − | | style="background:#fff"| {{white}} / {{white}}
| |
| − | | style="background:#fff"| Sci-Fi
| |
| − | | style="background:#fff"| Basic
| |
| − | | style="background:#fff"| {{medium}}
| |
| − | | style="background:#fff"| Can use
| |
| − | | style="background:#fff"| No
| |
| − | |-
| |
| − | | style="background:#fff"| Kitchen Corner
| |
| − | | style="background:#fff"| [[File:Kitchen Corner HHD Icon.png]]
| |
| − | | style="background:#fff"| 1,800
| |
| − | | style="background:#fff"| 450
| |
| − | | style="background:#fff"| [[Timmy and Tommy's store|Timmy & Tommy]]
| |
| − | | style="background:#fff"| {{white}} / {{white}}
| |
| − | | style="background:#fff"| Sci-Fi
| |
| − | | style="background:#fff"| Basic
| |
| − | | style="background:#fff"| {{small}}
| |
| − | | style="background:#fff"| -
| |
| − | | style="background:#fff"| No
| |
| − | |-
| |
| − | | style="background:#fff"| Deluxe Range
| |
| − | | style="background:#fff"| [[File:Deluxe Range HHD Icon.png]]
| |
| − | | style="background:#fff"| 3,200
| |
| − | | style="background:#fff"| 800
| |
| − | | style="background:#fff"| [[Timmy and Tommy's store|Timmy & Tommy]]
| |
| − | | style="background:#fff"| {{black}} / {{white}}
| |
| − | | style="background:#fff"| Sci-Fi
| |
| − | | style="background:#fff"| Basic
| |
| − | | style="background:#fff"| {{small}}
| |
| − | | style="background:#fff"| Can use
| |
| − | | style="background:#fff"| No
| |
| − | |-
| |
| − | | style="background:#fff"| Range
| |
| − | | style="background:#fff"| [[File:Range HHD Icon.png]]
| |
| − | | style="background:#fff"| 1,800
| |
| − | | style="background:#fff"| 450
| |
| − | | style="background:#fff"| [[Timmy and Tommy's store|Timmy & Tommy]]
| |
| − | | style="background:#fff"| {{brown}} / {{white}}
| |
| − | | style="background:#fff"| Sci-Fi
| |
| − | | style="background:#fff"| Historical
| |
| − | | style="background:#fff"| {{small}}
| |
| − | | style="background:#fff"| -
| |
| − | | style="background:#fff"| No
| |
| − | |-
| |
| − | | style="background:#fff"| Stove
| |
| − | | style="background:#fff"| [[File:Stove HHD Icon.png]]
| |
| − | | style="background:#fff"| 1,980
| |
| − | | style="background:#fff"| 495
| |
| − | | style="background:#fff"| [[Timmy and Tommy's store|Timmy & Tommy]]
| |
| − | | style="background:#fff"| {{red}} / {{white}}
| |
| − | | style="background:#fff"| None
| |
| − | | style="background:#fff"| Historical
| |
| − | | style="background:#fff"| {{small}}
| |
| − | | style="background:#fff"| -
| |
| − | | style="background:#fff"| No
| |
| − | |-
| |
| − | | style="background:#fff"| Extinguisher
| |
| − | | style="background:#fff"| [[File:Extinguisher HHD Icon.png]]
| |
| − | | style="background:#fff"| 1,300
| |
| − | | style="background:#fff"| 325
| |
| − | | style="background:#fff"| [[Timmy and Tommy's store|Timmy & Tommy]]
| |
| − | | style="background:#fff"| {{red}} / {{red}}
| |
| − | | style="background:#fff"| Sci-Fi
| |
| − | | style="background:#fff"| Basic
| |
| − | | style="background:#fff"| {{small}}
| |
| − | | style="background:#fff"| -
| |
| − | | style="background:#fff"| No
| |
| − | |-
| |
| − | | style="background:#fff"| Kitchen Island
| |
| − | | style="background:#fff"| [[File:Kitchen Island HHD Icon.png]]
| |
| − | | style="background:#fff"| 30 medals
| |
| − | | style="background:#fff"| 375 bells
| |
| − | | style="background:#fff"| [[Tortimer Island]]
| |
| − | | style="background:#fff"| {{beige}} / {{beige}}
| |
| − | | style="background:#fff"| None
| |
| − | | style="background:#fff"| Basic
| |
| − | | style="background:#fff"| {{large}}
| |
| − | | style="background:#fff"| -
| |
| − | | style="background:#fff"| No
| |
| − | |-
| |
| − | | style="background:#fff"| Sink
| |
| − | | style="background:#fff"| [[File:Sink HHD Icon.png]]
| |
| − | | style="background:#fff"| 1,960
| |
| − | | style="background:#fff"| 490
| |
| − | | style="background:#fff"| [[Timmy and Tommy's store|Timmy & Tommy]]
| |
| − | | style="background:#fff"| {{brown}} / {{white}}
| |
| − | | style="background:#fff"| Sci-Fi
| |
| − | | style="background:#fff"| Historical
| |
| − | | style="background:#fff"| {{medium}}
| |
| − | | style="background:#fff"| -
| |
| − | | style="background:#fff"| No
| |
| − | |-
| |
| − | | style="background:#fff"| Refrigerator
| |
| − | | style="background:#fff"| [[File:Refrigerator HHD Icon.png]]
| |
| − | | style="background:#fff"| 1,200
| |
| − | | style="background:#fff"| 300
| |
| − | | style="background:#fff"| [[Timmy and Tommy's store|Timmy & Tommy]]
| |
| − | | style="background:#fff"| {{white}} / {{white}}
| |
| − | | style="background:#fff"| Sci-Fi
| |
| − | | style="background:#fff"| Basic
| |
| − | | style="background:#fff"| {{small}}
| |
| − | | style="background:#fff"| Storage
| |
| − | | style="background:#fff"| No
| |
| − | |-
| |
| − | | style="background:#fff"| Retro Fridge
| |
| − | | style="background:#fff"| [[File:Retro Fridge HHD Icon.png]]
| |
| − | | style="background:#fff"| 2,300
| |
| − | | style="background:#fff"| 575
| |
| − | | style="background:#fff"| [[Timmy and Tommy's store|Timmy & Tommy]]
| |
| − | | style="background:#fff"| {{green}} / {{green}}
| |
| − | | style="background:#fff"| Antique
| |
| − | | style="background:#fff"| Historical
| |
| − | | style="background:#fff"| {{small}}
| |
| − | | style="background:#fff"| Storage
| |
| − | | style="background:#fff"| No
| |
| − | |-
| |
| − | | style="background:#fff"| Freezer
| |
| − | | style="background:#fff"| [[File:Freezer HHD Icon.png]]
| |
| − | | style="background:#fff"| 2,400
| |
| − | | style="background:#fff"| 600
| |
| − | | style="background:#fff"| [[Timmy and Tommy's store|Timmy & Tommy]]
| |
| − | | style="background:#fff"| {{white}} / {{white}}
| |
| − | | style="background:#fff"| Sci-Fi
| |
| − | | style="background:#fff"| Basic
| |
| − | | style="background:#fff"| {{small}}
| |
| − | | style="background:#fff"| Can use
| |
| − | | style="background:#fff"| No
| |
| − | |-
| |
| − | | style="background:#fff"| Dishwasher
| |
| − | | style="background:#fff"| [[File:Dishwasher HHD Icon.png]]
| |
| − | | style="background:#fff"| 1,980
| |
| − | | style="background:#fff"| 495
| |
| − | | style="background:#fff"| [[Timmy and Tommy's store|Timmy & Tommy]]
| |
| − | | style="background:#fff"| {{gray}} / {{gray}}
| |
| − | | style="background:#fff"| None
| |
| − | | style="background:#fff"| Modern
| |
| − | | style="background:#fff"| {{small}}
| |
| − | | style="background:#fff"| Can use, can place on table
| |
| − | | style="background:#fff"| No
| |
| − | |-
| |
| − | | style="background:#fff"| Microwave
| |
| − | | style="background:#fff"| [[File:Microwave HHD Icon.png]]
| |
| − | | style="background:#fff"| 2,300
| |
| − | | style="background:#fff"| 575
| |
| − | | style="background:#fff"| [[Timmy and Tommy's store|Timmy & Tommy]]
| |
| − | | style="background:#fff"| {{white}} / {{white}}
| |
| − | | style="background:#fff"| Sci-Fi
| |
| − | | style="background:#fff"| Basic
| |
| − | | style="background:#fff"| {{small}}
| |
| − | | style="background:#fff"| Can use, can place on table
| |
| − | | style="background:#fff"| No
| |
| − | |-
| |
| − | | style="background:#fff"| Rice Cooker
| |
| − | | style="background:#fff"| [[File:Rice Cooker HHD Icon.png]]
| |
| − | | style="background:#fff"| 2,000
| |
| − | | style="background:#fff"| 500
| |
| − | | style="background:#fff"| [[Timmy and Tommy's store|Timmy & Tommy]]
| |
| − | | style="background:#fff"| {{white}} / {{white}}
| |
| − | | style="background:#fff"| None
| |
| − | | style="background:#fff"| Modern
| |
| − | | style="background:#fff"| {{small}}
| |
| − | | style="background:#fff"| Can place on table
| |
| − | | style="background:#fff"| Yes
| |
| − | |-
| |
| − | | style="background:#fff"| Hot Plate
| |
| − | | style="background:#fff"| [[File:Hot Plate HHD Icon.png]]
| |
| − | | style="background:#fff"| 1,680
| |
| − | | style="background:#fff"| 420
| |
| − | | style="background:#fff"| [[Timmy and Tommy's store|Timmy & Tommy]]
| |
| − | | style="background:#fff"| {{black}} / {{white}}
| |
| − | | style="background:#fff"| None
| |
| − | | style="background:#fff"| Modern
| |
| − | | style="background:#fff"| {{small}}
| |
| − | | style="background:#fff"| Can use, can place on table
| |
| − | | style="background:#fff"| Yes
| |
| − | |-
| |
| − | | style="background:#fff"| Ceramic Hot Pot
| |
| − | | style="background:#fff"| [[File:Ceramic Hot Pot HHD Icon.png]]
| |
| − | | style="background:#fff"| 1,000
| |
| − | | style="background:#fff"| 250
| |
| − | | style="background:#fff"| [[Timmy and Tommy's store|Timmy & Tommy]]
| |
| − | | style="background:#fff"| {{brown}} / {{brown}}
| |
| − | | style="background:#fff"| Harmonious
| |
| − | | style="background:#fff"| Iconic
| |
| − | | style="background:#fff"| {{small}}
| |
| − | | style="background:#fff"| Can use, can place on table
| |
| − | | style="background:#fff"| Yes
| |
| − | |-
| |
| − | | style="background:#fff"| Stewpot
| |
| − | | style="background:#fff"| [[File:Stewpot HHD Icon.png]]
| |
| − | | style="background:#fff"| 960
| |
| − | | style="background:#fff"| 240
| |
| − | | style="background:#fff"| [[Igloo camper]]
| |
| − | | style="background:#fff"| {{beige}} / {{brown}}
| |
| − | | style="background:#fff"| None
| |
| − | | style="background:#fff"| Iconic
| |
| − | | style="background:#fff"| {{small}}
| |
| − | | style="background:#fff"| Can place on table
| |
| − | | style="background:#fff"| Yes
| |
| − | |-
| |
| − | | style="background:#fff"| Bread Box
| |
| − | | style="background:#fff"| [[File:Bread Box HHD Icon.png]]
| |
| − | | style="background:#fff"| 800
| |
| − | | style="background:#fff"| 200
| |
| − | | style="background:#fff"| [[Timmy and Tommy's store|Timmy & Tommy]]
| |
| − | | style="background:#fff"| {{brown}} / {{gray}}
| |
| − | | style="background:#fff"| None
| |
| − | | style="background:#fff"| Basic
| |
| − | | style="background:#fff"| {{small}}
| |
| − | | style="background:#fff"| Can use, can place on table
| |
| − | | style="background:#fff"| Yes
| |
| − | |-
| |
| − | | style="background:#fff"| Toaster
| |
| − | | style="background:#fff"| [[File:Toaster HHD Icon.png]]
| |
| − | | style="background:#fff"| 720
| |
| − | | style="background:#fff"| 180
| |
| − | | style="background:#fff"| [[Timmy and Tommy's store|Timmy & Tommy]]
| |
| − | | style="background:#fff"| {{white}} / {{white}}
| |
| − | | style="background:#fff"| None
| |
| − | | style="background:#fff"| Iconic
| |
| − | | style="background:#fff"| {{small}}
| |
| − | | style="background:#fff"| Can use, can place on table
| |
| − | | style="background:#fff"| Yes
| |
| − | |-
| |
| − | | style="background:#fff"| Kitchen Scale
| |
| − | | style="background:#fff"| [[File:Kitchen Scale HHD Icon.png]]
| |
| − | | style="background:#fff"| 1,200
| |
| − | | style="background:#fff"| 300
| |
| − | | style="background:#fff"| [[Timmy and Tommy's store|Timmy & Tommy]]
| |
| − | | style="background:#fff"| {{green}} / {{white}}
| |
| − | | style="background:#fff"| Sci-Fi
| |
| − | | style="background:#fff"| Basic
| |
| − | | style="background:#fff"| {{small}}
| |
| − | | style="background:#fff"| Can use, can place on table
| |
| − | | style="background:#fff"| No
| |
| − | |-
| |
| − | | style="background:#fff"| Mixer
| |
| − | | style="background:#fff"| [[File:Mixer HHD Icon.png]]
| |
| − | | style="background:#fff"| 1,000
| |
| − | | style="background:#fff"| 250
| |
| − | | style="background:#fff"| [[Timmy and Tommy's store|Timmy & Tommy]]
| |
| − | | style="background:#fff"| {{black}} / {{white}}
| |
| − | | style="background:#fff"| None
| |
| − | | style="background:#fff"| Iconic
| |
| − | | style="background:#fff"| {{small}}
| |
| − | | style="background:#fff"| Can use, can place on table
| |
| − | | style="background:#fff"| No
| |
| − | |-
| |
| − | | style="background:#fff"| Milk Can
| |
| − | | style="background:#fff"| [[File:Milk Can HHD Icon.png]]
| |
| − | | style="background:#fff"| 980
| |
| − | | style="background:#fff"| 245
| |
| − | | style="background:#fff"| [[Timmy and Tommy's store|Timmy & Tommy]]
| |
| − | | style="background:#fff"| {{gray}} / {{gray}}
| |
| − | | style="background:#fff"| None
| |
| − | | style="background:#fff"| Basic
| |
| − | | style="background:#fff"| {{small}}
| |
| − | | style="background:#fff"| -
| |
| − | | style="background:#fff"| No
| |
| − | |-
| |
| − | | style="background:#fff"| Kettle
| |
| − | | style="background:#fff"| [[File:Kettle HHD Icon.png]]
| |
| − | | style="background:#fff"| 800
| |
| − | | style="background:#fff"| 200
| |
| − | | style="background:#fff"| [[Timmy and Tommy's store|Timmy & Tommy]]
| |
| − | | style="background:#fff"| {{yellow}} / {{yellow}}
| |
| − | | style="background:#fff"| None
| |
| − | | style="background:#fff"| Basic
| |
| − | | style="background:#fff"| {{small}}
| |
| − | | style="background:#fff"| Can place on table
| |
| − | | style="background:#fff"| No
| |
| − | |-
| |
| − | | style="background:#fff"| Simple Kettle
| |
| − | | style="background:#fff"| [[File:Simple Kettle HHD Icon.png]]
| |
| − | | style="background:#fff"| 1,200
| |
| − | | style="background:#fff"| 300
| |
| − | | style="background:#fff"| [[Timmy and Tommy's store|Timmy & Tommy]]
| |
| − | | style="background:#fff"| {{red}} / {{red}}
| |
| − | | style="background:#fff"| None
| |
| − | | style="background:#fff"| Basic
| |
| − | | style="background:#fff"| {{small}}
| |
| − | | style="background:#fff"| Can place on table
| |
| − | | style="background:#fff"| Yes
| |
| − | |-
| |
| − | | style="background:#fff"| Electric Kettle
| |
| − | | style="background:#fff"| [[File:Electric Kettle HHD Icon.png]]
| |
| − | | style="background:#fff"| 1,280
| |
| − | | style="background:#fff"| 320
| |
| − | | style="background:#fff"| [[Timmy and Tommy's store|Timmy & Tommy]]
| |
| − | | style="background:#fff"| {{white}} / {{white}}
| |
| − | | style="background:#fff"| Trendy
| |
| − | | style="background:#fff"| Modern
| |
| − | | style="background:#fff"| {{small}}
| |
| − | | style="background:#fff"| Can use, can place on table
| |
| − | | style="background:#fff"| No
| |
| − | |-
| |
| − | | style="background:#fff"| Hourglass
| |
| − | | style="background:#fff"| [[File:Hourglass HHD Icon.png]]
| |
| − | | style="background:#fff"| 480
| |
| − | | style="background:#fff"| 120
| |
| − | | style="background:#fff"| [[Timmy and Tommy's store|Timmy & Tommy]]
| |
| − | | style="background:#fff"| {{brown}} / {{green}}
| |
| − | | style="background:#fff"| Iconic
| |
| − | | style="background:#fff"| Can use
| |
| − | | style="background:#fff"| {{small}}
| |
| − | | style="background:#fff"| Can use, can place on table
| |
| − | | style="background:#fff"| Yes
| |
| − | |-
| |
| − | | style="background:#fff"| Tea Set
| |
| − | | style="background:#fff"| [[File:Tea Set HHD Icon.png]]
| |
| − | | style="background:#fff"| 300
| |
| − | | style="background:#fff"| 75
| |
| − | | style="background:#fff"| [[Timmy and Tommy's store|Timmy & Tommy]]
| |
| − | | style="background:#fff"| {{green}} / {{yellow}}
| |
| − | | style="background:#fff"| None
| |
| − | | style="background:#fff"| Iconic
| |
| − | | style="background:#fff"| {{small}}
| |
| − | | style="background:#fff"| Can place on table
| |
| − | | style="background:#fff"| No
| |
| − | |-
| |
| − | | style="background:#fff"| Afternoon-Tea Set
| |
| − | | style="background:#fff"| [[File:Afternoon-Tea Set HHD Icon.png]]
| |
| − | | style="background:#fff"| -
| |
| − | | style="background:#fff"| 420
| |
| − | | style="background:#fff"| [[DLC]]
| |
| − | | style="background:#fff"| {{colorful}} / {{white}}
| |
| − | | style="background:#fff"| Fairy Tale
| |
| − | | style="background:#fff"| ???
| |
| − | | style="background:#fff"| {{small}}
| |
| − | | style="background:#fff"| Can place on table
| |
| − | | style="background:#fff"| No
| |
| − | |-
| |
| − | | style="background:#fff"| Pumpkin Pie
| |
| − | | style="background:#fff"| [[File:Pumpkin Pie HHD Icon.png]]
| |
| − | | style="background:#fff"| -
| |
| − | | style="background:#fff"| 375
| |
| − | | style="background:#fff"| [[DLC]]
| |
| − | | style="background:#fff"| ??? / {{orange}}
| |
| − | | style="background:#fff"| Fairy Tale
| |
| − | | style="background:#fff"| ???
| |
| − | | style="background:#fff"| {{small}}
| |
| − | | style="background:#fff"| Can place on table
| |
| − | | style="background:#fff"| No
| |
| − | |-
| |
| − | | style="background:#fff"| Chocolate Cake
| |
| − | | style="background:#fff"| [[File:Chocolate Cake HHD Icon.png]]
| |
| − | | style="background:#fff"| -
| |
| − | | style="background:#fff"| 150
| |
| − | | style="background:#fff"| [[Valentine's Day]]
| |
| − | | style="background:#fff"| {{brown}} / {{brown}}
| |
| − | | style="background:#fff"| Fairy Tale
| |
| − | | style="background:#fff"| Cute
| |
| − | | style="background:#fff"| {{small}}
| |
| − | | style="background:#fff"| Can place on table
| |
| − | | style="background:#fff"| No
| |
| − | |-
| |
| − | | style="background:#fff"| Box of Chocolates
| |
| − | | style="background:#fff"| [[File:Box of Chocolates HHD Icon.png]]
| |
| − | | style="background:#fff"| 20 medals
| |
| − | | style="background:#fff"| 250 bells
| |
| − | | style="background:#fff"| [[Club Tortimer]]
| |
| − | | style="background:#fff"| {{brown}} / {{brown}}
| |
| − | | style="background:#fff"| None
| |
| − | | style="background:#fff"| Cute
| |
| − | | style="background:#fff"| {{small}}
| |
| − | | style="background:#fff"| Can place on table
| |
| − | | style="background:#fff"| No
| |
| − | |-
| |
| − | | style="background:#fff"| Chocolate Fountain
| |
| − | | style="background:#fff"| [[File:Chocolate Fountain HHD Icon.png]]
| |
| − | | style="background:#fff"| 2,200
| |
| − | | style="background:#fff"| 550
| |
| − | | style="background:#fff"| [[Timmy and Tommy's store|Timmy & Tommy]]
| |
| − | | style="background:#fff"| {{brown}} / {{brown}}
| |
| − | | style="background:#fff"| Fairy Tale
| |
| − | | style="background:#fff"| Ornate
| |
| − | | style="background:#fff"| {{small}}
| |
| − | | style="background:#fff"| Can place on table
| |
| − | | style="background:#fff"| Yes
| |
| − | |-
| |
| − | | style="background:#fff"| Cream and Sugar
| |
| − | | style="background:#fff"| [[File:Cream and Sugar HHD Icon.png]]
| |
| − | | style="background:#fff"| -
| |
| − | | style="background:#fff"| 250
| |
| − | | style="background:#fff"| [[Brewster]]
| |
| − | | style="background:#fff"| {{brown}} / {{gray}}
| |
| − | | style="background:#fff"| Fairy Tale
| |
| − | | style="background:#fff"| Iconic
| |
| − | | style="background:#fff"| {{small}}
| |
| − | | style="background:#fff"| Can place on table
| |
| − | | style="background:#fff"| No
| |
| − | |-
| |
| − | | style="background:#fff"| Coffee Cup
| |
| − | | style="background:#fff"| [[File:Coffee Cup HHD Icon.png]]
| |
| − | | style="background:#fff"| -
| |
| − | | style="background:#fff"| 500
| |
| − | | style="background:#fff"| [[Brewster]]
| |
| − | | style="background:#fff"| {{brown}} / {{white}}
| |
| − | | style="background:#fff"| None
| |
| − | | style="background:#fff"| Official
| |
| − | | style="background:#fff"| {{small}}
| |
| − | | style="background:#fff"| Can place on table
| |
| − | | style="background:#fff"| No
| |
| − | |-
| |
| − | | style="background:#fff"| Coffee Grinder
| |
| − | | style="background:#fff"| [[File:Coffee Grinder HHD Icon.png]]
| |
| − | | style="background:#fff"| -
| |
| − | | style="background:#fff"| 400
| |
| − | | style="background:#fff"| [[Brewster]]
| |
| − | | style="background:#fff"| {{brown}} / {{gray}}
| |
| − | | style="background:#fff"| Trendy
| |
| − | | style="background:#fff"| Historical
| |
| − | | style="background:#fff"| {{small}}
| |
| − | | style="background:#fff"| Can use, can place on table
| |
| − | | style="background:#fff"| No
| |
| − | |-
| |
| − | | style="background:#fff"| Espresso Maker
| |
| − | | style="background:#fff"| [[File:Espresso Maker HHD Icon.png]]
| |
| − | | style="background:#fff"| -
| |
| − | | style="background:#fff"| 125
| |
| − | | style="background:#fff"| [[Brewster]]
| |
| − | | style="background:#fff"| {{gray}} / {{gray}}
| |
| − | | style="background:#fff"| Trendy
| |
| − | | style="background:#fff"| Modern
| |
| − | | style="background:#fff"| {{small}}
| |
| − | | style="background:#fff"| Can place on table
| |
| − | | style="background:#fff"| No
| |
| − | |-
| |
| − | | style="background:#fff"| Dessert Case
| |
| − | | style="background:#fff"| [[File:Dessert Case HHD Icon.png]]
| |
| − | | style="background:#fff"| 3,200
| |
| − | | style="background:#fff"| 800
| |
| − | | style="background:#fff"| [[Timmy and Tommy's store|Timmy & Tommy]]
| |
| − | | style="background:#fff"| {{black}} / {{gray}}
| |
| − | | style="background:#fff"| Fairy Tale
| |
| − | | style="background:#fff"| Cute
| |
| − | | style="background:#fff"| {{medium}}
| |
| − | | style="background:#fff"| -
| |
| − | | style="background:#fff"| No
| |
| − | |-
| |
| − | | style="background:#fff"| Shaved-Ice Lamp
| |
| − | | style="background:#fff"| [[File:Shaved-Ice Lamp HHD Icon.png]]
| |
| − | | style="background:#fff"| -
| |
| − | | style="background:#fff"| 600
| |
| − | | style="background:#fff"| [[DLC]]
| |
| − | | style="background:#fff"| {{colorful}} / {{white}}
| |
| − | | style="background:#fff"| Fairy Tale
| |
| − | | style="background:#fff"| ???
| |
| − | | style="background:#fff"| {{small}}
| |
| − | | style="background:#fff"| Lamp, can place on table
| |
| − | | style="background:#fff"| No
| |
| − | |-
| |
| − | | style="background:#fff"| Soft-Serve Lamp
| |
| − | | style="background:#fff"| [[File:Soft-Serve Lamp HHD Icon.png]]
| |
| − | | style="background:#fff"| 1,120
| |
| − | | style="background:#fff"| 280
| |
| − | | style="background:#fff"| [[Timmy and Tommy's store|Timmy & Tommy]]
| |
| − | | style="background:#fff"| {{brown}} / {{white}}
| |
| − | | style="background:#fff"| Fairy Tale
| |
| − | | style="background:#fff"| Iconic
| |
| − | | style="background:#fff"| {{small}}
| |
| − | | style="background:#fff"| Lamp
| |
| − | | style="background:#fff"| Yes
| |
| − | |-
| |
| − | | style="background:#fff"| Candy Machine
| |
| − | | style="background:#fff"| [[File:Candy Machine HHD Icon.png]]
| |
| − | | style="background:#fff"| 980
| |
| − | | style="background:#fff"| 245
| |
| − | | style="background:#fff"| [[Timmy and Tommy's store|Timmy & Tommy]]
| |
| − | | style="background:#fff"| {{colorful}} / {{red}}
| |
| − | | style="background:#fff"| Toy Shop
| |
| − | | style="background:#fff"| Cute
| |
| − | | style="background:#fff"| {{small}}
| |
| − | | style="background:#fff"| Can use
| |
| − | | style="background:#fff"| No
| |
| − | |-
| |
| − | | style="background:#fff"| Candy Jar
| |
| − | | style="background:#fff"| [[File:Candy Jar HHD Icon.png]]
| |
| − | | style="background:#fff"| 2,200
| |
| − | | style="background:#fff"| 550
| |
| − | | style="background:#fff"| [[Timmy and Tommy's store|Timmy & Tommy]]
| |
| − | | style="background:#fff"| {{colorful}} / {{colorful}}
| |
| − | | style="background:#fff"| Fairy Tale
| |
| − | | style="background:#fff"| Cute
| |
| − | | style="background:#fff"| {{small}}
| |
| − | | style="background:#fff"| Can place on table
| |
| − | | style="background:#fff"| No
| |
| − | |-
| |
| − | | style="background:#fff"| Popcorn Machine
| |
| − | | style="background:#fff"| [[File:Popcorn Machine HHD Icon.png]]
| |
| − | | style="background:#fff"| 3,200
| |
| − | | style="background:#fff"| 800
| |
| − | | style="background:#fff"| [[Timmy and Tommy's store|Timmy & Tommy]]
| |
| − | | style="background:#fff"| {{beige}} / {{red}}
| |
| − | | style="background:#fff"| Toy SHop
| |
| − | | style="background:#fff"| Cute
| |
| − | | style="background:#fff"| {{small}}
| |
| − | | style="background:#fff"| -
| |
| − | | style="background:#fff"| No
| |
| − | |-
| |
| − | | style="background:#fff"| Birthday Table
| |
| − | | style="background:#fff"| [[File:Birthday Table HHD Icon.png]]
| |
| − | | style="background:#fff"| -
| |
| − | | style="background:#fff"| 300
| |
| − | | style="background:#fff"| [[Birthday]]
| |
| − | | style="background:#fff"| {{red}} / {{white}}
| |
| − | | style="background:#fff"| Fairy Tale
| |
| − | | style="background:#fff"| Cute
| |
| − | | style="background:#fff"| {{large}}
| |
| − | | style="background:#fff"| Can use, can't recycle
| |
| − | | style="background:#fff"| No
| |
| − | |-
| |
| − | | style="background:#fff"| Birthday Candles
| |
| − | | style="background:#fff"| [[File:Birthday Candles HHD Icon.png]]
| |
| − | | style="background:#fff"| -
| |
| − | | style="background:#fff"| 300
| |
| − | | style="background:#fff"| [[Birthday]]
| |
| − | | style="background:#fff"| {{colorful}} / {{red}}
| |
| − | | style="background:#fff"| Fairy Tale
| |
| − | | style="background:#fff"| Cute
| |
| − | | style="background:#fff"| {{small}}
| |
| − | | style="background:#fff"| Can use, can place on table, can't recycle
| |
| − | | style="background:#fff"| No
| |
| − | |-
| |
| − | | style="background:#fff"| Birthday Sign
| |
| − | | style="background:#fff"| [[File:Birthday Sign HHD Icon.png]]
| |
| − | | style="background:#fff"| -
| |
| − | | style="background:#fff"| 300
| |
| − | | style="background:#fff"| [[Birthday]]
| |
| − | | style="background:#fff"| {{colorful}} / {{colorful}}
| |
| − | | style="background:#fff"| Fairy Tale
| |
| − | | style="background:#fff"| Cute
| |
| − | | style="background:#fff"| {{medium}}
| |
| − | | style="background:#fff"| Can't recycle
| |
| − | | style="background:#fff"| No
| |
| − | |-
| |
| − | | style="background:#fff"| Birthday Cake
| |
| − | | style="background:#fff"| [[File:Birthday Cake HHD Icon.png]]
| |
| − | | style="background:#fff"| -
| |
| − | | style="background:#fff"| 100
| |
| − | | style="background:#fff"| [[Birthday]]
| |
| − | | style="background:#fff"| {{red}} / {{white}}
| |
| − | | style="background:#fff"| Fairy Tale
| |
| − | | style="background:#fff"| Cute
| |
| − | | style="background:#fff"| {{small}}
| |
| − | | style="background:#fff"| Can use, can place on table, can't recycle
| |
| − | | style="background:#fff"| No
| |
| − | |-
| |
| − | | style="background:#fff"| Wedding Cake
| |
| − | | style="background:#fff"| [[File:Wedding Cake HHD Icon.png]]
| |
| − | | style="background:#fff"| 60,000
| |
| − | | style="background:#fff"| 15,000
| |
| − | | style="background:#fff"| [[GracieGrace]]
| |
| − | | style="background:#fff"| {{pink}} / {{pink}}
| |
| − | | style="background:#fff"| Fairy Tale
| |
| − | | style="background:#fff"| Cute
| |
| − | | style="background:#fff"| {{small}}
| |
| − | | style="background:#fff"| Can't recycle
| |
| − | | style="background:#fff"| No
| |
| − | |-
| |
| − | | style="background:#fff"| Lunch Tray
| |
| − | | style="background:#fff"| [[File:Lunch Tray HHD Icon.png]]
| |
| − | | style="background:#fff"| 800
| |
| − | | style="background:#fff"| 200
| |
| − | | style="background:#fff"| [[Timmy and Tommy's store|Timmy & Tommy]]
| |
| − | | style="background:#fff"| {{gray}} / {{gray}}
| |
| − | | style="background:#fff"| None
| |
| − | | style="background:#fff"| Iconic
| |
| − | | style="background:#fff"| {{small}}
| |
| − | | style="background:#fff"| Can place on the table
| |
| − | | style="background:#fff"| Yes
| |
| − | |-
| |
| − | | style="background:#fff"| Sushi Platter
| |
| − | | style="background:#fff"| [[File:Sushi Platter HHD Icon.png]]
| |
| − | | style="background:#fff"| 1,680
| |
| − | | style="background:#fff"| 420
| |
| − | | style="background:#fff"| [[Timmy and Tommy's store|Timmy & Tommy]]
| |
| − | | style="background:#fff"| {{brown}} / {{colorful}}
| |
| − | | style="background:#fff"| Harmonious
| |
| − | | style="background:#fff"| Basic
| |
| − | | style="background:#fff"| {{small}}
| |
| − | | style="background:#fff"| Can place on table
| |
| − | | style="background:#fff"| No
| |
| − | |-
| |
| − | | style="background:#fff"| Kimbap Plate
| |
| − | | style="background:#fff"| [[File:Kimbap Plate HHD Icon.png]]
| |
| − | | style="background:#fff"| -
| |
| − | | style="background:#fff"| 200
| |
| − | | style="background:#fff"| [[DLC]]
| |
| − | | style="background:#fff"| {{black}} / {{white}}
| |
| − | | style="background:#fff"| Harmonious
| |
| − | | style="background:#fff"| ???
| |
| − | | style="background:#fff"| {{small}}
| |
| − | | style="background:#fff"| Can place on table
| |
| − | | style="background:#fff"| No
| |
| − | |-
| |
| − | | style="background:#fff"| Samgyetang
| |
| − | | style="background:#fff"| [[File:Samgyetang HHD Icon.png]]
| |
| − | | style="background:#fff"| 1,200
| |
| − | | style="background:#fff"| 300
| |
| − | | style="background:#fff"| [[Gulliver]]
| |
| − | | style="background:#fff"| {{white}} / {{white}}
| |
| − | | style="background:#fff"| Harmonious
| |
| − | | style="background:#fff"| Iconic
| |
| − | | style="background:#fff"| {{small}}
| |
| − | | style="background:#fff"| Can place on table
| |
| − | | style="background:#fff"| No
| |
| − | |-
| |
| − | | style="background:#fff"| Picnic Basket
| |
| − | | style="background:#fff"| [[File:Picnic Basket HHD Icon.png]]
| |
| − | | style="background:#fff"| -
| |
| − | | style="background:#fff"| 490
| |
| − | | style="background:#fff"| [[Labor Day]]
| |
| − | | style="background:#fff"| {{brown}} / {{colorful}}
| |
| − | | style="background:#fff"| None
| |
| − | | style="background:#fff"| ???
| |
| − | | style="background:#fff"| {{small}}
| |
| − | | style="background:#fff"| -
| |
| − | | style="background:#fff"| No
| |
| − | |-
| |
| − | | style="background:#fff"| Fruit Basket
| |
| − | | style="background:#fff"| [[File:Fruit Basket HHD Icon.png]]
| |
| − | | style="background:#fff"| -
| |
| − | | style="background:#fff"| 200
| |
| − | | style="background:#fff"| [[Harvest Festival]]
| |
| − | | style="background:#fff"| {{red}} / {{yellow}}
| |
| − | | style="background:#fff"| Rustic
| |
| − | | style="background:#fff"| Iconic
| |
| − | | style="background:#fff"| {{small}}
| |
| − | | style="background:#fff"| Can place on table, can't recycle
| |
| − | | style="background:#fff"| No
| |
| − | |-
| |
| − | | style="background:#fff"| Veggie Basket
| |
| − | | style="background:#fff"| [[File:Veggie Basket HHD Icon.png]]
| |
| − | | style="background:#fff"| -
| |
| − | | style="background:#fff"| 125
| |
| − | | style="background:#fff"| [[Aumumn Moon]]
| |
| − | | style="background:#fff"| {{brown}} / {{colorful}}
| |
| − | | style="background:#fff"| None
| |
| − | | style="background:#fff"| Basic
| |
| − | | style="background:#fff"| {{small}}
| |
| − | | style="background:#fff"| -
| |
| − | | style="background:#fff"| No
| |
| − | |-
| |
| − | | style="background:#fff"| Egg Basket
| |
| − | | style="background:#fff"| [[File:Egg Basket HHD Icon.png]]
| |
| − | | style="background:#fff"| -
| |
| − | | style="background:#fff"| 200
| |
| − | | style="background:#fff"| [[Bunny Day]]
| |
| − | | style="background:#fff"| {{brown}} / {{colorful}}
| |
| − | | style="background:#fff"| None
| |
| − | | style="background:#fff"| Iconic
| |
| − | | style="background:#fff"| {{small}}
| |
| − | | style="background:#fff"| Can't recycle
| |
| − | | style="background:#fff"| No
| |
| − | |-
| |
| − | | style="background:#fff"| Pickle Jar
| |
| − | | style="background:#fff"| [[File:Pickle Jar HHD Icon.png]]
| |
| − | | style="background:#fff"| 800
| |
| − | | style="background:#fff"| 200
| |
| − | | style="background:#fff"| [[Timmy and Tommy's store|Timmy & Tommy]]
| |
| − | | style="background:#fff"| {{colorful}} / {{colorful}}
| |
| − | | style="background:#fff"| None
| |
| − | | style="background:#fff"| Basic
| |
| − | | style="background:#fff"| {{small}}
| |
| − | | style="background:#fff"| Can place on table
| |
| − | | style="background:#fff"| Yes
| |
| − | |-
| |
| − | | style="background:#fff"| Pepper Mill
| |
| − | | style="background:#fff"| [[File:Pepper Mill HHD Icon.png]]
| |
| − | | style="background:#fff"| 800
| |
| − | | style="background:#fff"| 200
| |
| − | | style="background:#fff"| [[Timmy and Tommy's store|Timmy & Tommy]]
| |
| − | | style="background:#fff"| {{brown}} / {{brown}}
| |
| − | | style="background:#fff"| None
| |
| − | | style="background:#fff"| Basic
| |
| − | | style="background:#fff"| {{small}}
| |
| − | | style="background:#fff"| Can place on table
| |
| − | | style="background:#fff"| No
| |
| − | |-
| |
| − | | style="background:#fff"| Revolving Spice Rack
| |
| − | | style="background:#fff"| [[File:Revolving Spice Rack HHD Icon.png]]
| |
| − | | style="background:#fff"| 800
| |
| − | | style="background:#fff"| 200
| |
| − | | style="background:#fff"| [[Timmy and Tommy's store|Timmy & Tommy]]
| |
| − | | style="background:#fff"| {{brown}} / {{colorful}}
| |
| − | | style="background:#fff"| None
| |
| − | | style="background:#fff"| Basic
| |
| − | | style="background:#fff"| {{small}}
| |
| − | | style="background:#fff"| Can place on table
| |
| − | | style="background:#fff"| No
| |
| − | |-
| |
| − | | style="background:#fff"| Pot Rack
| |
| − | | style="background:#fff"| [[File:Pot Rack HHD Icon.png]]
| |
| − | | style="background:#fff"| 980
| |
| − | | style="background:#fff"| 245
| |
| − | | style="background:#fff"| [[Timmy and Tommy's store|Timmy & Tommy]]
| |
| − | | style="background:#fff"| {{brown}} / {{colorful}}
| |
| − | | style="background:#fff"| None
| |
| − | | style="background:#fff"| Basic
| |
| − | | style="background:#fff"| {{medium}}
| |
| − | | style="background:#fff"| Wall furniture
| |
| − | | style="background:#fff"| No
| |
| − | |-
| |
| − | | style="background:#fff"| Display Shelf
| |
| − | | style="background:#fff"| [[File:Display Shelf HHD Icon.png]]
| |
| − | | style="background:#fff"| 1,200
| |
| − | | style="background:#fff"| 300
| |
| − | | style="background:#fff"| [[Timmy and Tommy's store|Timmy & Tommy]]
| |
| − | | style="background:#fff"| {{brown}} / {{colorful}}
| |
| − | | style="background:#fff"| None
| |
| − | | style="background:#fff"| Basic
| |
| − | | style="background:#fff"| {{medium}}
| |
| − | | style="background:#fff"| Wall furniture
| |
| − | | style="background:#fff"| No
| |
| − | |-
| |
| − | | style="background:#fff"| Shaved-Ice Maker
| |
| − | | style="background:#fff"| [[File:Shaved-Ice Maker HHD Icon.png]]
| |
| − | | style="background:#fff"| 1,200
| |
| − | | style="background:#fff"| 300
| |
| − | | style="background:#fff"| [[Timmy and Tommy's store|Timmy & Tommy]]
| |
| − | | style="background:#fff"| {{aqua}} / {{gray}}
| |
| − | | style="background:#fff"| None
| |
| − | | style="background:#fff"| Historical
| |
| − | | style="background:#fff"| {{small}}
| |
| − | | style="background:#fff"| Can use, can place on table
| |
| − | | style="background:#fff"| No
| |
| − | |-
| |
| − | | style="background:#fff"| Air Conditioner
| |
| − | | style="background:#fff"| [[File:Air Conditioner HHD Icon.png]]
| |
| − | | style="background:#fff"| 2,500
| |
| − | | style="background:#fff"| 625
| |
| − | | style="background:#fff"| [[Timmy and Tommy's store|Timmy & Tommy]]
| |
| − | | style="background:#fff"| None / None
| |
| − | | style="background:#fff"| Sci-Fi
| |
| − | | style="background:#fff"| Basic
| |
| − | | style="background:#fff"| {{medium}}
| |
| − | | style="background:#fff"| Wall furniture
| |
| − | | style="background:#fff"| No
| |
| − | |-
| |
| − | | style="background:#fff"| Drip Pail
| |
| − | | style="background:#fff"| [[File:Drip Pail HHD Icon.png]]
| |
| − | | style="background:#fff"| 800
| |
| − | | style="background:#fff"| 200
| |
| − | | style="background:#fff"| [[Timmy and Tommy's store|Timmy & Tommy]]
| |
| − | | style="background:#fff"| {{aqua}} / {{gray}}
| |
| − | | style="background:#fff"| Quirky
| |
| − | | style="background:#fff"| Rock 'n' Roll
| |
| − | | style="background:#fff"| {{small}}
| |
| − | | style="background:#fff"| -
| |
| − | | style="background:#fff"| No
| |
| − | |-
| |
| − | | style="background:#fff"| Humidfier
| |
| − | | style="background:#fff"| [[File:Humidfier HHD Icon.png]]
| |
| − | | style="background:#fff"| 1,600
| |
| − | | style="background:#fff"| 400
| |
| − | | style="background:#fff"| [[Timmy and Tommy's store|Timmy & Tommy]]
| |
| − | | style="background:#fff"| {{aqua}} / {{white}}
| |
| − | | style="background:#fff"| Trendy<br>Sci-Fi
| |
| − | | style="background:#fff"| Modern
| |
| − | | style="background:#fff"| {{small}}
| |
| − | | style="background:#fff"| Can place on table
| |
| − | | style="background:#fff"| No
| |
| − | |-
| |
| − | | style="background:#fff"| Space Heater
| |
| − | | style="background:#fff"| [[File:Space Heater HHD Icon.png]]
| |
| − | | style="background:#fff"| 1,700
| |
| − | | style="background:#fff"| 425
| |
| − | | style="background:#fff"| [[Timmy and Tommy's store|Timmy & Tommy]]
| |
| − | | style="background:#fff"| {{white}} / {{white}}
| |
| − | | style="background:#fff"| Sci-Fi
| |
| − | | style="background:#fff"| Basic
| |
| − | | style="background:#fff"| {{small}}
| |
| − | | style="background:#fff"| Can use
| |
| − | | style="background:#fff"| No
| |
| − | |-
| |
| − | | style="background:#fff"| Radiator
| |
| − | | style="background:#fff"| [[File:Radiator HHD Icon.png]]
| |
| − | | style="background:#fff"| 2,380
| |
| − | | style="background:#fff"| 595
| |
| − | | style="background:#fff"| [[Timmy and Tommy's store|Timmy & Tommy]]
| |
| − | | style="background:#fff"| {{white}} / {{white}}
| |
| − | | style="background:#fff"| Sci-Fi
| |
| − | | style="background:#fff"| Basic
| |
| − | | style="background:#fff"| {{small}}
| |
| − | | style="background:#fff"| -
| |
| − | | style="background:#fff"| No
| |
| − | |-
| |
| − | | style="background:#fff"| Potbelly Stove
| |
| − | | style="background:#fff"| [[File:Potbelly Stove HHD Icon.png]]
| |
| − | | style="background:#fff"| 2,000
| |
| − | | style="background:#fff"| 500
| |
| − | | style="background:#fff"| [[Timmy and Tommy's store|Timmy & Tommy]]
| |
| − | | style="background:#fff"| {{gray}} / {{gray}}
| |
| − | | style="background:#fff"| None
| |
| − | | style="background:#fff"| Historical
| |
| − | | style="background:#fff"| {{small}}
| |
| − | | style="background:#fff"| -
| |
| − | | style="background:#fff"| No
| |
| − | |-
| |
| − | | style="background:#fff"| Fireplace
| |
| − | | style="background:#fff"| [[File:Fireplace HHD Icon.png]]
| |
| − | | style="background:#fff"| 2,200
| |
| − | | style="background:#fff"| 550
| |
| − | | style="background:#fff"| [[Timmy and Tommy's store|Timmy & Tommy]]
| |
| − | | style="background:#fff"| {{brown}} / {{brown}}
| |
| − | | style="background:#fff"| None
| |
| − | | style="background:#fff"| Historical
| |
| − | | style="background:#fff"| {{medium}}
| |
| − | | style="background:#fff"| Table
| |
| − | | style="background:#fff"| No
| |
| − | |-
| |
| − | | style="background:#fff"| Vacuum Cleaner
| |
| − | | style="background:#fff"| [[File:Vacuum Cleaner HHD Icon.png]]
| |
| − | | style="background:#fff"| 1,200
| |
| − | | style="background:#fff"| 300
| |
| − | | style="background:#fff"| [[Timmy and Tommy's store|Timmy & Tommy]]
| |
| − | | style="background:#fff"| {{red}} / {{white}}
| |
| − | | style="background:#fff"| Sci-Fi
| |
| − | | style="background:#fff"| Historical
| |
| − | | style="background:#fff"| {{small}}
| |
| − | | style="background:#fff"| -
| |
| − | | style="background:#fff"| No
| |
| − | |-
| |
| − | | style="background:#fff"| Upright Vacuum
| |
| − | | style="background:#fff"| [[File:Upright Vacuum HHD Icon.png]]
| |
| − | | style="background:#fff"| 1,800
| |
| − | | style="background:#fff"| 450
| |
| − | | style="background:#fff"| [[Timmy and Tommy's store|Timmy & Tommy]]
| |
| − | | style="background:#fff"| {{blue}} / {{white}}
| |
| − | | style="background:#fff"| Sci-Fi
| |
| − | | style="background:#fff"| Modern
| |
| − | | style="background:#fff"| {{small}}
| |
| − | | style="background:#fff"| -
| |
| − | | style="background:#fff"| No
| |
| − | |-
| |
| − | | style="background:#fff"| Ironing Set
| |
| − | | style="background:#fff"| [[File:Ironing Set HHD Icon.png]]
| |
| − | | style="background:#fff"| 1,400
| |
| − | | style="background:#fff"| 350
| |
| − | | style="background:#fff"| [[Timmy and Tommy's store|Timmy & Tommy]]
| |
| − | | style="background:#fff"| {{red}} / {{white}}
| |
| − | | style="background:#fff"| None
| |
| − | | style="background:#fff"| Modern
| |
| − | | style="background:#fff"| {{small}}
| |
| − | | style="background:#fff"| -
| |
| − | | style="background:#fff"| Yes
| |
| − | |-
| |
| − | | style="background:#fff"| Coat Hanger
| |
| − | | style="background:#fff"| [[File:Coat Hanger HHD Icon.png]]
| |
| − | | style="background:#fff"| 1,100
| |
| − | | style="background:#fff"| 275
| |
| − | | style="background:#fff"| [[Timmy and Tommy's store|Timmy & Tommy]]
| |
| − | | style="background:#fff"| {{brown}} / {{gray}}
| |
| − | | style="background:#fff"| Trendy
| |
| − | | style="background:#fff"| Basic
| |
| − | | style="background:#fff"| {{small}}
| |
| − | | style="background:#fff"| -
| |
| − | | style="background:#fff"| No
| |
| − | |-
| |
| − | | style="background:#fff"| Clothesline Pole
| |
| − | | style="background:#fff"| [[File:Clothesline Pole HHD Icon.png]]
| |
| − | | style="background:#fff"| 960
| |
| − | | style="background:#fff"| 240
| |
| − | | style="background:#fff"| [[Timmy and Tommy's store|Timmy & Tommy]]
| |
| − | | style="background:#fff"| {{aqua}} / {{white}}
| |
| − | | style="background:#fff"| None
| |
| − | | style="background:#fff"| Iconic
| |
| − | | style="background:#fff"| {{medium}}
| |
| − | | style="background:#fff"| -
| |
| − | | style="background:#fff"| Yes
| |
| − | |-
| |
| − | | style="background:#fff"| Clothes Closet
| |
| − | | style="background:#fff"| [[File:Clothes Closet HHD Icon.png]]
| |
| − | | style="background:#fff"| 1,340
| |
| − | | style="background:#fff"| 335
| |
| − | | style="background:#fff"| [[Timmy and Tommy's store|Timmy & Tommy]]
| |
| − | | style="background:#fff"| {{beige}} / {{beige}}
| |
| − | | style="background:#fff"| None
| |
| − | | style="background:#fff"| Cute
| |
| − | | style="background:#fff"| {{small}}
| |
| − | | style="background:#fff"| Storage
| |
| − | | style="background:#fff"| No
| |
| − | |-
| |
| − | | style="background:#fff"| Washing Machine
| |
| − | | style="background:#fff"| [[File:Washing Machine HHD Icon.png]]
| |
| − | | style="background:#fff"| 2,800
| |
| − | | style="background:#fff"| 700
| |
| − | | style="background:#fff"| [[Timmy and Tommy's store|Timmy & Tommy]]
| |
| − | | style="background:#fff"| {{white}} / {{white}}
| |
| − | | style="background:#fff"| Sci-Fi
| |
| − | | style="background:#fff"| Modern
| |
| − | | style="background:#fff"| {{small}}
| |
| − | | style="background:#fff"| Can use
| |
| − | | style="background:#fff"| No
| |
| − | |-
| |
| − | | style="background:#fff"| Deluxe Washer
| |
| − | | style="background:#fff"| [[File:Deluxe Washer HHD Icon.png]]
| |
| − | | style="background:#fff"| 5,200
| |
| − | | style="background:#fff"| 1,300
| |
| − | | style="background:#fff"| [[Spotlight]] / [[Wishy]]
| |
| − | | style="background:#fff"| {{orange}} / {{orange}}
| |
| − | | style="background:#fff"| Sci-Fi
| |
| − | | style="background:#fff"| Basic
| |
| − | | style="background:#fff"| {{small}}
| |
| − | | style="background:#fff"| Can use, table
| |
| − | | style="background:#fff"| No
| |
| − | |-
| |
| − | | style="background:#fff"| Automatic Washer
| |
| − | | style="background:#fff"| [[File:Automatic Washer HHD Icon.png]]
| |
| − | | style="background:#fff"| 4,800
| |
| − | | style="background:#fff"| 1,200
| |
| − | | style="background:#fff"| [[Timmy and Tommy's store|Timmy & Tommy]]
| |
| − | | style="background:#fff"| {{white}} / {{white}}
| |
| − | | style="background:#fff"| Sci-Fi
| |
| − | | style="background:#fff"| Basic
| |
| − | | style="background:#fff"| {{small}}
| |
| − | | style="background:#fff"| Can use
| |
| − | | style="background:#fff"| No
| |
| − | |-
| |
| − | | style="background:#fff"| Washer-Dryer
| |
| − | | style="background:#fff"| [[File:Washer-Dryer HHD Icon.png]]
| |
| − | | style="background:#fff"| 1,800
| |
| − | | style="background:#fff"| 450
| |
| − | | style="background:#fff"| [[Timmy and Tommy's store|Timmy & Tommy]]
| |
| − | | style="background:#fff"| {{green}} / {{green}}
| |
| − | | style="background:#fff"| Sci-Fi
| |
| − | | style="background:#fff"| Basic
| |
| − | | style="background:#fff"| {{small}}
| |
| − | | style="background:#fff"| Can use
| |
| − | | style="background:#fff"| No
| |
| − | |-
| |
| − | | style="background:#fff"| Sewing Machine
| |
| − | | style="background:#fff"| [[File:Sewing Machine HHD Icon.png]]
| |
| − | | style="background:#fff"| 1,480
| |
| − | | style="background:#fff"| 370
| |
| − | | style="background:#fff"| [[Timmy and Tommy's store|Timmy & Tommy]]
| |
| − | | style="background:#fff"| {{white}} / {{white}}
| |
| − | | style="background:#fff"| None
| |
| − | | style="background:#fff"| Basic
| |
| − | | style="background:#fff"| {{small}}
| |
| − | | style="background:#fff"| Can use, can place on table
| |
| − | | style="background:#fff"| No
| |
| − | |-
| |
| − | | style="background:#fff"| Old Sewing Machine
| |
| − | | style="background:#fff"| [[File:Old Sewing Machine HHD Icon.png]]
| |
| − | | style="background:#fff"| 1,350
| |
| − | | style="background:#fff"| 337
| |
| − | | style="background:#fff"| [[Timmy and Tommy's store|Timmy & Tommy]]
| |
| − | | style="background:#fff"| {{brown}} / {{gray}}
| |
| − | | style="background:#fff"| None
| |
| − | | style="background:#fff"| Historical
| |
| − | | style="background:#fff"| {{medium}}
| |
| − | | style="background:#fff"| Can use
| |
| − | | style="background:#fff"| No
| |
| − | |-
| |
| − | | style="background:#fff"| Spinning Wheel
| |
| − | | style="background:#fff"| [[File:Spinning Wheel HHD Icon.png]]
| |
| − | | style="background:#fff"| 2,200
| |
| − | | style="background:#fff"| 550
| |
| − | | style="background:#fff"| [[Timmy and Tommy's store|Timmy & Tommy]]
| |
| − | | style="background:#fff"| {{brown}} / {{brown}}
| |
| − | | style="background:#fff"| Rustic<br>Quirky
| |
| − | | style="background:#fff"| Historical
| |
| − | | style="background:#fff"| {{small}}
| |
| − | | style="background:#fff"| Can use
| |
| − | | style="background:#fff"| No
| |
| − | |-
| |
| − | | style="background:#fff"| Loom
| |
| − | | style="background:#fff"| [[File:Loom HHD Icon.png]]
| |
| − | | style="background:#fff"| 3,000
| |
| − | | style="background:#fff"| 750
| |
| − | | style="background:#fff"| [[Timmy and Tommy's store|Timmy & Tommy]]
| |
| − | | style="background:#fff"| {{brown}} / {{pink}}
| |
| − | | style="background:#fff"| None
| |
| − | | style="background:#fff"| Iconic
| |
| − | | style="background:#fff"| {{small}}
| |
| − | | style="background:#fff"| Can use
| |
| − | | style="background:#fff"| Yes
| |
| − | |-
| |
| − | | style="background:#fff"| Patchwork Chair
| |
| − | | style="background:#fff"| [[File:Patchwork Chair HHD Icon.png]]
| |
| − | | style="background:#fff"| 1,600
| |
| − | | style="background:#fff"| 400
| |
| − | | style="background:#fff"| [[Timmy and Tommy's store|Timmy & Tommy]]
| |
| − | | style="background:#fff"| {{colorful}} / {{colorful}}
| |
| − | | style="background:#fff"| Fairy Tale
| |
| − | | style="background:#fff"| Cute
| |
| − | | style="background:#fff"| {{small}}
| |
| − | | style="background:#fff"| Chair
| |
| − | | style="background:#fff"| Yes
| |
| − | |-
| |
| − | | style="background:#fff"| Patchwork Dresser
| |
| − | | style="background:#fff"| [[File:Patchwork Dresser HHD Icon.png]]
| |
| − | | style="background:#fff"| 1,800
| |
| − | | style="background:#fff"| 450
| |
| − | | style="background:#fff"| [[Timmy and Tommy's store|Timmy & Tommy]]
| |
| − | | style="background:#fff"| {{colorful}} / {{colorful}}
| |
| − | | style="background:#fff"| Fairy Tale
| |
| − | | style="background:#fff"| Cute
| |
| − | | style="background:#fff"| {{small}}
| |
| − | | style="background:#fff"| Storage
| |
| − | | style="background:#fff"| Yes
| |
| − | |-
| |
| − | | style="background:#fff"| Patchwork Lamp
| |
| − | | style="background:#fff"| [[File:Patchwork Lamp HHD Icon.png]]
| |
| − | | style="background:#fff"| 1,480
| |
| − | | style="background:#fff"| 370
| |
| − | | style="background:#fff"| [[Timmy and Tommy's store|Timmy & Tommy]]
| |
| − | | style="background:#fff"| {{colorful}} / {{colorful}}
| |
| − | | style="background:#fff"| Fairy Tale
| |
| − | | style="background:#fff"| Cute
| |
| − | | style="background:#fff"| {{small}}
| |
| − | | style="background:#fff"| Lamp
| |
| − | | style="background:#fff"| Yes
| |
| − | |-
| |
| − | | style="background:#fff"| Patchwork Sofa
| |
| − | | style="background:#fff"| [[File:Patchwork Sofa HHD Icon.png]]
| |
| − | | style="background:#fff"| 1,800
| |
| − | | style="background:#fff"| 450
| |
| − | | style="background:#fff"| [[Timmy and Tommy's store|Timmy & Tommy]]
| |
| − | | style="background:#fff"| {{colorful}} / {{colorful}}
| |
| − | | style="background:#fff"| Fairy Tale
| |
| − | | style="background:#fff"| Cute
| |
| − | | style="background:#fff"| {{medium}}
| |
| − | | style="background:#fff"| Chair
| |
| − | | style="background:#fff"| Yes
| |
| − | |-
| |
| − | | style="background:#fff"| Patchwork Table
| |
| − | | style="background:#fff"| [[File:Patchwork Table HHD Icon.png]]
| |
| − | | style="background:#fff"| 2,000
| |
| − | | style="background:#fff"| 500
| |
| − | | style="background:#fff"| [[Timmy and Tommy's store|Timmy & Tommy]]
| |
| − | | style="background:#fff"| {{colorful}} / {{colorful}}
| |
| − | | style="background:#fff"| Fairy Tale
| |
| − | | style="background:#fff"| Cute
| |
| − | | style="background:#fff"| {{large}}
| |
| − | | style="background:#fff"| Table
| |
| − | | style="background:#fff"| Yes
| |
| − | |-
| |
| − | | style="background:#fff"| Exercise Bike
| |
| − | | style="background:#fff"| [[File:Exercise Bike HHD Icon.png]]
| |
| − | | style="background:#fff"| 2,400
| |
| − | | style="background:#fff"| 600
| |
| − | | style="background:#fff"| [[Timmy and Tommy's store|Timmy & Tommy]]
| |
| − | | style="background:#fff"| {{gray}} / {{gray}}
| |
| − | | style="background:#fff"| Sci-Fi
| |
| − | | style="background:#fff"| Sporty
| |
| − | | style="background:#fff"| {{small}}
| |
| − | | style="background:#fff"| -
| |
| − | | style="background:#fff"| No
| |
| − | |-
| |
| − | | style="background:#fff"| Butterfly Machine
| |
| − | | style="background:#fff"| [[File:Butterfly Machine HHD Icon.png]]
| |
| − | | style="background:#fff"| 2,680
| |
| − | | style="background:#fff"| 670
| |
| − | | style="background:#fff"| [[Timmy and Tommy's store|Timmy & Tommy]]
| |
| − | | style="background:#fff"| {{black}} / {{gray}}
| |
| − | | style="background:#fff"| Sci-Fi
| |
| − | | style="background:#fff"| Sporty
| |
| − | | style="background:#fff"| {{small}}
| |
| − | | style="background:#fff"| Chair
| |
| − | | style="background:#fff"| No
| |
| − | |-
| |
| − | | style="background:#fff"| Lat Pulldown Machine
| |
| − | | style="background:#fff"| [[File:Lat Pulldown Machine HHD Icon.png]]
| |
| − | | style="background:#fff"| 2,380
| |
| − | | style="background:#fff"| 595
| |
| − | | style="background:#fff"| [[Timmy and Tommy's store|Timmy & Tommy]]
| |
| − | | style="background:#fff"| {{gray}} / {{gray}}
| |
| − | | style="background:#fff"| Sci-Fi
| |
| − | | style="background:#fff"| Sporty
| |
| − | | style="background:#fff"| {{small}}
| |
| − | | style="background:#fff"| Chair
| |
| − | | style="background:#fff"| No
| |
| − | |-
| |
| − | | style="background:#fff"| Treadmill
| |
| − | | style="background:#fff"| [[File:Treadmill HHD Icon.png]]
| |
| − | | style="background:#fff"| 2,400
| |
| − | | style="background:#fff"| 600
| |
| − | | style="background:#fff"| [[Timmy and Tommy's store|Timmy & Tommy]]
| |
| − | | style="background:#fff"| {{black}} / {{gray}}
| |
| − | | style="background:#fff"| Sci-Fi
| |
| − | | style="background:#fff"| Sporty
| |
| − | | style="background:#fff"| {{medium}}
| |
| − | | style="background:#fff"| Can use
| |
| − | | style="background:#fff"| No
| |
| − | |-
| |
| − | | style="background:#fff"| Trash Can
| |
| − | | style="background:#fff"| [[File:Trash Can HHD Icon.png]]
| |
| − | | style="background:#fff"| 1,400
| |
| − | | style="background:#fff"| 350
| |
| − | | style="background:#fff"| [[Timmy and Tommy's store|Timmy & Tommy]]
| |
| − | | style="background:#fff"| {{aqua}} / {{gray}}
| |
| − | | style="background:#fff"| Quirky
| |
| − | | style="background:#fff"| Basic
| |
| − | | style="background:#fff"| {{small}}
| |
| − | | style="background:#fff"| Can use
| |
| − | | style="background:#fff"| No
| |
| − | |-
| |
| − | | style="background:#fff"| Garbage Pail
| |
| − | | style="background:#fff"| [[File:Garbage Pail HHD Icon.png]]
| |
| − | | style="background:#fff"| 1,100
| |
| − | | style="background:#fff"| 275
| |
| − | | style="background:#fff"| [[Timmy and Tommy's store|Timmy & Tommy]]
| |
| − | | style="background:#fff"| {{blue}} / {{blue}}
| |
| − | | style="background:#fff"| Quirky
| |
| − | | style="background:#fff"| Basic
| |
| − | | style="background:#fff"| {{small}}
| |
| − | | style="background:#fff"| Can use
| |
| − | | style="background:#fff"| No
| |
| − | |-
| |
| − | | style="background:#fff"| Garbage Can
| |
| − | | style="background:#fff"| [[File:Garbage Can HHD Icon.png]]
| |
| − | | style="background:#fff"| 500
| |
| − | | style="background:#fff"| 125
| |
| − | | style="background:#fff"| [[Timmy and Tommy's store|Timmy & Tommy]]
| |
| − | | style="background:#fff"| {{gray}} / {{gray}}
| |
| − | | style="background:#fff"| Quirky
| |
| − | | style="background:#fff"| Basic
| |
| − | | style="background:#fff"| {{small}}
| |
| − | | style="background:#fff"| Can use
| |
| − | | style="background:#fff"| No
| |
| − | |-
| |
| − | | style="background:#fff"| Trash Bin
| |
| − | | style="background:#fff"| [[File:Trash Bin HHD Icon.png]]
| |
| − | | style="background:#fff"| 400
| |
| − | | style="background:#fff"| 100
| |
| − | | style="background:#fff"| [[Timmy and Tommy's store|Timmy & Tommy]]
| |
| − | | style="background:#fff"| {{blue}} / {{red}}
| |
| − | | style="background:#fff"| Quirky
| |
| − | | style="background:#fff"| Basic
| |
| − | | style="background:#fff"| {{small}}
| |
| − | | style="background:#fff"| Can use
| |
| − | | style="background:#fff"| No
| |
| − | |-
| |
| − | | style="background:#fff"| Aroma Pot
| |
| − | | style="background:#fff"| [[File:Aroma Pot HHD Icon.png]]
| |
| − | | style="background:#fff"| 1,200
| |
| − | | style="background:#fff"| 300
| |
| − | | style="background:#fff"| [[Timmy and Tommy's store|Timmy & Tommy]]
| |
| − | | style="background:#fff"| {{gray}} / {{gray}}
| |
| − | | style="background:#fff"| Trendy
| |
| − | | style="background:#fff"| Cute
| |
| − | | style="background:#fff"| {{small}}
| |
| − | | style="background:#fff"| Can place on table
| |
| − | | style="background:#fff"| Yes
| |
| − | |-
| |
| − | | style="background:#fff"| Incense Burner
| |
| − | | style="background:#fff"| [[File:Incense Burner HHD Icon.png]]
| |
| − | | style="background:#fff"| 680
| |
| − | | style="background:#fff"| 170
| |
| − | | style="background:#fff"| [[Timmy and Tommy's store|Timmy & Tommy]]
| |
| − | | style="background:#fff"| {{black}} / {{purple}}
| |
| − | | style="background:#fff"| Harmonious
| |
| − | | style="background:#fff"| Cute
| |
| − | | style="background:#fff"| {{small}}
| |
| − | | style="background:#fff"| Can place on table
| |
| − | | style="background:#fff"| No
| |
| − | |-
| |
| − | | style="background:#fff"| Birdcage
| |
| − | | style="background:#fff"| [[File:Birdcage HHD Icon.png]]
| |
| − | | style="background:#fff"| 1,700
| |
| − | | style="background:#fff"| 425
| |
| − | | style="background:#fff"| [[Timmy and Tommy's store|Timmy & Tommy]]
| |
| − | | style="background:#fff"| {{brown}} / {{brown}}
| |
| − | | style="background:#fff"| Rustic<br>Fairy Tale
| |
| − | | style="background:#fff"| Basic
| |
| − | | style="background:#fff"| {{small}}
| |
| − | | style="background:#fff"| -
| |
| − | | style="background:#fff"| No
| |
| − | |-
| |
| − | | style="background:#fff"| Cat Tower
| |
| − | | style="background:#fff"| [[File:Cat Tower HHD Icon.png]]
| |
| − | | style="background:#fff"| 1,600
| |
| − | | style="background:#fff"| 400
| |
| − | | style="background:#fff"| [[DLC]]
| |
| − | | style="background:#fff"| {{beige}} / {{beige}}
| |
| − | | style="background:#fff"| None
| |
| − | | style="background:#fff"| ???
| |
| − | | style="background:#fff"| {{small}}
| |
| − | | style="background:#fff"| -
| |
| − | | style="background:#fff"| No
| |
| − | |-
| |
| − | | style="background:#fff"| Doghouse
| |
| − | | style="background:#fff"| [[File:Doghouse HHD Icon.png]]
| |
| − | | style="background:#fff"| 1,200
| |
| − | | style="background:#fff"| 300
| |
| − | | style="background:#fff"| [[Timmy and Tommy's store|Timmy & Tommy]]
| |
| − | | style="background:#fff"| {{brown}} / {{red}}
| |
| − | | style="background:#fff"| None
| |
| − | | style="background:#fff"| Iconic
| |
| − | | style="background:#fff"| {{small}}
| |
| − | | style="background:#fff"| Can use
| |
| − | | style="background:#fff"| Yes
| |
| − | |-
| |
| − | | style="background:#fff"| Shower
| |
| − | | style="background:#fff"| [[File:Shower HHD Icon.png]]
| |
| − | | style="background:#fff"| 880
| |
| − | | style="background:#fff"| 220
| |
| − | | style="background:#fff"| [[Timmy and Tommy's store|Timmy & Tommy]]
| |
| − | | style="background:#fff"| {{gray}} / {{gray}}
| |
| − | | style="background:#fff"| Trendy<br>Sci-Fi
| |
| − | | style="background:#fff"| Basic
| |
| − | | style="background:#fff"| {{small}}
| |
| − | | style="background:#fff"| -
| |
| − | | style="background:#fff"| No
| |
| − | |-
| |
| − | | style="background:#fff"| Claw-Foot Tub
| |
| − | | style="background:#fff"| [[File:Claw-Foot Tub HHD Icon.png]]
| |
| − | | style="background:#fff"| 1,280
| |
| − | | style="background:#fff"| 320
| |
| − | | style="background:#fff"| [[Timmy and Tommy's store|Timmy & Tommy]]
| |
| − | | style="background:#fff"| {{white}} / {{white}}
| |
| − | | style="background:#fff"| Fairy Tale
| |
| − | | style="background:#fff"| Cute
| |
| − | | style="background:#fff"| {{medium}}
| |
| − | | style="background:#fff"| -
| |
| − | | style="background:#fff"| Yes
| |
| − | |-
| |
| − | | style="background:#fff"| Whirlpool Bath
| |
| − | | style="background:#fff"| [[File:Whirlpool Bath HHD Icon.png]]
| |
| − | | style="background:#fff"| 70 medals
| |
| − | | style="background:#fff"| 875 bells
| |
| − | | style="background:#fff"| [[Club Tortimer]]
| |
| − | | style="background:#fff"| {{white}} / {{white}}
| |
| − | | style="background:#fff"| Trendy<br>Sci-Fi
| |
| − | | style="background:#fff"| Ornate
| |
| − | | style="background:#fff"| {{large}}
| |
| − | | style="background:#fff"| -
| |
| − | | style="background:#fff"| No
| |
| − | |-
| |
| − | | style="background:#fff"| Outdoor Bath
| |
| − | | style="background:#fff"| [[File:Outdoor Bath HHD Icon.png]]
| |
| − | | style="background:#fff"| 4,900
| |
| − | | style="background:#fff"| 1,225
| |
| − | | style="background:#fff"| [[Timmy and Tommy's store|Timmy & Tommy]]
| |
| − | | style="background:#fff"| {{gray}} / {{gray}}
| |
| − | | style="background:#fff"| Harmonious
| |
| − | | style="background:#fff"| Iconic
| |
| − | | style="background:#fff"| {{large}}
| |
| − | | style="background:#fff"| -
| |
| − | | style="background:#fff"| No
| |
| − | |-
| |
| − | | style="background:#fff"| Shower Stall
| |
| − | | style="background:#fff"| [[File:Shower Stall HHD Icon.png]]
| |
| − | | style="background:#fff"| 2,200
| |
| − | | style="background:#fff"| 550
| |
| − | | style="background:#fff"| [[Timmy and Tommy's store|Timmy & Tommy]]
| |
| − | | style="background:#fff"| {{aqua}} / {{aqua}}
| |
| − | | style="background:#fff"| Trendy<br>Sci-Fi
| |
| − | | style="background:#fff"| Basic
| |
| − | | style="background:#fff"| {{large}}
| |
| − | | style="background:#fff"| -
| |
| − | | style="background:#fff"| No
| |
| − | |-
| |
| − | | style="background:#fff"| Potty
| |
| − | | style="background:#fff"| [[File:Potty HHD Icon.png]]
| |
| − | | style="background:#fff"| 1,200
| |
| − | | style="background:#fff"| 300
| |
| − | | style="background:#fff"| [[Timmy and Tommy's store|Timmy & Tommy]]
| |
| − | | style="background:#fff"| {{white}} / {{white}}
| |
| − | | style="background:#fff"| None
| |
| − | | style="background:#fff"| Basic
| |
| − | | style="background:#fff"| {{small}}
| |
| − | | style="background:#fff"| -
| |
| − | | style="background:#fff"| Yes
| |
| − | |-
| |
| − | | style="background:#fff"| Toilet
| |
| − | | style="background:#fff"| [[File:Toilet HHD Icon.png]]
| |
| − | | style="background:#fff"| 1,800
| |
| − | | style="background:#fff"| 450
| |
| − | | style="background:#fff"| [[Timmy and Tommy's store|Timmy & Tommy]]
| |
| − | | style="background:#fff"| {{white}} / {{white}}
| |
| − | | style="background:#fff"| None
| |
| − | | style="background:#fff"| Basic
| |
| − | | style="background:#fff"| {{small}}
| |
| − | | style="background:#fff"| Chair
| |
| − | | style="background:#fff"| Yes
| |
| − | |-
| |
| − | | style="background:#fff"| Super Toilet
| |
| − | | style="background:#fff"| [[File:Super Toilet HHD Icon.png]]
| |
| − | | style="background:#fff"| 1,980
| |
| − | | style="background:#fff"| 495
| |
| − | | style="background:#fff"| [[Timmy and Tommy's store|Timmy & Tommy]]
| |
| − | | style="background:#fff"| {{pink}} / {{pink}}
| |
| − | | style="background:#fff"| None
| |
| − | | style="background:#fff"| Basic
| |
| − | | style="background:#fff"| {{small}}
| |
| − | | style="background:#fff"| Chair
| |
| − | | style="background:#fff"| Yes
| |
| − | |-
| |
| − | | style="background:#fff"| Men's Toilet
| |
| − | | style="background:#fff"| [[File:Men's Toilet HHD Icon.png]]
| |
| − | | style="background:#fff"| 1,600
| |
| − | | style="background:#fff"| 400
| |
| − | | style="background:#fff"| [[Timmy and Tommy's store|Timmy & Tommy]]
| |
| − | | style="background:#fff"| {{aqua}} / {{aqua}}
| |
| − | | style="background:#fff"| None
| |
| − | | style="background:#fff"| Basic
| |
| − | | style="background:#fff"| {{small}}
| |
| − | | style="background:#fff"| Can use
| |
| − | | style="background:#fff"| No
| |
| − | |-
| |
| − | | style="background:#fff"| Bathroom Stall
| |
| − | | style="background:#fff"| [[File:Bathroom Stall HHD Icon.png]]
| |
| − | | style="background:#fff"| 2,000
| |
| − | | style="background:#fff"| 500
| |
| − | | style="background:#fff"| [[Timmy and Tommy's store|Timmy & Tommy]]
| |
| − | | style="background:#fff"| {{white}} / {{white}}
| |
| − | | style="background:#fff"| None
| |
| − | | style="background:#fff"| Flashy
| |
| − | | style="background:#fff"| {{small}}
| |
| − | | style="background:#fff"| Can use
| |
| − | | style="background:#fff"| No
| |
| − | |-
| |
| − | | style="background:#fff"| Portable Toilet
| |
| − | | style="background:#fff"| [[File:Portable Toilet HHD Icon.png]]
| |
| − | | style="background:#fff"| 2,000
| |
| − | | style="background:#fff"| 500
| |
| − | | style="background:#fff"| [[Timmy and Tommy's store|Timmy & Tommy]]
| |
| − | | style="background:#fff"| {{aqua}} / {{white}}
| |
| − | | style="background:#fff"| None
| |
| − | | style="background:#fff"| Flashy
| |
| − | | style="background:#fff"| {{small}}
| |
| − | | style="background:#fff"| Can use
| |
| − | | style="background:#fff"| No
| |
| − | |-
| |
| − | | style="background:#fff"| Bathroom Sink
| |
| − | | style="background:#fff"| [[File:Bathroom Sink HHD Icon.png]]
| |
| − | | style="background:#fff"| 1,200
| |
| − | | style="background:#fff"| 300
| |
| − | | style="background:#fff"| [[Timmy and Tommy's store|Timmy & Tommy]]
| |
| − | | style="background:#fff"| {{white}} / {{white}}
| |
| − | | style="background:#fff"| None
| |
| − | | style="background:#fff"| Basic
| |
| − | | style="background:#fff"| {{small}}
| |
| − | | style="background:#fff"| -
| |
| − | | style="background:#fff"| No
| |
| − | |-
| |
| − | | style="background:#fff"| Box of Tissues
| |
| − | | style="background:#fff"| [[File:Box of Tissues HHD Icon.png]]
| |
| − | | style="background:#fff"| -
| |
| − | | style="background:#fff"| 320
| |
| − | | style="background:#fff"| [[Savings]]
| |
| − | | style="background:#fff"| {{white}} / {{white}}
| |
| − | | style="background:#fff"| None
| |
| − | | style="background:#fff"| Basic
| |
| − | | style="background:#fff"| {{small}}
| |
| − | | style="background:#fff"| Can place on table
| |
| − | | style="background:#fff"| No
| |
| − | |-
| |
| − | | style="background:#fff"| Makeup Case
| |
| − | | style="background:#fff"| [[File:Makeup Case HHD Icon.png]]
| |
| − | | style="background:#fff"| 1,200
| |
| − | | style="background:#fff"| 300
| |
| − | | style="background:#fff"| [[Timmy and Tommy's store|Timmy & Tommy]]
| |
| − | | style="background:#fff"| {{colorful}} / {{pink}}
| |
| − | | style="background:#fff"| Fairy Tale
| |
| − | | style="background:#fff"| Cute
| |
| − | | style="background:#fff"| {{small}}
| |
| − | | style="background:#fff"| Can use, can place on table
| |
| − | | style="background:#fff"| No
| |
| − | |-
| |
| − | | style="background:#fff"| Dollhouse
| |
| − | | style="background:#fff"| [[File:Dollhouse HHD Icon.png]]
| |
| − | | style="background:#fff"| 2,000
| |
| − | | style="background:#fff"| 500
| |
| − | | style="background:#fff"| [[Timmy and Tommy's store|Timmy & Tommy]]
| |
| − | | style="background:#fff"| {{brown}} / {{pink}}
| |
| − | | style="background:#fff"| Fairy Tale<br>Toy Shop
| |
| − | | style="background:#fff"| Cute
| |
| − | | style="background:#fff"| {{small}}
| |
| − | | style="background:#fff"| Can place on table
| |
| − | | style="background:#fff"| No
| |
| − | |-
| |
| − | | style="background:#fff"| Giraffe Ruler
| |
| − | | style="background:#fff"| [[File:Giraffe Ruler HHD Icon.png]]
| |
| − | | style="background:#fff"| 1,600
| |
| − | | style="background:#fff"| 400
| |
| − | | style="background:#fff"| [[Timmy and Tommy's store|Timmy & Tommy]]
| |
| − | | style="background:#fff"| {{yellow}} / {{yellow}}
| |
| − | | style="background:#fff"| None
| |
| − | | style="background:#fff"| Cute
| |
| − | | style="background:#fff"| {{small}}
| |
| − | | style="background:#fff"| Wall furniture
| |
| − | | style="background:#fff"| No
| |
| − | |-
| |
| − | | style="background:#fff"| Mobile
| |
| − | | style="background:#fff"| [[File:Mobile HHD Icon.png]]
| |
| − | | style="background:#fff"| 1,200
| |
| − | | style="background:#fff"| 300
| |
| − | | style="background:#fff"| [[Timmy and Tommy's store|Timmy & Tommy]]
| |
| − | | style="background:#fff"| {{colorful}} / {{colorful}}
| |
| − | | style="background:#fff"| Toy Shop
| |
| − | | style="background:#fff"| Cute
| |
| − | | style="background:#fff"| {{small}}
| |
| − | | style="background:#fff"| Wall furniture
| |
| − | | style="background:#fff"| Yes
| |
| − | |-
| |
| − | | style="background:#fff"| Tricycle
| |
| − | | style="background:#fff"| [[File:Tricycle HHD Icon.png]]
| |
| − | | style="background:#fff"| 1,120
| |
| − | | style="background:#fff"| 280
| |
| − | | style="background:#fff"| [[Timmy and Tommy's store|Timmy & Tommy]]
| |
| − | | style="background:#fff"| {{orange}} / {{yellow}}
| |
| − | | style="background:#fff"| None
| |
| − | | style="background:#fff"| Cute
| |
| − | | style="background:#fff"| {{small}}
| |
| − | | style="background:#fff"| -
| |
| − | | style="background:#fff"| No
| |
| − | |-
| |
| − | | style="background:#fff"| Mini Circuit
| |
| − | | style="background:#fff"| [[File:Mini Circuit HHD Icon.png]]
| |
| − | | style="background:#fff"| 1,600
| |
| − | | style="background:#fff"| 400
| |
| − | | style="background:#fff"| [[Timmy and Tommy's store|Timmy & Tommy]]
| |
| − | | style="background:#fff"| {{gray}} / {{gray}}
| |
| − | | style="background:#fff"| Toy Shop
| |
| − | | style="background:#fff"| Sporty
| |
| − | | style="background:#fff"| {{large}}
| |
| − | | style="background:#fff"| Can use
| |
| − | | style="background:#fff"| No
| |
| − | |-
| |
| − | | style="background:#fff"| Bilboquet
| |
| − | | style="background:#fff"| [[File:Bilboquet HHD Icon.png]]
| |
| − | | style="background:#fff"| 2,000
| |
| − | | style="background:#fff"| 500
| |
| − | | style="background:#fff"| [[Timmy and Tommy's store|Timmy & Tommy]]
| |
| − | | style="background:#fff"| {{red}} / {{red}}
| |
| − | | style="background:#fff"| Harmonious<br>Toy Shop
| |
| − | | style="background:#fff"| Sporty
| |
| − | | style="background:#fff"| {{small}}
| |
| − | | style="background:#fff"| -
| |
| − | | style="background:#fff"| Yes
| |
| − | |-
| |
| − | | style="background:#fff"| Top
| |
| − | | style="background:#fff"| [[File:Top HHD Icon.png]]
| |
| − | | style="background:#fff"| 2,000
| |
| − | | style="background:#fff"| 500
| |
| − | | style="background:#fff"| [[DLC]]
| |
| − | | style="background:#fff"| {{black}} / {{red}}
| |
| − | | style="background:#fff"| Harmonious
| |
| − | | style="background:#fff"| ???
| |
| − | | style="background:#fff"| {{small}}
| |
| − | | style="background:#fff"| -
| |
| − | | style="background:#fff"| No
| |
| − | |-
| |
| − | | style="background:#fff"| Slide Puzzle
| |
| − | | style="background:#fff"| [[File:Slide Puzzle HHD Icon.png]]
| |
| − | | style="background:#fff"| 800
| |
| − | | style="background:#fff"| 200
| |
| − | | style="background:#fff"| [[Timmy and Tommy's store|Timmy & Tommy]]
| |
| − | | style="background:#fff"| {{blue}} / {{white}}
| |
| − | | style="background:#fff"| Toy Shop
| |
| − | | style="background:#fff"| Cute
| |
| − | | style="background:#fff"| {{small}}
| |
| − | | style="background:#fff"| Can use, can place on table
| |
| − | | style="background:#fff"| Yes
| |
| − | |-
| |
| − | | style="background:#fff"| Piggy Bank
| |
| − | | style="background:#fff"| [[File:Piggy Bank HHD Icon.png]]
| |
| − | | style="background:#fff"| -
| |
| − | | style="background:#fff"| 1,120
| |
| − | | style="background:#fff"| [[Savings]]
| |
| − | | style="background:#fff"| {{beige}} / {{pink}}
| |
| − | | style="background:#fff"| Harmonious
| |
| − | | style="background:#fff"| Cute
| |
| − | | style="background:#fff"| {{small}}
| |
| − | | style="background:#fff"| Can use, can place on table
| |
| − | | style="background:#fff"| Yes
| |
| − | |-
| |
| − | | style="background:#fff"| Water Bird
| |
| − | | style="background:#fff"| [[File:Water Bird HHD Icon.png]]
| |
| − | | style="background:#fff"| 1,400
| |
| − | | style="background:#fff"| 350
| |
| − | | style="background:#fff"| [[Timmy and Tommy's store|Timmy & Tommy]]
| |
| − | | style="background:#fff"| {{colorful}} / {{colorful}}
| |
| − | | style="background:#fff"| Toy Shop
| |
| − | | style="background:#fff"| Cute
| |
| − | | style="background:#fff"| {{small}}
| |
| − | | style="background:#fff"| Can place on table
| |
| − | | style="background:#fff"| No
| |
| − | |-
| |
| − | | style="background:#fff"| Toy Camera
| |
| − | | style="background:#fff"| [[File:Toy Camera HHD Icon.png]]
| |
| − | | style="background:#fff"| -
| |
| − | | style="background:#fff"| 240
| |
| − | | style="background:#fff"| [[Katie]]
| |
| − | | style="background:#fff"| {{pink}} / {{pink}}
| |
| − | | style="background:#fff"| Trendy<br>Toy Shop
| |
| − | | style="background:#fff"| Cute
| |
| − | | style="background:#fff"| {{small}}
| |
| − | | style="background:#fff"| Can place on table
| |
| − | | style="background:#fff"| Yes
| |
| − | |-
| |
| − | | style="background:#fff"| Pop-Up Book
| |
| − | | style="background:#fff"| [[File:Pop-Up Book HHD Icon.png]]
| |
| − | | style="background:#fff"| 1,000
| |
| − | | style="background:#fff"| 250
| |
| − | | style="background:#fff"| [[Timmy and Tommy's store|Timmy & Tommy]]
| |
| − | | style="background:#fff"| {{green}} / {{red}}
| |
| − | | style="background:#fff"| Toy Shop
| |
| − | | style="background:#fff"| Cute
| |
| − | | style="background:#fff"| {{small}}
| |
| − | | style="background:#fff"| Can use, can place on table
| |
| − | | style="background:#fff"| No
| |
| − | |-
| |
| − | | style="background:#fff"| Sketchbook
| |
| − | | style="background:#fff"| [[File:Sketchbook HHD Icon.png]]
| |
| − | | style="background:#fff"| -
| |
| − | | style="background:#fff"| 240
| |
| − | | style="background:#fff"| [[Katie]]
| |
| − | | style="background:#fff"| {{red}} / {{red}}
| |
| − | | style="background:#fff"| None
| |
| − | | style="background:#fff"| Basic
| |
| − | | style="background:#fff"| {{small}}
| |
| − | | style="background:#fff"| Can use, can place on table
| |
| − | | style="background:#fff"| No
| |
| − | |-
| |
| − | | style="background:#fff"| Painting Set
| |
| − | | style="background:#fff"| [[File:Painting Set HHD Icon.png]]
| |
| − | | style="background:#fff"| 680
| |
| − | | style="background:#fff"| 170
| |
| − | | style="background:#fff"| [[Timmy and Tommy's store|Timmy & Tommy]]
| |
| − | | style="background:#fff"| {{colorful}} / {{colorful}}
| |
| − | | style="background:#fff"| Toy Shop
| |
| − | | style="background:#fff"| Cute
| |
| − | | style="background:#fff"| {{small}}
| |
| − | | style="background:#fff"| Can place on table
| |
| − | | style="background:#fff"| No
| |
| − | |-
| |
| − | | style="background:#fff"| Homework Set
| |
| − | | style="background:#fff"| [[File:Homework Set HHD Icon.png]]
| |
| − | | style="background:#fff"| 680
| |
| − | | style="background:#fff"| 170
| |
| − | | style="background:#fff"| [[Timmy and Tommy's store|Timmy & Tommy]]
| |
| − | | style="background:#fff"| {{colorful}} / {{white}}
| |
| − | | style="background:#fff"| Sci-Fi
| |
| − | | style="background:#fff"| Official
| |
| − | | style="background:#fff"| {{small}}
| |
| − | | style="background:#fff"| Can place on table
| |
| − | | style="background:#fff"| No
| |
| − | |-
| |
| − | | style="background:#fff"| Post-Office Poster
| |
| − | | style="background:#fff"| [[File:Post-Office Poster HHD Icon.png]]
| |
| − | | style="background:#fff"| -
| |
| − | | style="background:#fff"| 100
| |
| − | | style="background:#fff"| [[Savings]]
| |
| − | | style="background:#fff"| None / None
| |
| − | | style="background:#fff"| None
| |
| − | | style="background:#fff"| Iconic
| |
| − | | style="background:#fff"| {{small}}
| |
| − | | style="background:#fff"| Wall furniture, can't recycle
| |
| − | | style="background:#fff"| No
| |
| − | |-
| |
| − | | style="background:#fff"| Phonograph
| |
| − | | style="background:#fff"| [[File:Phonograph HHD Icon.png]]
| |
| − | | style="background:#fff"| 1,840
| |
| − | | style="background:#fff"| 460
| |
| − | | style="background:#fff"| [[Timmy and Tommy's store|Timmy & Tommy]]
| |
| − | | style="background:#fff"| {{brown}} / {{yellow}}
| |
| − | | style="background:#fff"| Antique
| |
| − | | style="background:#fff"| Historical
| |
| − | | style="background:#fff"| {{small}}
| |
| − | | style="background:#fff"| Stereo, can place on table
| |
| − | | style="background:#fff"| No
| |
| − | |-
| |
| − | | style="background:#fff"| Turntable
| |
| − | | style="background:#fff"| [[File:Turntable HHD Icon.png]]
| |
| − | | style="background:#fff"| 2,580
| |
| − | | style="background:#fff"| 645
| |
| − | | style="background:#fff"| [[Timmy and Tommy's store|Timmy & Tommy]]
| |
| − | | style="background:#fff"| {{brown}} / {{brown}}
| |
| − | | style="background:#fff"| Antique
| |
| − | | style="background:#fff"| Historical
| |
| − | | style="background:#fff"| {{small}}
| |
| − | | style="background:#fff"| Stereo
| |
| − | | style="background:#fff"| No
| |
| − | |-
| |
| − | | style="background:#fff"| Reel-to-Reel
| |
| − | | style="background:#fff"| [[File:Reel-to-Reel HHD Icon.png]]
| |
| − | | style="background:#fff"| 2,000
| |
| − | | style="background:#fff"| 500
| |
| − | | style="background:#fff"| [[Timmy and Tommy's store|Timmy & Tommy]]
| |
| − | | style="background:#fff"| {{black}} / {{colorful}}
| |
| − | | style="background:#fff"| Sci-Fi
| |
| − | | style="background:#fff"| Historical
| |
| − | | style="background:#fff"| {{small}}
| |
| − | | style="background:#fff"| Stereo, can place on table
| |
| − | | style="background:#fff"| No
| |
| − | |-
| |
| − | | style="background:#fff"| Retro Stereo
| |
| − | | style="background:#fff"| [[File:Retro Stereo HHD Icon.png]]
| |
| − | | style="background:#fff"| 5,500
| |
| − | | style="background:#fff"| 1,375
| |
| − | | style="background:#fff"| [[Timmy and Tommy's store|Timmy & Tommy]]
| |
| − | | style="background:#fff"| {{black}} / {{black}}
| |
| − | | style="background:#fff"| Antique
| |
| − | | style="background:#fff"| Historical
| |
| − | | style="background:#fff"| {{medium}}
| |
| − | | style="background:#fff"| Stereo
| |
| − | | style="background:#fff"| No
| |
| − | |-
| |
| − | | style="background:#fff"| Gold Stereo
| |
| − | | style="background:#fff"| [[File:Gold Stereo HHD Icon.png]]
| |
| − | | style="background:#fff"| 2,640
| |
| − | | style="background:#fff"| 660
| |
| − | | style="background:#fff"| [[Timmy and Tommy's store|Timmy & Tommy]]
| |
| − | | style="background:#fff"| {{black}} / {{yellow}}
| |
| − | | style="background:#fff"| Trendy
| |
| − | | style="background:#fff"| Basic
| |
| − | | style="background:#fff"| {{medium}}
| |
| − | | style="background:#fff"| Stereo
| |
| − | | style="background:#fff"| No
| |
| − | |-
| |
| − | | style="background:#fff"| Hi-Fi Stereo
| |
| − | | style="background:#fff"| [[File:Hi-Fi Stereo HHD Icon.png]]
| |
| − | | style="background:#fff"| 5,400
| |
| − | | style="background:#fff"| 1,350
| |
| − | | style="background:#fff"| [[Spotlight]] / [[Wishy]]
| |
| − | | style="background:#fff"| {{black}} / {{brown}}
| |
| − | | style="background:#fff"| Trendy
| |
| − | | style="background:#fff"| Basic
| |
| − | | style="background:#fff"| {{medium}}
| |
| − | | style="background:#fff"| Stereo
| |
| − | | style="background:#fff"| No
| |
| − | |-
| |
| − | | style="background:#fff"| High-End Stereo
| |
| − | | style="background:#fff"| [[File:High-End Stereo HHD Icon.png]]
| |
| − | | style="background:#fff"| 2,750
| |
| − | | style="background:#fff"| 687
| |
| − | | style="background:#fff"| [[Timmy and Tommy's store|Timmy & Tommy]]
| |
| − | | style="background:#fff"| {{black}} / {{brown}}
| |
| − | | style="background:#fff"| Trendy
| |
| − | | style="background:#fff"| Basic
| |
| − | | style="background:#fff"| {{medium}}
| |
| − | | style="background:#fff"| Stereo
| |
| − | | style="background:#fff"| No
| |
| − | |-
| |
| − | | style="background:#fff"| Dice Stereo
| |
| − | | style="background:#fff"| [[File:Dice Stereo HHD Icon.png]]
| |
| − | | style="background:#fff"| 2,150
| |
| − | | style="background:#fff"| 537
| |
| − | | style="background:#fff"| [[Timmy and Tommy's store|Timmy & Tommy]]
| |
| − | | style="background:#fff"| {{white}} / {{white}}
| |
| − | | style="background:#fff"| Trendy<br>Toy Shop
| |
| − | | style="background:#fff"| Cute
| |
| − | | style="background:#fff"| {{medium}}
| |
| − | | style="background:#fff"| Stereo
| |
| − | | style="background:#fff"| No
| |
| − | |-
| |
| − | | style="background:#fff"| Tape Deck
| |
| − | | style="background:#fff"| [[File:Tape Deck HHD Icon.png]]
| |
| − | | style="background:#fff"| 700
| |
| − | | style="background:#fff"| 175
| |
| − | | style="background:#fff"| [[Timmy and Tommy's store|Timmy & Tommy]]
| |
| − | | style="background:#fff"| {{gray}} / {{gray}}
| |
| − | | style="background:#fff"| None
| |
| − | | style="background:#fff"| Historical
| |
| − | | style="background:#fff"| {{small}}
| |
| − | | style="background:#fff"| Stereo, can place on table
| |
| − | | style="background:#fff"| No
| |
| − | |-
| |
| − | | style="background:#fff"| CD Player
| |
| − | | style="background:#fff"| [[File:CD Player HHD Icon.png]]
| |
| − | | style="background:#fff"| 1,600
| |
| − | | style="background:#fff"| 400
| |
| − | | style="background:#fff"| [[Timmy and Tommy's store|Timmy & Tommy]]
| |
| − | | style="background:#fff"| {{aqua}} / {{aqua}}
| |
| − | | style="background:#fff"| None
| |
| − | | style="background:#fff"| Historical
| |
| − | | style="background:#fff"| {{small}}
| |
| − | | style="background:#fff"| Stereo, can place on table
| |
| − | | style="background:#fff"| No
| |
| − | |-
| |
| − | | style="background:#fff"| Cassette Player
| |
| − | | style="background:#fff"| [[File:Cassette Player HHD Icon.png]]
| |
| − | | style="background:#fff"| 1,500
| |
| − | | style="background:#fff"| 375
| |
| − | | style="background:#fff"| [[Timmy and Tommy's store|Timmy & Tommy]]
| |
| − | | style="background:#fff"| {{red}} / {{red}}
| |
| − | | style="background:#fff"| None
| |
| − | | style="background:#fff"| Historical
| |
| − | | style="background:#fff"| {{small}}
| |
| − | | style="background:#fff"| Stereo, can place on table
| |
| − | | style="background:#fff"| Yes
| |
| − | |-
| |
| − | | style="background:#fff"| Round Clock
| |
| − | | style="background:#fff"| [[File:Round Clock HHD Icon.png]]
| |
| − | | style="background:#fff"| 960
| |
| − | | style="background:#fff"| 240
| |
| − | | style="background:#fff"| [[Timmy and Tommy's store|Timmy & Tommy]]
| |
| − | | style="background:#fff"| {{red}} / {{white}}
| |
| − | | style="background:#fff"| None
| |
| − | | style="background:#fff"| Basic
| |
| − | | style="background:#fff"| {{small}}
| |
| − | | style="background:#fff"| Clock, can place on table
| |
| − | | style="background:#fff"| Yes
| |
| − | |-
| |
| − | | style="background:#fff"| Kitschy Clock
| |
| − | | style="background:#fff"| [[File:Kitschy Clock HHD Icon.png]]
| |
| − | | style="background:#fff"| 1,800
| |
| − | | style="background:#fff"| 450
| |
| − | | style="background:#fff"| [[Timmy and Tommy's store|Timmy & Tommy]]
| |
| − | | style="background:#fff"| {{colorful}} / {{gray}}
| |
| − | | style="background:#fff"| None
| |
| − | | style="background:#fff"| Sporty
| |
| − | | style="background:#fff"| {{small}}
| |
| − | | style="background:#fff"| Clock
| |
| − | | style="background:#fff"| No
| |
| − | |-
| |
| − | | style="background:#fff"| Antique Clock
| |
| − | | style="background:#fff"| [[File:Antique Clock HHD Icon.png]]
| |
| − | | style="background:#fff"| 2,350
| |
| − | | style="background:#fff"| 587
| |
| − | | style="background:#fff"| [[Timmy and Tommy's store|Timmy & Tommy]]
| |
| − | | style="background:#fff"| {{brown}} / {{brown}}
| |
| − | | style="background:#fff"| Antique
| |
| − | | style="background:#fff"| Historical
| |
| − | | style="background:#fff"| {{small}}
| |
| − | | style="background:#fff"| Clock
| |
| − | | style="background:#fff"| No
| |
| − | |-
| |
| − | | style="background:#fff"| Cube Clock
| |
| − | | style="background:#fff"| [[File:Cube Clock HHD Icon.png]]
| |
| − | | style="background:#fff"| 1,100
| |
| − | | style="background:#fff"| 275
| |
| − | | style="background:#fff"| [[Timmy and Tommy's store|Timmy & Tommy]]
| |
| − | | style="background:#fff"| {{white}} / {{yellow}}
| |
| − | | style="background:#fff"| Trendy
| |
| − | | style="background:#fff"| Modern
| |
| − | | style="background:#fff"| {{small}}
| |
| − | | style="background:#fff"| Clock, can place on table
| |
| − | | style="background:#fff"| No
| |
| − | |-
| |
| − | | style="background:#fff"| Odd Clock
| |
| − | | style="background:#fff"| [[File:Odd Clock HHD Icon.png]]
| |
| − | | style="background:#fff"| 1,800
| |
| − | | style="background:#fff"| 450
| |
| − | | style="background:#fff"| [[Timmy and Tommy's store|Timmy & Tommy]]
| |
| − | | style="background:#fff"| {{yellow}} / {{yellow}}
| |
| − | | style="background:#fff"| Harmonious<br>Antique
| |
| − | | style="background:#fff"| Historical
| |
| − | | style="background:#fff"| {{small}}
| |
| − | | style="background:#fff"| Clock, can place on table
| |
| − | | style="background:#fff"| No
| |
| − | |-
| |
| − | | style="background:#fff"| Oval Clock
| |
| − | | style="background:#fff"| [[File:Oval Clock HHD Icon.png]]
| |
| − | | style="background:#fff"| 800
| |
| − | | style="background:#fff"| 200
| |
| − | | style="background:#fff"| [[Timmy and Tommy's store|Timmy & Tommy]]
| |
| − | | style="background:#fff"| {{green}} / {{yellow}}
| |
| − | | style="background:#fff"| None
| |
| − | | style="background:#fff"| Iconic
| |
| − | | style="background:#fff"| {{small}}
| |
| − | | style="background:#fff"| Clock, can place on table
| |
| − | | style="background:#fff"| Yes
| |
| − | |-
| |
| − | | style="background:#fff"| Alarm Clock
| |
| − | | style="background:#fff"| [[File:Alarm Clock HHD Icon.png]]
| |
| − | | style="background:#fff"| 1,000
| |
| − | | style="background:#fff"| 250
| |
| − | | style="background:#fff"| [[Timmy and Tommy's store|Timmy & Tommy]]
| |
| − | | style="background:#fff"| {{beige}} / {{beige}}
| |
| − | | style="background:#fff"| None
| |
| − | | style="background:#fff"| Basic
| |
| − | | style="background:#fff"| {{small}}
| |
| − | | style="background:#fff"| Clock, can place on table
| |
| − | | style="background:#fff"| Yes
| |
| − | |-
| |
| − | | style="background:#fff"| Owl Clock
| |
| − | | style="background:#fff"| [[File:Owl Clock HHD Icon.png]]
| |
| − | | style="background:#fff"| 1,300
| |
| − | | style="background:#fff"| 325
| |
| − | | style="background:#fff"| [[Timmy and Tommy's store|Timmy & Tommy]]
| |
| − | | style="background:#fff"| {{brown}} / {{brown}}
| |
| − | | style="background:#fff"| Fairy Tale
| |
| − | | style="background:#fff"| Historical
| |
| − | | style="background:#fff"| {{small}}
| |
| − | | style="background:#fff"| Clock, can place on table
| |
| − | | style="background:#fff"| No
| |
| − | |-
| |
| − | | style="background:#fff"| Cuckoo Clock
| |
| − | | style="background:#fff"| [[File:Cuckoo Clock HHD Icon.png]]
| |
| − | | style="background:#fff"| 1,800
| |
| − | | style="background:#fff"| 450
| |
| − | | style="background:#fff"| [[Timmy and Tommy's store|Timmy & Tommy]]
| |
| − | | style="background:#fff"| {{brown}} / {{red}}
| |
| − | | style="background:#fff"| Rustic
| |
| − | | style="background:#fff"| Historical
| |
| − | | style="background:#fff"| {{small}}
| |
| − | | style="background:#fff"| Clock, wall furniture
| |
| − | | style="background:#fff"| No
| |
| − | |-
| |
| − | | style="background:#fff"| Pendulum Clock
| |
| − | | style="background:#fff"| [[File:Pendulum Clock HHD Icon.png]]
| |
| − | | style="background:#fff"| 1,600
| |
| − | | style="background:#fff"| 400
| |
| − | | style="background:#fff"| [[Timmy and Tommy's store|Timmy & Tommy]]
| |
| − | | style="background:#fff"| None / None
| |
| − | | style="background:#fff"| Antique
| |
| − | | style="background:#fff"| Basic
| |
| − | | style="background:#fff"| {{small}}
| |
| − | | style="background:#fff"| Clock, wall furniture
| |
| − | | style="background:#fff"| No
| |
| − | |-
| |
| − | | style="background:#fff"| Raccoon Wall Clock
| |
| − | | style="background:#fff"| [[File:Raccoon Wall Clock HHD Icon.png]]
| |
| − | | style="background:#fff"| 1,600
| |
| − | | style="background:#fff"| 400
| |
| − | | style="background:#fff"| [[DLC]]
| |
| − | | style="background:#fff"| {{brown}} / {{brown}}
| |
| − | | style="background:#fff"| Toy Shop
| |
| − | | style="background:#fff"| ???
| |
| − | | style="background:#fff"| {{small}}
| |
| − | | style="background:#fff"| Clock, wall furniture
| |
| − | | style="background:#fff"| No
| |
| − | |-
| |
| − | | style="background:#fff"| Vintage Camera
| |
| − | | style="background:#fff"| [[File:Vintage Camera HHD Icon.png]]
| |
| − | | style="background:#fff"| 1,800
| |
| − | | style="background:#fff"| 450
| |
| − | | style="background:#fff"| [[Timmy and Tommy's store|Timmy & Tommy]]
| |
| − | | style="background:#fff"| {{black}} / {{brown}}
| |
| − | | style="background:#fff"| Antique
| |
| − | | style="background:#fff"| Historical
| |
| − | | style="background:#fff"| {{small}}
| |
| − | | style="background:#fff"| Can use
| |
| − | | style="background:#fff"| No
| |
| − | |-
| |
| − | | style="background:#fff"| Vintage Radio
| |
| − | | style="background:#fff"| [[File:Vintage Radio HHD Icon.png]]
| |
| − | | style="background:#fff"| 1,280
| |
| − | | style="background:#fff"| 320
| |
| − | | style="background:#fff"| [[Spotlight]] / [[Wishy]]
| |
| − | | style="background:#fff"| {{brown}} / {{brown}}
| |
| − | | style="background:#fff"| Antique
| |
| − | | style="background:#fff"| Historical
| |
| − | | style="background:#fff"| {{small}}
| |
| − | | style="background:#fff"| Can use, can place on table
| |
| − | | style="background:#fff"| No
| |
| − | |-
| |
| − | | style="background:#fff"| Vintage Telephone
| |
| − | | style="background:#fff"| [[File:Vintage Telephone HHD Icon.png]]
| |
| − | | style="background:#fff"| 1,800
| |
| − | | style="background:#fff"| 450
| |
| − | | style="background:#fff"| [[Timmy and Tommy's store|Timmy & Tommy]]
| |
| − | | style="background:#fff"| {{brown}} / {{brown}}
| |
| − | | style="background:#fff"| Antique
| |
| − | | style="background:#fff"| Historical
| |
| − | | style="background:#fff"| {{small}}
| |
| − | | style="background:#fff"| -
| |
| − | | style="background:#fff"| No
| |
| − | |-
| |
| − | | style="background:#fff"| Lovely Phone
| |
| − | | style="background:#fff"| [[File:Lovely Phone HHD Icon.png]]
| |
| − | | style="background:#fff"| -
| |
| − | | style="background:#fff"| 2,600
| |
| − | | style="background:#fff"| [[Fireworks]]
| |
| − | | style="background:#fff"| {{pink}} / {{pink}}
| |
| − | | style="background:#fff"| Fairy Tale
| |
| − | | style="background:#fff"| Cute
| |
| − | | style="background:#fff"| {{small}}
| |
| − | | style="background:#fff"| Can use, can't recycle
| |
| − | | style="background:#fff"| No
| |
| − | |-
| |
| − | | style="background:#fff"| Computer
| |
| − | | style="background:#fff"| [[File:Computer HHD Icon.png]]
| |
| − | | style="background:#fff"| 1,720
| |
| − | | style="background:#fff"| 430
| |
| − | | style="background:#fff"| [[Timmy and Tommy's store|Timmy & Tommy]]
| |
| − | | style="background:#fff"| {{brown}} / {{white}}
| |
| − | | style="background:#fff"| Sci-Fi
| |
| − | | style="background:#fff"| Basic
| |
| − | | style="background:#fff"| {{small}}
| |
| − | | style="background:#fff"| Can use
| |
| − | | style="background:#fff"| No
| |
| − | |-
| |
| − | | style="background:#fff"| Home-Computer Rack
| |
| − | | style="background:#fff"| [[File:Home-Computer Rack HHD Icon.png]]
| |
| − | | style="background:#fff"| 1,800
| |
| − | | style="background:#fff"| 450
| |
| − | | style="background:#fff"| [[Timmy and Tommy's store|Timmy & Tommy]]
| |
| − | | style="background:#fff"| {{brown}} / {{white}}
| |
| − | | style="background:#fff"| Trendy
| |
| − | | style="background:#fff"| Modern
| |
| − | | style="background:#fff"| {{small}}
| |
| − | | style="background:#fff"| Can use
| |
| − | | style="background:#fff"| No
| |
| − | |-
| |
| − | | style="background:#fff"| Glass-Top Table
| |
| − | | style="background:#fff"| [[File:Glass-Top Table HHD Icon.png]]
| |
| − | | style="background:#fff"| 2,200
| |
| − | | style="background:#fff"| 550
| |
| − | | style="background:#fff"| [[Timmy and Tommy's store|Timmy & Tommy]]
| |
| − | | style="background:#fff"| {{brown}} / {{brown}}
| |
| − | | style="background:#fff"| Harmonious
| |
| − | | style="background:#fff"| Iconic
| |
| − | | style="background:#fff"| {{medium}}
| |
| − | | style="background:#fff"| Table
| |
| − | | style="background:#fff"| No
| |
| − | |-
| |
| − | | style="background:#fff"| Lazy-Susan Table
| |
| − | | style="background:#fff"| [[File:Lazy-Susan Table HHD Icon.png]]
| |
| − | | style="background:#fff"| 2,400
| |
| − | | style="background:#fff"| 600
| |
| − | | style="background:#fff"| [[Timmy and Tommy's store|Timmy & Tommy]]
| |
| − | | style="background:#fff"| {{red}} / {{red}}
| |
| − | | style="background:#fff"| Harmonious
| |
| − | | style="background:#fff"| Iconic
| |
| − | | style="background:#fff"| {{large}}
| |
| − | | style="background:#fff"| Can use
| |
| − | | style="background:#fff"| No
| |
| − | |-
| |
| − | | style="background:#fff"| Fireworks Table
| |
| − | | style="background:#fff"| [[File:Fireworks Table HHD Icon.png]]
| |
| − | | style="background:#fff"| 4,320
| |
| − | | style="background:#fff"| 1,080
| |
| − | | style="background:#fff"| [[DLC]]
| |
| − | | style="background:#fff"| {{brown}} / {{colorful}}
| |
| − | | style="background:#fff"| None
| |
| − | | style="background:#fff"| ???
| |
| − | | style="background:#fff"| {{large}}
| |
| − | | style="background:#fff"| Table
| |
| − | | style="background:#fff"| No
| |
| − | |-
| |
| − | | style="background:#fff"| Kotatsu
| |
| − | | style="background:#fff"| [[File:Kotatsu HHD Icon.png]]
| |
| − | | style="background:#fff"| 1,200
| |
| − | | style="background:#fff"| 300
| |
| − | | style="background:#fff"| [[Timmy and Tommy's store|Timmy & Tommy]]
| |
| − | | style="background:#fff"| {{blue}} / {{brown}}
| |
| − | | style="background:#fff"| Harmonious
| |
| − | | style="background:#fff"| Historical
| |
| − | | style="background:#fff"| {{large}}
| |
| − | | style="background:#fff"| Table
| |
| − | | style="background:#fff"| Yes
| |
| − | |-
| |
| − | | style="background:#fff"| Common Bed
| |
| − | | style="background:#fff"| [[File:Common Bed HHD Icon.png]]
| |
| − | | style="background:#fff"| 800
| |
| − | | style="background:#fff"| 200
| |
| − | | style="background:#fff"| [[Timmy and Tommy's store|Timmy & Tommy]]
| |
| − | | style="background:#fff"| {{brown}} / {{red}}
| |
| − | | style="background:#fff"| None
| |
| − | | style="background:#fff"| Basic
| |
| − | | style="background:#fff"| {{medium}}
| |
| − | | style="background:#fff"| Bed
| |
| − | | style="background:#fff"| Yes
| |
| − | |-
| |
| − | | style="background:#fff"| Bunk Bed
| |
| − | | style="background:#fff"| [[File:Bunk Bed HHD Icon.png]]
| |
| − | | style="background:#fff"| 2,800
| |
| − | | style="background:#fff"| 700
| |
| − | | style="background:#fff"| [[Timmy and Tommy's store|Timmy & Tommy]]
| |
| − | | style="background:#fff"| {{brown}} / {{white}}
| |
| − | | style="background:#fff"| None
| |
| − | | style="background:#fff"| Iconic
| |
| − | | style="background:#fff"| {{medium}}
| |
| − | | style="background:#fff"| Bed
| |
| − | | style="background:#fff"| No
| |
| − | |-
| |
| − | | style="background:#fff"| Pineapple Bed
| |
| − | | style="background:#fff"| [[File:Pineapple Bed HHD Icon.png]]
| |
| − | | style="background:#fff"| 1,990
| |
| − | | style="background:#fff"| 497
| |
| − | | style="background:#fff"| [[Timmy and Tommy's store|Timmy & Tommy]]
| |
| − | | style="background:#fff"| {{yellow}} / {{yellow}}
| |
| − | | style="background:#fff"| Rustic
| |
| − | | style="background:#fff"| Cute
| |
| − | | style="background:#fff"| {{medium}}
| |
| − | | style="background:#fff"| Bed
| |
| − | | style="background:#fff"| No
| |
| − | |-
| |
| − | | style="background:#fff"| Cupid Bench
| |
| − | | style="background:#fff"| [[File:Cupid Bench HHD Icon.png]]
| |
| − | | style="background:#fff"| 2,000
| |
| − | | style="background:#fff"| 500
| |
| − | | style="background:#fff"| [[Timmy and Tommy's store|Timmy & Tommy]]
| |
| − | | style="background:#fff"| {{white}} / {{white}}
| |
| − | | style="background:#fff"| Fairy Tale
| |
| − | | style="background:#fff"| Cute
| |
| − | | style="background:#fff"| {{medium}}
| |
| − | | style="background:#fff"| Chair
| |
| − | | style="background:#fff"| No
| |
| − | |-
| |
| − | | style="background:#fff"| Cream Sofa
| |
| − | | style="background:#fff"| [[File:Cream Sofa HHD Icon.png]]
| |
| − | | style="background:#fff"| 2,000
| |
| − | | style="background:#fff"| 500
| |
| − | | style="background:#fff"| [[Timmy and Tommy's store|Timmy & Tommy]]
| |
| − | | style="background:#fff"| {{white}} / {{white}}
| |
| − | | style="background:#fff"| None
| |
| − | | style="background:#fff"| Basic
| |
| − | | style="background:#fff"| {{medium}}
| |
| − | | style="background:#fff"| Chair
| |
| − | | style="background:#fff"| No
| |
| − | |-
| |
| − | | style="background:#fff"| Chaise Lounge
| |
| − | | style="background:#fff"| [[File:Chaise Lounge HHD Icon.png]]
| |
| − | | style="background:#fff"| 2,480
| |
| − | | style="background:#fff"| 620
| |
| − | | style="background:#fff"| [[Timmy and Tommy's store|Timmy & Tommy]]
| |
| − | | style="background:#fff"| {{beige}} / {{brown}}
| |
| − | | style="background:#fff"| Trendy
| |
| − | | style="background:#fff"| Ornate
| |
| − | | style="background:#fff"| {{medium}}
| |
| − | | style="background:#fff"| Chair
| |
| − | | style="background:#fff"| Yes
| |
| − | |-
| |
| − | | style="background:#fff"| Simple Armchair
| |
| − | | style="background:#fff"| [[File:Simple Armchair HHD Icon.png]]
| |
| − | | style="background:#fff"| 1,800
| |
| − | | style="background:#fff"| 450
| |
| − | | style="background:#fff"| [[Timmy and Tommy's store|Timmy & Tommy]]
| |
| − | | style="background:#fff"| {{red}} / {{red}}
| |
| − | | style="background:#fff"| Trendy
| |
| − | | style="background:#fff"| Basic
| |
| − | | style="background:#fff"| {{small}}
| |
| − | | style="background:#fff"| Chair
| |
| − | | style="background:#fff"| Yes
| |
| − | |-
| |
| − | | style="background:#fff"| Simple Love Seat
| |
| − | | style="background:#fff"| [[File:Simple Love Seat HHD Icon.png]]
| |
| − | | style="background:#fff"| 2,050
| |
| − | | style="background:#fff"| 512
| |
| − | | style="background:#fff"| [[Timmy and Tommy's store|Timmy & Tommy]]
| |
| − | | style="background:#fff"| {{red}} / {{red}}
| |
| − | | style="background:#fff"| Trendy
| |
| − | | style="background:#fff"| Basic
| |
| − | | style="background:#fff"| {{medium}}
| |
| − | | style="background:#fff"| Chair
| |
| − | | style="background:#fff"| Yes
| |
| − | |-
| |
| − | | style="background:#fff"| Box Sofa
| |
| − | | style="background:#fff"| [[File:Box Sofa HHD Icon.png]]
| |
| − | | style="background:#fff"| 2,400
| |
| − | | style="background:#fff"| 600
| |
| − | | style="background:#fff"| [[Timmy and Tommy's store|Timmy & Tommy]]
| |
| − | | style="background:#fff"| {{green}} / {{green}}
| |
| − | | style="background:#fff"| Trendy
| |
| − | | style="background:#fff"| Basic
| |
| − | | style="background:#fff"| {{small}}
| |
| − | | style="background:#fff"| Chair
| |
| − | | style="background:#fff"| Yes
| |
| − | |-
| |
| − | | style="background:#fff"| Box Corner Sofa
| |
| − | | style="background:#fff"| [[File:Box Corner Sofa HHD Icon.png]]
| |
| − | | style="background:#fff"| 1,600
| |
| − | | style="background:#fff"| 400
| |
| − | | style="background:#fff"| [[Timmy and Tommy's store|Timmy & Tommy]]
| |
| − | | style="background:#fff"| {{green}} / {{green}}
| |
| − | | style="background:#fff"| Trendy
| |
| − | | style="background:#fff"| Basic
| |
| − | | style="background:#fff"| {{small}}
| |
| − | | style="background:#fff"| Chair
| |
| − | | style="background:#fff"| Yes
| |
| − | |-
| |
| − | | style="background:#fff"| Throne
| |
| − | | style="background:#fff"| [[File:Throne HHD Icon.png]]
| |
| − | | style="background:#fff"| 800,000
| |
| − | | style="background:#fff"| 200,000
| |
| − | | style="background:#fff"| [[Spotlight]] / [[Wishy]]
| |
| − | | style="background:#fff"| {{red}} / {{yellow}}
| |
| − | | style="background:#fff"| Antique<br>Fairy Tale
| |
| − | | style="background:#fff"| Historical
| |
| − | | style="background:#fff"| {{small}}
| |
| − | | style="background:#fff"| Chair
| |
| − | | style="background:#fff"| Yes
| |
| − | |-
| |
| − | | style="background:#fff"| Massage Chair
| |
| − | | style="background:#fff"| [[File:Massage Chair HHD Icon.png]]
| |
| − | | style="background:#fff"| 2,400
| |
| − | | style="background:#fff"| 600
| |
| − | | style="background:#fff"| [[Timmy and Tommy's store|Timmy & Tommy]]
| |
| − | | style="background:#fff"| {{brown}} / {{brown}}
| |
| − | | style="background:#fff"| Sci-Fi
| |
| − | | style="background:#fff"| Historical
| |
| − | | style="background:#fff"| {{small}}
| |
| − | | style="background:#fff"| Chair
| |
| − | | style="background:#fff"| No
| |
| − | |-
| |
| − | | style="background:#fff"| Dentist's Chair
| |
| − | | style="background:#fff"| [[File:Dentist's Chair HHD Icon.png]]
| |
| − | | style="background:#fff"| 3,200
| |
| − | | style="background:#fff"| 800
| |
| − | | style="background:#fff"| [[Timmy and Tommy's store|Timmy & Tommy]]
| |
| − | | style="background:#fff"| {{green}} / {{white}}
| |
| − | | style="background:#fff"| Sci-Fi<br>Quirky
| |
| − | | style="background:#fff"| Rock 'n' Roll
| |
| − | | style="background:#fff"| {{small}}
| |
| − | | style="background:#fff"| Chair
| |
| − | | style="background:#fff"| No
| |
| − | |-
| |
| − | | style="background:#fff"| Peacock Chair
| |
| − | | style="background:#fff"| [[File:Peacock Chair HHD Icon.png]]
| |
| − | | style="background:#fff"| 3,600
| |
| − | | style="background:#fff"| 900
| |
| − | | style="background:#fff"| [[Timmy and Tommy's store|Timmy & Tommy]]
| |
| − | | style="background:#fff"| {{brown}} / {{green}}
| |
| − | | style="background:#fff"| None
| |
| − | | style="background:#fff"| Ornate
| |
| − | | style="background:#fff"| {{small}}
| |
| − | | style="background:#fff"| Chair
| |
| − | | style="background:#fff"| No
| |
| − | |-
| |
| − | | style="background:#fff"| Rocking Chair
| |
| − | | style="background:#fff"| [[File:Rocking Chair HHD Icon.png]]
| |
| − | | style="background:#fff"| 1,400
| |
| − | | style="background:#fff"| 350
| |
| − | | style="background:#fff"| [[Timmy and Tommy's store|Timmy & Tommy]]
| |
| − | | style="background:#fff"| {{brown}} / {{brown}}
| |
| − | | style="background:#fff"| Rustic
| |
| − | | style="background:#fff"| Historical
| |
| − | | style="background:#fff"| {{small}}
| |
| − | | style="background:#fff"| Chair
| |
| − | | style="background:#fff"| No
| |
| − | |-
| |
| − | | style="background:#fff"| Common Chair
| |
| − | | style="background:#fff"| [[File:Common Chair HHD Icon.png]]
| |
| − | | style="background:#fff"| 800
| |
| − | | style="background:#fff"| 200
| |
| − | | style="background:#fff"| [[Timmy and Tommy's store|Timmy & Tommy]]
| |
| − | | style="background:#fff"| {{green}} / {{green}}
| |
| − | | style="background:#fff"| None
| |
| − | | style="background:#fff"| Basic
| |
| − | | style="background:#fff"| {{small}}
| |
| − | | style="background:#fff"| Chair
| |
| − | | style="background:#fff"| Yes
| |
| − | |-
| |
| − | | style="background:#fff"| Folding Chair
| |
| − | | style="background:#fff"| [[File:Folding Chair HHD Icon.png]]
| |
| − | | style="background:#fff"| 600
| |
| − | | style="background:#fff"| 150
| |
| − | | style="background:#fff"| [[Timmy and Tommy's store|Timmy & Tommy]]
| |
| − | | style="background:#fff"| {{aqua}} / {{gray}}
| |
| − | | style="background:#fff"| None
| |
| − | | style="background:#fff"| Official
| |
| − | | style="background:#fff"| {{small}}
| |
| − | | style="background:#fff"| Chair
| |
| − | | style="background:#fff"| Yes
| |
| − | |-
| |
| − | | style="background:#fff"| Cushion
| |
| − | | style="background:#fff"| [[File:Cushion HHD Icon.png]]
| |
| − | | style="background:#fff"| 800
| |
| − | | style="background:#fff"| 200
| |
| − | | style="background:#fff"| [[Timmy and Tommy's store|Timmy & Tommy]]
| |
| − | | style="background:#fff"| {{white}} / {{white}}
| |
| − | | style="background:#fff"| None
| |
| − | | style="background:#fff"| Basic
| |
| − | | style="background:#fff"| {{small}}
| |
| − | | style="background:#fff"| Can place on table
| |
| − | | style="background:#fff"| Yes
| |
| − | |-
| |
| − | | style="background:#fff"| Marshmallow Chair
| |
| − | | style="background:#fff"| [[File:Marshmallow Chair HHD Icon.png]]
| |
| − | | style="background:#fff"| 1,200
| |
| − | | style="background:#fff"| 300
| |
| − | | style="background:#fff"| [[Timmy and Tommy's store|Timmy & Tommy]]
| |
| − | | style="background:#fff"| {{white}} / {{white}}
| |
| − | | style="background:#fff"| Fairy Tale
| |
| − | | style="background:#fff"| Cute
| |
| − | | style="background:#fff"| {{small}}
| |
| − | | style="background:#fff"| Chair
| |
| − | | style="background:#fff"| Yes
| |
| − | |-
| |
| − | | style="background:#fff"| Fedora Chair
| |
| − | | style="background:#fff"| [[File:Fedora Chair HHD Icon.png]]
| |
| − | | style="background:#fff"| -
| |
| − | | style="background:#fff"| 800
| |
| − | | style="background:#fff"| [[DLC]]
| |
| − | | style="background:#fff"| {{black}} / {{white}}
| |
| − | | style="background:#fff"| Trendy
| |
| − | | style="background:#fff"| ???
| |
| − | | style="background:#fff"| {{small}}
| |
| − | | style="background:#fff"| Chair
| |
| − | | style="background:#fff"| No
| |
| − | |-
| |
| − | | style="background:#fff"| Stool
| |
| − | | style="background:#fff"| [[File:Stool HHD Icon.png]]
| |
| − | | style="background:#fff"| 1,360
| |
| − | | style="background:#fff"| 340
| |
| − | | style="background:#fff"| [[Timmy and Tommy's store|Timmy & Tommy]]
| |
| − | | style="background:#fff"| {{red}} / {{red}}
| |
| − | | style="background:#fff"| None
| |
| − | | style="background:#fff"| Modern
| |
| − | | style="background:#fff"| {{small}}
| |
| − | | style="background:#fff"| Chair
| |
| − | | style="background:#fff"| No
| |
| − | |-
| |
| − | | style="background:#fff"| Pipe Stool
| |
| − | | style="background:#fff"| [[File:Pipe Stool HHD Icon.png]]
| |
| − | | style="background:#fff"| 1,000
| |
| − | | style="background:#fff"| 250
| |
| − | | style="background:#fff"| [[Timmy and Tommy's store|Timmy & Tommy]]
| |
| − | | style="background:#fff"| {{blue}} / {{gray}}
| |
| − | | style="background:#fff"| Sci-Fi
| |
| − | | style="background:#fff"| Basic
| |
| − | | style="background:#fff"| {{small}}
| |
| − | | style="background:#fff"| Chair
| |
| − | | style="background:#fff"| Yes
| |
| − | |-
| |
| − | | style="background:#fff"| Donut Stool
| |
| − | | style="background:#fff"| [[File:Donut Stool HHD Icon.png]]
| |
| − | | style="background:#fff"| 1,600
| |
| − | | style="background:#fff"| 400
| |
| − | | style="background:#fff"| [[Timmy and Tommy's store|Timmy & Tommy]]
| |
| − | | style="background:#fff"| {{gray}} / {{white}}
| |
| − | | style="background:#fff"| None
| |
| − | | style="background:#fff"| Cute
| |
| − | | style="background:#fff"| {{small}}
| |
| − | | style="background:#fff"| Chair
| |
| − | | style="background:#fff"| Yes
| |
| − | |-
| |
| − | | style="background:#fff"| Wooden Stool
| |
| − | | style="background:#fff"| [[File:Wooden Stool HHD Icon.png]]
| |
| − | | style="background:#fff"| 1,000
| |
| − | | style="background:#fff"| 250
| |
| − | | style="background:#fff"| [[Timmy and Tommy's store|Timmy & Tommy]]
| |
| − | | style="background:#fff"| {{brown}} / {{brown}}
| |
| − | | style="background:#fff"| Rustic
| |
| − | | style="background:#fff"| Historical
| |
| − | | style="background:#fff"| {{small}}
| |
| − | | style="background:#fff"| Chair
| |
| − | | style="background:#fff"| Yes
| |
| − | |-
| |
| − | | style="background:#fff"| Pink Velvet Stool
| |
| − | | style="background:#fff"| [[File:Pink Velvet Stool HHD Icon.png]]
| |
| − | | style="background:#fff"| 1,400
| |
| − | | style="background:#fff"| 350
| |
| − | | style="background:#fff"| [[Timmy and Tommy's store|Timmy & Tommy]]
| |
| − | | style="background:#fff"| {{brown}} / {{purple}}
| |
| − | | style="background:#fff"| None
| |
| − | | style="background:#fff"| Modern
| |
| − | | style="background:#fff"| {{small}}
| |
| − | | style="background:#fff"| Chair
| |
| − | | style="background:#fff"| No
| |
| − | |-
| |
| − | | style="background:#fff"| Large Bookshelf
| |
| − | | style="background:#fff"| [[File:Large Bookshelf HHD Icon.png]]
| |
| − | | style="background:#fff"| 2,400
| |
| − | | style="background:#fff"| 600
| |
| − | | style="background:#fff"| [[Timmy and Tommy's store|Timmy & Tommy]]
| |
| − | | style="background:#fff"| {{brown}} / {{brown}}
| |
| − | | style="background:#fff"| None
| |
| − | | style="background:#fff"| Basic
| |
| − | | style="background:#fff"| {{medium}}
| |
| − | | style="background:#fff"| -
| |
| − | | style="background:#fff"| No
| |
| − | |-
| |
| − | | style="background:#fff"| Game Shelf
| |
| − | | style="background:#fff"| [[File:Game Shelf HHD Icon.png]]
| |
| − | | style="background:#fff"| 980
| |
| − | | style="background:#fff"| 245
| |
| − | | style="background:#fff"| [[Timmy and Tommy's store|Timmy & Tommy]]
| |
| − | | style="background:#fff"| {{pink}} / {{pink}}
| |
| − | | style="background:#fff"| None
| |
| − | | style="background:#fff"| Basic
| |
| − | | style="background:#fff"| {{small}}
| |
| − | | style="background:#fff"| -
| |
| − | | style="background:#fff"| Yes
| |
| − | |-
| |
| − | | style="background:#fff"| CD Shelf
| |
| − | | style="background:#fff"| [[File:CD Shelf HHD Icon.png]]
| |
| − | | style="background:#fff"| 1,200
| |
| − | | style="background:#fff"| 300
| |
| − | | style="background:#fff"| [[Timmy and Tommy's store|Timmy & Tommy]]
| |
| − | | style="background:#fff"| {{brown}} / {{colorful}}
| |
| − | | style="background:#fff"| Trendy
| |
| − | | style="background:#fff"| Rock 'n' Roll
| |
| − | | style="background:#fff"| {{small}}
| |
| − | | style="background:#fff"| -
| |
| − | | style="background:#fff"| No
| |
| − | |-
| |
| − | | style="background:#fff"| Large Magazine Rack
| |
| − | | style="background:#fff"| [[File:Large Magazine Rack HHD Icon.png]]
| |
| − | | style="background:#fff"| 2,200
| |
| − | | style="background:#fff"| 550
| |
| − | | style="background:#fff"| [[Timmy and Tommy's store|Timmy & Tommy]]
| |
| − | | style="background:#fff"| {{brown}} / {{colorful}}
| |
| − | | style="background:#fff"| Trendy
| |
| − | | style="background:#fff"| Basic
| |
| − | | style="background:#fff"| {{medium}}
| |
| − | | style="background:#fff"| -
| |
| − | | style="background:#fff"| No
| |
| − | |-
| |
| − | | style="background:#fff"| Small Magazine Rack
| |
| − | | style="background:#fff"| [[File:Small Magazine Rack HHD Icon.png]]
| |
| − | | style="background:#fff"| 1,780
| |
| − | | style="background:#fff"| 445
| |
| − | | style="background:#fff"| [[Timmy and Tommy's store|Timmy & Tommy]]
| |
| − | | style="background:#fff"| {{colorful}} / {{white}}
| |
| − | | style="background:#fff"| Trendy
| |
| − | | style="background:#fff"| Basic
| |
| − | | style="background:#fff"| {{small}}
| |
| − | | style="background:#fff"| -
| |
| − | | style="background:#fff"| No
| |
| − | |-
| |
| − | | style="background:#fff"| Storage Case
| |
| − | | style="background:#fff"| [[File:Storage Case HHD Icon.png]]
| |
| − | | style="background:#fff"| 980
| |
| − | | style="background:#fff"| 245
| |
| − | | style="background:#fff"| [[Timmy and Tommy's store|Timmy & Tommy]]
| |
| − | | style="background:#fff"| {{black}} / {{white}}
| |
| − | | style="background:#fff"| None
| |
| − | | style="background:#fff"| Basic
| |
| − | | style="background:#fff"| {{small}}
| |
| − | | style="background:#fff"| Storage
| |
| − | | style="background:#fff"| No
| |
| − | |-
| |
| − | | style="background:#fff"| Safe
| |
| − | | style="background:#fff"| [[File:Safe HHD Icon.png]]
| |
| − | | style="background:#fff"| -
| |
| − | | style="background:#fff"| 189
| |
| − | | style="background:#fff"| [[Savings]]
| |
| − | | style="background:#fff"| {{black}} / {{black}}
| |
| − | | style="background:#fff"| Sci-Fi
| |
| − | | style="background:#fff"| Basic
| |
| − | | style="background:#fff"| {{small}}
| |
| − | | style="background:#fff"| Storage
| |
| − | | style="background:#fff"| No
| |
| − | |-
| |
| − | | style="background:#fff"| ABD
| |
| − | | style="background:#fff"| [[File:ABD HHD Icon.png]]
| |
| − | | style="background:#fff"| -
| |
| − | | style="background:#fff"| 250
| |
| − | | style="background:#fff"| [[Savings]]
| |
| − | | style="background:#fff"| {{gray}} / {{gray}}
| |
| − | | style="background:#fff"| None
| |
| − | | style="background:#fff"| Basic
| |
| − | | style="background:#fff"| {{small}}
| |
| − | | style="background:#fff"| Can use
| |
| − | | style="background:#fff"| No
| |
| − | |-
| |
| − | | style="background:#fff"| Aluminum Briefcase
| |
| − | | style="background:#fff"| [[File:Aluminum Briefcase HHD Icon.png]]
| |
| − | | style="background:#fff"| -
| |
| − | | style="background:#fff"| 300
| |
| − | | style="background:#fff"| [[Savings]]
| |
| − | | style="background:#fff"| {{gray}} / {{gray}}
| |
| − | | style="background:#fff"| Trendy<br>Sci-Fi
| |
| − | | style="background:#fff"| Modern
| |
| − | | style="background:#fff"| {{small}}
| |
| − | | style="background:#fff"| Can use, can place on table
| |
| − | | style="background:#fff"| No
| |
| − | |-
| |
| − | | style="background:#fff"| Trunk
| |
| − | | style="background:#fff"| [[File:Trunk HHD Icon.png]]
| |
| − | | style="background:#fff"| 1,000
| |
| − | | style="background:#fff"| 250
| |
| − | | style="background:#fff"| [[Timmy and Tommy's store|Timmy & Tommy]]
| |
| − | | style="background:#fff"| {{brown}} / {{brown}}
| |
| − | | style="background:#fff"| None
| |
| − | | style="background:#fff"| Historical
| |
| − | | style="background:#fff"| {{small}}
| |
| − | | style="background:#fff"| Can place on table
| |
| − | | style="background:#fff"| Yes
| |
| − | |-
| |
| − | | style="background:#fff"| Rolling Suitcase
| |
| − | | style="background:#fff"| [[File:Rolling Suitcase HHD Icon.png]]
| |
| − | | style="background:#fff"| 1,000
| |
| − | | style="background:#fff"| 250
| |
| − | | style="background:#fff"| [[DLC]]
| |
| − | | style="background:#fff"| {{gray}} / {{red}}
| |
| − | | style="background:#fff"| None
| |
| − | | style="background:#fff"| ???
| |
| − | | style="background:#fff"| {{small}}
| |
| − | | style="background:#fff"| -
| |
| − | | style="background:#fff"| Yes
| |
| − | |-
| |
| − | | style="background:#fff"| Fan
| |
| − | | style="background:#fff"| [[File:Fan HHD Icon.png]]
| |
| − | | style="background:#fff"| 1,200
| |
| − | | style="background:#fff"| 300
| |
| − | | style="background:#fff"| [[Timmy and Tommy's store|Timmy & Tommy]]
| |
| − | | style="background:#fff"| {{aqua}} / {{green}}
| |
| − | | style="background:#fff"| Sci-Fi
| |
| − | | style="background:#fff"| Iconic
| |
| − | | style="background:#fff"| {{small}}
| |
| − | | style="background:#fff"| Can use
| |
| − | | style="background:#fff"| No
| |
| − | |-
| |
| − | | style="background:#fff"| Wall Fan
| |
| − | | style="background:#fff"| [[File:Wall Fan HHD Icon.png]]
| |
| − | | style="background:#fff"| 1,680
| |
| − | | style="background:#fff"| 420
| |
| − | | style="background:#fff"| [[Timmy and Tommy's store|Timmy & Tommy]]
| |
| − | | style="background:#fff"| {{aqua}} / {{white}}
| |
| − | | style="background:#fff"| None
| |
| − | | style="background:#fff"| Historical
| |
| − | | style="background:#fff"| {{small}}
| |
| − | | style="background:#fff"| Can use, wall furniture
| |
| − | | style="background:#fff"| No
| |
| − | |-
| |
| − | | style="background:#fff"| Ventilation Fan
| |
| − | | style="background:#fff"| [[File:Ventilation Fan HHD Icon.png]]
| |
| − | | style="background:#fff"| 1,120
| |
| − | | style="background:#fff"| 280
| |
| − | | style="background:#fff"| [[Timmy and Tommy's store|Timmy & Tommy]]
| |
| − | | style="background:#fff"| {{white}} / {{white}}
| |
| − | | style="background:#fff"| Sci-Fi
| |
| − | | style="background:#fff"| Basic
| |
| − | | style="background:#fff"| {{small}}
| |
| − | | style="background:#fff"| Can use, wall furniture
| |
| − | | style="background:#fff"| No
| |
| − | |-
| |
| − | | style="background:#fff"| Sconce
| |
| − | | style="background:#fff"| [[File:Sconce HHD Icon.png]]
| |
| − | | style="background:#fff"| 1,600
| |
| − | | style="background:#fff"| 400
| |
| − | | style="background:#fff"| [[Timmy and Tommy's store|Timmy & Tommy]]
| |
| − | | style="background:#fff"| {{brown}} / {{orange}}
| |
| − | | style="background:#fff"| Antique
| |
| − | | style="background:#fff"| Iconic
| |
| − | | style="background:#fff"| {{small}}
| |
| − | | style="background:#fff"| Lamp, wall furniture
| |
| − | | style="background:#fff"| No
| |
| − | |-
| |
| − | | style="background:#fff"| Candle
| |
| − | | style="background:#fff"| [[File:Candle HHD Icon.png]]
| |
| − | | style="background:#fff"| 1,280
| |
| − | | style="background:#fff"| 320
| |
| − | | style="background:#fff"| [[Timmy and Tommy's store|Timmy & Tommy]]
| |
| − | | style="background:#fff"| {{white}} / {{yellow}}
| |
| − | | style="background:#fff"| Quirky
| |
| − | | style="background:#fff"| Basic
| |
| − | | style="background:#fff"| {{small}}
| |
| − | | style="background:#fff"| Lamp, can place on table
| |
| − | | style="background:#fff"| No
| |
| − | |-
| |
| − | | style="background:#fff"| Oil Lamp
| |
| − | | style="background:#fff"| [[File:Oil Lamp HHD Icon.png]]
| |
| − | | style="background:#fff"| 680
| |
| − | | style="background:#fff"| 170
| |
| − | | style="background:#fff"| [[Timmy and Tommy's store|Timmy & Tommy]]
| |
| − | | style="background:#fff"| {{aqua}} / {{red}}
| |
| − | | style="background:#fff"| Sci-Fi<br>Quirky
| |
| − | | style="background:#fff"| Official
| |
| − | | style="background:#fff"| {{small}}
| |
| − | | style="background:#fff"| Lamp, can place on table
| |
| − | | style="background:#fff"| No
| |
| − | |-
| |
| − | | style="background:#fff"| Mini Lamp
| |
| − | | style="background:#fff"| [[File:Mini Lamp HHD Icon.png]]
| |
| − | | style="background:#fff"| 1,280
| |
| − | | style="background:#fff"| 320
| |
| − | | style="background:#fff"| [[Timmy and Tommy's store|Timmy & Tommy]]
| |
| − | | style="background:#fff"| {{beige}} / {{gray}}
| |
| − | | style="background:#fff"| Sci-Fi
| |
| − | | style="background:#fff"| Basic
| |
| − | | style="background:#fff"| {{small}}
| |
| − | | style="background:#fff"| Lamp, can place on table
| |
| − | | style="background:#fff"| No
| |
| − | |-
| |
| − | | style="background:#fff"| Desk Light
| |
| − | | style="background:#fff"| [[File:Desk Light HHD Icon.png]]
| |
| − | | style="background:#fff"| 1,280
| |
| − | | style="background:#fff"| 320
| |
| − | | style="background:#fff"| [[Timmy and Tommy's store|Timmy & Tommy]]
| |
| − | | style="background:#fff"| {{black}} / {{black}}
| |
| − | | style="background:#fff"| Sci-Fi
| |
| − | | style="background:#fff"| Basic
| |
| − | | style="background:#fff"| {{small}}
| |
| − | | style="background:#fff"| Lamp, can place on table
| |
| − | | style="background:#fff"| No
| |
| − | |-
| |
| − | | style="background:#fff"| Table Lamp
| |
| − | | style="background:#fff"| [[File:Table Lamp HHD Icon.png]]
| |
| − | | style="background:#fff"| 640
| |
| − | | style="background:#fff"| 160
| |
| − | | style="background:#fff"| [[Timmy and Tommy's store|Timmy & Tommy]]
| |
| − | | style="background:#fff"| {{aqua}} / {{white}}
| |
| − | | style="background:#fff"| Sci-Fi
| |
| − | | style="background:#fff"| Basic
| |
| − | | style="background:#fff"| {{small}}
| |
| − | | style="background:#fff"| Lamp, can place on table
| |
| − | | style="background:#fff"| No
| |
| − | |-
| |
| − | | style="background:#fff"| Lava Lamp
| |
| − | | style="background:#fff"| [[File:Lava Lamp HHD Icon.png]]
| |
| − | | style="background:#fff"| 1,800
| |
| − | | style="background:#fff"| 450
| |
| − | | style="background:#fff"| [[Timmy and Tommy's store|Timmy & Tommy]]
| |
| − | | style="background:#fff"| {{aqua}} / {{aqua}}
| |
| − | | style="background:#fff"| Trendy<br>Sci-Fi<br>Toy Shop
| |
| − | | style="background:#fff"| Modern
| |
| − | | style="background:#fff"| {{small}}
| |
| − | | style="background:#fff"| Lamp
| |
| − | | style="background:#fff"| Yes
| |
| − | |-
| |
| − | | style="background:#fff"| Zero Lamp
| |
| − | | style="background:#fff"| [[File:Zero Lamp HHD Icon.png]]
| |
| − | | style="background:#fff"| 10,000
| |
| − | | style="background:#fff"| 2,500
| |
| − | | style="background:#fff"| [[Spotlight]] / [[Wishy]]
| |
| − | | style="background:#fff"| {{white}} / {{white}}
| |
| − | | style="background:#fff"| Trendy
| |
| − | | style="background:#fff"| Cute
| |
| − | | style="background:#fff"| {{small}}
| |
| − | | style="background:#fff"| Lamp, can place on table
| |
| − | | style="background:#fff"| Yes
| |
| − | |-
| |
| − | | style="background:#fff"| One Lamp
| |
| − | | style="background:#fff"| [[File:One Lamp HHD Icon.png]]
| |
| − | | style="background:#fff"| 1,000
| |
| − | | style="background:#fff"| 250
| |
| − | | style="background:#fff"| [[Spotlight]] / [[Wishy]]
| |
| − | | style="background:#fff"| {{white}} / {{white}}
| |
| − | | style="background:#fff"| Trendy
| |
| − | | style="background:#fff"| Cute
| |
| − | | style="background:#fff"| {{small}}
| |
| − | | style="background:#fff"| Lamp, can place on table
| |
| − | | style="background:#fff"| Yes
| |
| − | |-
| |
| − | | style="background:#fff"| Two Lamp
| |
| − | | style="background:#fff"| [[File:Two Lamp HHD Icon.png]]
| |
| − | | style="background:#fff"| 2,000
| |
| − | | style="background:#fff"| 500
| |
| − | | style="background:#fff"| [[Spotlight]] / [[Wishy]]
| |
| − | | style="background:#fff"| {{white}} / {{white}}
| |
| − | | style="background:#fff"| Trendy
| |
| − | | style="background:#fff"| Cute
| |
| − | | style="background:#fff"| {{small}}
| |
| − | | style="background:#fff"| Lamp, can place on table
| |
| − | | style="background:#fff"| Yes
| |
| − | |-
| |
| − | | style="background:#fff"| Three Lamp
| |
| − | | style="background:#fff"| [[File:Three Lamp HHD Icon.png]]
| |
| − | | style="background:#fff"| 3,000
| |
| − | | style="background:#fff"| 750
| |
| − | | style="background:#fff"| [[Spotlight]] / [[Wishy]]
| |
| − | | style="background:#fff"| {{white}} / {{white}}
| |
| − | | style="background:#fff"| Trendy
| |
| − | | style="background:#fff"| Cute
| |
| − | | style="background:#fff"| {{small}}
| |
| − | | style="background:#fff"| Lamp, can place on table
| |
| − | | style="background:#fff"| Yes
| |
| − | |-
| |
| − | | style="background:#fff"| Four Lamp
| |
| − | | style="background:#fff"| [[File:Four Lamp HHD Icon.png]]
| |
| − | | style="background:#fff"| 4,000
| |
| − | | style="background:#fff"| 1,000
| |
| − | | style="background:#fff"| [[Spotlight]] / [[Wishy]]
| |
| − | | style="background:#fff"| {{white}} / {{white}}
| |
| − | | style="background:#fff"| Trendy
| |
| − | | style="background:#fff"| Cute
| |
| − | | style="background:#fff"| {{small}}
| |
| − | | style="background:#fff"| Lamp, can place on table
| |
| − | | style="background:#fff"| Yes
| |
| − | |-
| |
| − | | style="background:#fff"| Five Lamp
| |
| − | | style="background:#fff"| [[File:Five Lamp HHD Icon.png]]
| |
| − | | style="background:#fff"| 5,500
| |
| − | | style="background:#fff"| 1,375
| |
| − | | style="background:#fff"| [[Spotlight]] / [[Wishy]]
| |
| − | | style="background:#fff"| {{white}} / {{white}}
| |
| − | | style="background:#fff"| Trendy
| |
| − | | style="background:#fff"| Cute
| |
| − | | style="background:#fff"| {{small}}
| |
| − | | style="background:#fff"| Lamp, can place on table
| |
| − | | style="background:#fff"| Yes
| |
| − | |-
| |
| − | | style="background:#fff"| Six Lamp
| |
| − | | style="background:#fff"| [[File:Six Lamp HHD Icon.png]]
| |
| − | | style="background:#fff"| 6,000
| |
| − | | style="background:#fff"| 1,500
| |
| − | | style="background:#fff"| [[Spotlight]] / [[Wishy]]
| |
| − | | style="background:#fff"| {{white}} / {{white}}
| |
| − | | style="background:#fff"| Trendy
| |
| − | | style="background:#fff"| Cute
| |
| − | | style="background:#fff"| {{small}}
| |
| − | | style="background:#fff"| Lamp, can place on table
| |
| − | | style="background:#fff"| Yes
| |
| − | |-
| |
| − | | style="background:#fff"| Seven Lamp
| |
| − | | style="background:#fff"| [[File:Seven Lamp HHD Icon.png]]
| |
| − | | style="background:#fff"| 7,000
| |
| − | | style="background:#fff"| 1,750
| |
| − | | style="background:#fff"| [[Spotlight]] / [[Wishy]]
| |
| − | | style="background:#fff"| {{white}} / {{white}}
| |
| − | | style="background:#fff"| Trendy
| |
| − | | style="background:#fff"| Cute
| |
| − | | style="background:#fff"| {{small}}
| |
| − | | style="background:#fff"| Lamp, can place on table
| |
| − | | style="background:#fff"| Yes
| |
| − | |-
| |
| − | | style="background:#fff"| Eight Lamp
| |
| − | | style="background:#fff"| [[File:Eight Lamp HHD Icon.png]]
| |
| − | | style="background:#fff"| 8,000
| |
| − | | style="background:#fff"| 2,000
| |
| − | | style="background:#fff"| [[Spotlight]] / [[Wishy]]
| |
| − | | style="background:#fff"| {{white}} / {{white}}
| |
| − | | style="background:#fff"| Trendy
| |
| − | | style="background:#fff"| Cute
| |
| − | | style="background:#fff"| {{small}}
| |
| − | | style="background:#fff"| Lamp, can place on table
| |
| − | | style="background:#fff"| Yes
| |
| − | |-
| |
| − | | style="background:#fff"| Nine Lamp
| |
| − | | style="background:#fff"| [[File:Nine Lamp HHD Icon.png]]
| |
| − | | style="background:#fff"| 9,000
| |
| − | | style="background:#fff"| 2,250
| |
| − | | style="background:#fff"| [[Spotlight]] / [[Wishy]]
| |
| − | | style="background:#fff"| {{white}} / {{white}}
| |
| − | | style="background:#fff"| Trendy
| |
| − | | style="background:#fff"| Cute
| |
| − | | style="background:#fff"| {{small}}
| |
| − | | style="background:#fff"| Lamp, can place on table
| |
| − | | style="background:#fff"| Yes
| |
| − | |-
| |
| − | | style="background:#fff"| Stained-Glass Lamp
| |
| − | | style="background:#fff"| [[File:Stained-Glass Lamp HHD Icon.png]]
| |
| − | | style="background:#fff"| 1,200
| |
| − | | style="background:#fff"| 300
| |
| − | | style="background:#fff"| [[Timmy and Tommy's store|Timmy & Tommy]]
| |
| − | | style="background:#fff"| {{colorful}} / {{colorful}}
| |
| − | | style="background:#fff"| Fairy Tale
| |
| − | | style="background:#fff"| Cute
| |
| − | | style="background:#fff"| {{medium}}
| |
| − | | style="background:#fff"| Wall furniture
| |
| − | | style="background:#fff"| Yes
| |
| − | |-
| |
| − | | style="background:#fff"| Stained Glass
| |
| − | | style="background:#fff"| [[File:Stained Glass HHD Icon.png]]
| |
| − | | style="background:#fff"| 1,200
| |
| − | | style="background:#fff"| 300
| |
| − | | style="background:#fff"| [[Timmy and Tommy's store|Timmy & Tommy]]
| |
| − | | style="background:#fff"| {{colorful}} / {{colorful}}
| |
| − | | style="background:#fff"| Fairy Tale
| |
| − | | style="background:#fff"| Cute
| |
| − | | style="background:#fff"| {{medium}}
| |
| − | | style="background:#fff"| Wall furniture
| |
| − | | style="background:#fff"| Yes
| |
| − | |-
| |
| − | | style="background:#fff"| Ninja Sword
| |
| − | | style="background:#fff"| [[File:Ninja Sword HHD Icon.png]]
| |
| − | | style="background:#fff"| 9,600
| |
| − | | style="background:#fff"| 2,400
| |
| − | | style="background:#fff"| [[Timmy and Tommy's store|Timmy & Tommy]]
| |
| − | | style="background:#fff"| {{brown}} / {{brown}}
| |
| − | | style="background:#fff"| Harmonious<br>Antique<br>Quirky
| |
| − | | style="background:#fff"| Iconic
| |
| − | | style="background:#fff"| {{small}}
| |
| − | | style="background:#fff"| Usable
| |
| − | | style="background:#fff"| No
| |
| − | |-
| |
| − | | style="background:#fff"| Bow
| |
| − | | style="background:#fff"| [[File:Bow HHD Icon.png]]
| |
| − | | style="background:#fff"| 1,400
| |
| − | | style="background:#fff"| 350
| |
| − | | style="background:#fff"| [[Timmy and Tommy's store|Timmy & Tommy]]
| |
| − | | style="background:#fff"| {{black}} / {{yellow}}
| |
| − | | style="background:#fff"| Harmonious<br>Antique<br>Quirky
| |
| − | | style="background:#fff"| Iconic
| |
| − | | style="background:#fff"| {{small}}
| |
| − | | style="background:#fff"| -
| |
| − | | style="background:#fff"| No
| |
| − | |-
| |
| − | | style="background:#fff"| Black Katana
| |
| − | | style="background:#fff"| [[File:Black Katana HHD Icon.png]]
| |
| − | | style="background:#fff"| 12,000
| |
| − | | style="background:#fff"| 3,000
| |
| − | | style="background:#fff"| [[Timmy and Tommy's store|Timmy & Tommy]]
| |
| − | | style="background:#fff"| {{black}} / {{black}}
| |
| − | | style="background:#fff"| Harmonious<br>Antique<br>Quirky
| |
| − | | style="background:#fff"| Iconic
| |
| − | | style="background:#fff"| {{medium}}
| |
| − | | style="background:#fff"| -
| |
| − | | style="background:#fff"| No
| |
| − | |-
| |
| − | | style="background:#fff"| White Katana
| |
| − | | style="background:#fff"| [[File:White Katana HHD Icon.png]]
| |
| − | | style="background:#fff"| 36,800
| |
| − | | style="background:#fff"| 9,200
| |
| − | | style="background:#fff"| [[Timmy and Tommy's store|Timmy & Tommy]]
| |
| − | | style="background:#fff"| {{white}} / {{white}}
| |
| − | | style="background:#fff"| Harmonious<br>Antique<br>Quirky
| |
| − | | style="background:#fff"| Iconic
| |
| − | | style="background:#fff"| {{medium}}
| |
| − | | style="background:#fff"| Usable
| |
| − | | style="background:#fff"| No
| |
| − | |-
| |
| − | | style="background:#fff"| Samurai Suit
| |
| − | | style="background:#fff"| [[File:Samurai Suit HHD Icon.png]]
| |
| − | | style="background:#fff"| 4,500
| |
| − | | style="background:#fff"| 1,125
| |
| − | | style="background:#fff"| [[Spotlight Item]] / [[Wishy]]
| |
| − | | style="background:#fff"| {{black}} / {{yellow}}
| |
| − | | style="background:#fff"| Harmonious<br>Antique<br>Quirky
| |
| − | | style="background:#fff"| Iconic
| |
| − | | style="background:#fff"| {{medium}}
| |
| − | | style="background:#fff"| -
| |
| − | | style="background:#fff"| No
| |
| − | |-
| |
| − | | style="background:#fff"| Sword
| |
| − | | style="background:#fff"| [[File:Sword HHD Icon.png]]
| |
| − | | style="background:#fff"| 1,400
| |
| − | | style="background:#fff"| 350
| |
| − | | style="background:#fff"| [[Timmy and Tommy's store|Timmy & Tommy]]
| |
| − | | style="background:#fff"| {{black}} / {{yellow}}
| |
| − | | style="background:#fff"| Harmonious<br>Antique<br>Quirky
| |
| − | | style="background:#fff"| Iconic
| |
| − | | style="background:#fff"| {{small}}
| |
| − | | style="background:#fff"| -
| |
| − | | style="background:#fff"| No
| |
| − | |-
| |
| − | | style="background:#fff"| Beacon Fire
| |
| − | | style="background:#fff"| [[File:Beacon Fire HHD Icon.png]]
| |
| − | | style="background:#fff"| 1,000
| |
| − | | style="background:#fff"| 250
| |
| − | | style="background:#fff"| [[Timmy and Tommy's store|Timmy & Tommy]]
| |
| − | | style="background:#fff"| {{black}} / {{red}}
| |
| − | | style="background:#fff"| Harmonious
| |
| − | | style="background:#fff"| Historical
| |
| − | | style="background:#fff"| {{small}}
| |
| − | | style="background:#fff"| -
| |
| − | | style="background:#fff"| No
| |
| − | |-
| |
| − | | style="background:#fff"| Circle Banner
| |
| − | | style="background:#fff"| [[File:Circle Banner HHD Icon.png]]
| |
| − | | style="background:#fff"| 1,200
| |
| − | | style="background:#fff"| 300
| |
| − | | style="background:#fff"| [[Timmy and Tommy's store|Timmy & Tommy]]
| |
| − | | style="background:#fff"| {{black}} / {{red}}
| |
| − | | style="background:#fff"| Harmonious
| |
| − | | style="background:#fff"| Historical
| |
| − | | style="background:#fff"| {{small}}
| |
| − | | style="background:#fff"| -
| |
| − | | style="background:#fff"| Yes
| |
| − | |-
| |
| − | | style="background:#fff"| General's Fan
| |
| − | | style="background:#fff"| [[File:General's Fan HHD Icon.png]]
| |
| − | | style="background:#fff"| 1,600
| |
| − | | style="background:#fff"| 400
| |
| − | | style="background:#fff"| [[Timmy and Tommy's store|Timmy & Tommy]]
| |
| − | | style="background:#fff"| {{black}} / {{black}}
| |
| − | | style="background:#fff"| Harmonious
| |
| − | | style="background:#fff"| Historical
| |
| − | | style="background:#fff"| {{small}}
| |
| − | | style="background:#fff"| Can place on table
| |
| − | | style="background:#fff"| No
| |
| − | |-
| |
| − | | style="background:#fff"| General's Stool
| |
| − | | style="background:#fff"| [[File:General's Stool HHD Icon.png]]
| |
| − | | style="background:#fff"| 1,200
| |
| − | | style="background:#fff"| 300
| |
| − | | style="background:#fff"| [[Timmy and Tommy's store|Timmy & Tommy]]
| |
| − | | style="background:#fff"| {{beige}} / {{black}}
| |
| − | | style="background:#fff"| Harmonious
| |
| − | | style="background:#fff"| Historical
| |
| − | | style="background:#fff"| {{small}}
| |
| − | | style="background:#fff"| Chair
| |
| − | | style="background:#fff"| No
| |
| − | |-
| |
| − | | style="background:#fff"| Tokonoma
| |
| − | | style="background:#fff"| [[File:Tokonoma HHD Icon.png]]
| |
| − | | style="background:#fff"| 2,300
| |
| − | | style="background:#fff"| 575
| |
| − | | style="background:#fff"| [[Timmy and Tommy's store|Timmy & Tommy]]
| |
| − | | style="background:#fff"| {{brown}} / {{white}}
| |
| − | | style="background:#fff"| Harmonious
| |
| − | | style="background:#fff"| Iconic
| |
| − | | style="background:#fff"| {{medium}}
| |
| − | | style="background:#fff"| -
| |
| − | | style="background:#fff"| No
| |
| − | |-
| |
| − | | style="background:#fff"| Tatami Bed
| |
| − | | style="background:#fff"| [[File:Tatami Bed HHD Icon.png]]
| |
| − | | style="background:#fff"| 2,400
| |
| − | | style="background:#fff"| 600
| |
| − | | style="background:#fff"| [[Timmy and Tommy's store|Timmy & Tommy]]
| |
| − | | style="background:#fff"| {{brown}} / {{green}}
| |
| − | | style="background:#fff"| Harmonious
| |
| − | | style="background:#fff"| Iconic
| |
| − | | style="background:#fff"| {{medium}}
| |
| − | | style="background:#fff"| Bed
| |
| − | | style="background:#fff"| No
| |
| − | |-
| |
| − | | style="background:#fff"| Rice-Plant Bed
| |
| − | | style="background:#fff"| [[File:Rice-Plant Bed HHD Icon.png]]
| |
| − | | style="background:#fff"| 4,400
| |
| − | | style="background:#fff"| 1,100
| |
| − | | style="background:#fff"| [[DLC]]
| |
| − | | style="background:#fff"| {{beige}} / {{beige}}
| |
| − | | style="background:#fff"| Rustic
| |
| − | | style="background:#fff"| ???
| |
| − | | style="background:#fff"| {{medium}}
| |
| − | | style="background:#fff"| Bed
| |
| − | | style="background:#fff"| No
| |
| − | |-
| |
| − | | style="background:#fff"| Carp Banner
| |
| − | | style="background:#fff"| [[File:Carp Banner HHD Icon.png]]
| |
| − | | style="background:#fff"| 2,020
| |
| − | | style="background:#fff"| 505
| |
| − | | style="background:#fff"| Limited (May 1 to 5) (JP)
| |
| − | | style="background:#fff"| {{colorful}} / {{colorful}}
| |
| − | | style="background:#fff"| Harmonious
| |
| − | | style="background:#fff"| Iconic
| |
| − | | style="background:#fff"| {{small}}
| |
| − | | style="background:#fff"| -
| |
| − | | style="background:#fff"| No
| |
| − | |-
| |
| − | | style="background:#fff"| Flashy-Flower Sign
| |
| − | | style="background:#fff"| [[File:Flashy-Flower Sign HHD Icon.png]]
| |
| − | | style="background:#fff"| 1,200
| |
| − | | style="background:#fff"| 300
| |
| − | | style="background:#fff"| [[Timmy and Tommy's store|Timmy & Tommy]]
| |
| − | | style="background:#fff"| {{colorful}} / {{colorful}}
| |
| − | | style="background:#fff"| Harmonious
| |
| − | | style="background:#fff"| Iconic
| |
| − | | style="background:#fff"| {{small}}
| |
| − | | style="background:#fff"| -
| |
| − | | style="background:#fff"| No
| |
| − | |-
| |
| − | | style="background:#fff"| Hagoita
| |
| − | | style="background:#fff"| [[File:Hagoita HHD Icon.png]]
| |
| − | | style="background:#fff"| -
| |
| − | | style="background:#fff"| 600
| |
| − | | style="background:#fff"| [[DLC]]
| |
| − | | style="background:#fff"| {{brown}} / {{red}}
| |
| − | | style="background:#fff"| Harmonious
| |
| − | | style="background:#fff"| ???
| |
| − | | style="background:#fff"| {{small}}
| |
| − | | style="background:#fff"| -
| |
| − | | style="background:#fff"| No
| |
| − | |-
| |
| − | | style="background:#fff"| Lotus Lamp
| |
| − | | style="background:#fff"| [[File:Lotus Lamp HHD Icon.png]]
| |
| − | | style="background:#fff"| 1,600
| |
| − | | style="background:#fff"| 400
| |
| − | | style="background:#fff"| [[Timmy and Tommy's store|Timmy & Tommy]]
| |
| − | | style="background:#fff"| {{pink}} / {{pink}}
| |
| − | | style="background:#fff"| Harmonious<br>Rustic
| |
| − | | style="background:#fff"| Cute
| |
| − | | style="background:#fff"| {{small}}
| |
| − | | style="background:#fff"| Lamp, can place on table
| |
| − | | style="background:#fff"| Yes
| |
| − | |-
| |
| − | | style="background:#fff"| Blossom Lantern
| |
| − | | style="background:#fff"| [[File:Blossom Lantern HHD Icon.png]]
| |
| − | | style="background:#fff"| 2,400
| |
| − | | style="background:#fff"| 600
| |
| − | | style="background:#fff"| Limited (March 1 to 3) (JP)
| |
| − | | style="background:#fff"| {{black}} / {{white}}
| |
| − | | style="background:#fff"| Harmonious
| |
| − | | style="background:#fff"| Iconic
| |
| − | | style="background:#fff"| {{small}}
| |
| − | | style="background:#fff"| Lamp
| |
| − | | style="background:#fff"| No
| |
| − | |-
| |
| − | | style="background:#fff"| Festival Lantern
| |
| − | | style="background:#fff"| [[File:Festival Lantern HHD Icon.png]]
| |
| − | | style="background:#fff"| 900
| |
| − | | style="background:#fff"| 225
| |
| − | | style="background:#fff"| [[Timmy and Tommy's store|Timmy & Tommy]]
| |
| − | | style="background:#fff"| {{red}} / {{white}}
| |
| − | | style="background:#fff"| Harmonious
| |
| − | | style="background:#fff"| Iconic
| |
| − | | style="background:#fff"| {{small}}
| |
| − | | style="background:#fff"| Lamp, wall furniture
| |
| − | | style="background:#fff"| Yes
| |
| − | |-
| |
| − | | style="background:#fff"| Red-Tasseled Lantern
| |
| − | | style="background:#fff"| [[File:Red-Tasseled Lantern HHD Icon.png]]
| |
| − | | style="background:#fff"| 2,400
| |
| − | | style="background:#fff"| 600
| |
| − | | style="background:#fff"| [[Gulliver]]
| |
| − | | style="background:#fff"| {{red}} / {{yellow}}
| |
| − | | style="background:#fff"| Harmonious
| |
| − | | style="background:#fff"| Iconic
| |
| − | | style="background:#fff"| {{small}}
| |
| − | | style="background:#fff"| Lamp, wall furniture
| |
| − | | style="background:#fff"| No
| |
| − | |-
| |
| − | | style="background:#fff"| Elder Mask
| |
| − | | style="background:#fff"| [[File:Elder Mask HHD Icon.png]]
| |
| − | | style="background:#fff"| 1,600
| |
| − | | style="background:#fff"| 400
| |
| − | | style="background:#fff"| [[Timmy and Tommy's store|Timmy & Tommy]]
| |
| − | | style="background:#fff"| {{white}} / {{white}}
| |
| − | | style="background:#fff"| Harmonious<br>Antique<br>Quirky
| |
| − | | style="background:#fff"| Iconic
| |
| − | | style="background:#fff"| {{small}}
| |
| − | | style="background:#fff"| Wall furniture
| |
| − | | style="background:#fff"| No
| |
| − | |-
| |
| − | | style="background:#fff"| Ogre Mask
| |
| − | | style="background:#fff"| [[File:Ogre Mask HHD Icon.png]]
| |
| − | | style="background:#fff"| 1,600
| |
| − | | style="background:#fff"| 400
| |
| − | | style="background:#fff"| [[Timmy and Tommy's store|Timmy & Tommy]]
| |
| − | | style="background:#fff"| {{white}} / {{white}}
| |
| − | | style="background:#fff"| Harmonious<br>Antique<br>Quirky
| |
| − | | style="background:#fff"| Iconic
| |
| − | | style="background:#fff"| {{small}}
| |
| − | | style="background:#fff"| Wall furniture
| |
| − | | style="background:#fff"| No
| |
| − | |-
| |
| − | | style="background:#fff"| Female Mask
| |
| − | | style="background:#fff"| [[File:Female Mask HHD Icon.png]]
| |
| − | | style="background:#fff"| 1,600
| |
| − | | style="background:#fff"| 400
| |
| − | | style="background:#fff"| [[Timmy and Tommy's store|Timmy & Tommy]]
| |
| − | | style="background:#fff"| {{white}} / {{white}}
| |
| − | | style="background:#fff"| Harmonious<br>Antique<br>Quirky
| |
| − | | style="background:#fff"| Iconic
| |
| − | | style="background:#fff"| {{small}}
| |
| − | | style="background:#fff"| Wall furniture
| |
| − | | style="background:#fff"| No
| |
| − | |-
| |
| − | | style="background:#fff"| Cucumber Horse
| |
| − | | style="background:#fff"| [[File:Cucumber Horse HHD Icon.png]]
| |
| − | | style="background:#fff"| -
| |
| − | | style="background:#fff"| 100
| |
| − | | style="background:#fff"| [[Obon]] (JP)
| |
| − | | style="background:#fff"| {{green}} / {{green}}
| |
| − | | style="background:#fff"| Harmonious<br>Quirky
| |
| − | | style="background:#fff"| Iconic
| |
| − | | style="background:#fff"| {{small}}
| |
| − | | style="background:#fff"| Can place on table
| |
| − | | style="background:#fff"| No
| |
| − | |-
| |
| − | | style="background:#fff"| Eggplant Cow
| |
| − | | style="background:#fff"| [[File:Eggplant Cow HHD Icon.png]]
| |
| − | | style="background:#fff"| -
| |
| − | | style="background:#fff"| 125
| |
| − | | style="background:#fff"| [[Obon]] (JP)
| |
| − | | style="background:#fff"| {{purple}} / {{purple}}
| |
| − | | style="background:#fff"| Harmonious<br>Quirky
| |
| − | | style="background:#fff"| Iconic
| |
| − | | style="background:#fff"| {{small}}
| |
| − | | style="background:#fff"| Can place on table, can't recycle
| |
| − | | style="background:#fff"| No
| |
| − | |-
| |
| − | | style="background:#fff"| Mochi Pestle
| |
| − | | style="background:#fff"| [[File:Mochi Pestle HHD Icon.png]]
| |
| − | | style="background:#fff"| 1,400
| |
| − | | style="background:#fff"| 350
| |
| − | | style="background:#fff"| [[Timmy and Tommy's store|Timmy & Tommy]]
| |
| − | | style="background:#fff"| {{brown}} / {{brown}}
| |
| − | | style="background:#fff"| Harmonious
| |
| − | | style="background:#fff"| Iconic
| |
| − | | style="background:#fff"| {{small}}
| |
| − | | style="background:#fff"| -
| |
| − | | style="background:#fff"| No
| |
| − | |-
| |
| − | | style="background:#fff"| Rice Cake
| |
| − | | style="background:#fff"| [[File:Rice Cake HHD Icon.png]]
| |
| − | | style="background:#fff"| -
| |
| − | | style="background:#fff"| 300
| |
| − | | style="background:#fff"| [[Girl's Day]] (JP)
| |
| − | | style="background:#fff"| {{black}} / {{colorful}}
| |
| − | | style="background:#fff"| Harmonious
| |
| − | | style="background:#fff"| Iconic
| |
| − | | style="background:#fff"| {{small}}
| |
| − | | style="background:#fff"| Can't recycle
| |
| − | | style="background:#fff"| No
| |
| − | |-
| |
| − | | style="background:#fff"| Kagamimochi
| |
| − | | style="background:#fff"| [[File:Kagamimochi HHD Icon.png]]
| |
| − | | style="background:#fff"| 1,800
| |
| − | | style="background:#fff"| 450
| |
| − | | style="background:#fff"| [[DLC]]
| |
| − | | style="background:#fff"| {{brown}} / {{white}}
| |
| − | | style="background:#fff"| Harmonious
| |
| − | | style="background:#fff"| ???
| |
| − | | style="background:#fff"| {{small}}
| |
| − | | style="background:#fff"| -
| |
| − | | style="background:#fff"| No
| |
| − | |-
| |
| − | | style="background:#fff"| Dango
| |
| − | | style="background:#fff"| [[File:Dango HHD Icon.png]]
| |
| − | | style="background:#fff"| -
| |
| − | | style="background:#fff"| 888
| |
| − | | style="background:#fff"| [[Tsukimi]] (JP)
| |
| − | | style="background:#fff"| {{brown}} / {{white}}
| |
| − | | style="background:#fff"| Harmonious
| |
| − | | style="background:#fff"| Iconic
| |
| − | | style="background:#fff"| {{small}}
| |
| − | | style="background:#fff"| Can't recycle
| |
| − | | style="background:#fff"| No
| |
| − | |-
| |
| − | | style="background:#fff"| Bamboo Grass
| |
| − | | style="background:#fff"| [[File:Bamboo Grass HHD Icon.png]]
| |
| − | | style="background:#fff"| -
| |
| − | | style="background:#fff"| 770
| |
| − | | style="background:#fff"| [[Starcrossed Day]] (JP)
| |
| − | | style="background:#fff"| {{colorful}} / {{green}}
| |
| − | | style="background:#fff"| Harmonious
| |
| − | | style="background:#fff"| Iconic
| |
| − | | style="background:#fff"| {{small}}
| |
| − | | style="background:#fff"| Can use, can't recycle
| |
| − | | style="background:#fff"| No
| |
| − | |-
| |
| − | | style="background:#fff"| Kadomatsu
| |
| − | | style="background:#fff"| [[File:Kadomatsu HHD Icon.png]]
| |
| − | | style="background:#fff"| 2,580
| |
| − | | style="background:#fff"| 645
| |
| − | | style="background:#fff"| [[DLC]]
| |
| − | | style="background:#fff"| {{green}} / {{green}}
| |
| − | | style="background:#fff"| Harmonious<br>Rustic
| |
| − | | style="background:#fff"| ???
| |
| − | | style="background:#fff"| {{small}}
| |
| − | | style="background:#fff"| -
| |
| − | | style="background:#fff"| No
| |
| − | |-
| |
| − | | style="background:#fff"| Bureom
| |
| − | | style="background:#fff"| [[File:Bureom HHD Icon.png]]
| |
| − | | style="background:#fff"| -
| |
| − | | style="background:#fff"| 300
| |
| − | | style="background:#fff"| [[Daeboreum]] (KOR)
| |
| − | | style="background:#fff"| {{brown}} / {{red}}
| |
| − | | style="background:#fff"| Harmonious
| |
| − | | style="background:#fff"| Iconic
| |
| − | | style="background:#fff"| {{small}}
| |
| − | | style="background:#fff"| -
| |
| − | | style="background:#fff"| No
| |
| − | |-
| |
| − | | style="background:#fff"| Jack-in-the-Box
| |
| − | | style="background:#fff"| [[File:Jack-in-the-Box HHD Icon.png]]
| |
| − | | style="background:#fff"| -
| |
| − | | style="background:#fff"| 400
| |
| − | | style="background:#fff"| [[Halloween]]
| |
| − | | style="background:#fff"| {{colorful}} / {{green}}
| |
| − | | style="background:#fff"| Toy Shop
| |
| − | | style="background:#fff"| Cute
| |
| − | | style="background:#fff"| {{small}}
| |
| − | | style="background:#fff"| Can use, can't recycle
| |
| − | | style="background:#fff"| No
| |
| − | |-
| |
| − | | style="background:#fff"| Scarecrow
| |
| − | | style="background:#fff"| [[File:Scarecrow HHD Icon.png]]
| |
| − | | style="background:#fff"| 420
| |
| − | | style="background:#fff"| 105
| |
| − | | style="background:#fff"| [[Timmy and Tommy's store|Timmy & Tommy]]
| |
| − | | style="background:#fff"| {{brown}} / {{white}}
| |
| − | | style="background:#fff"| Harmonious
| |
| − | | style="background:#fff"| Cute
| |
| − | | style="background:#fff"| {{small}}
| |
| − | | style="background:#fff"| -
| |
| − | | style="background:#fff"| No
| |
| − | |-
| |
| − | | style="background:#fff"| Wheat Bundle
| |
| − | | style="background:#fff"| [[File:Wheat Bundle HHD Icon.png]]
| |
| − | | style="background:#fff"| -
| |
| − | | style="background:#fff"| 125
| |
| − | | style="background:#fff"| [[Autumn Moon]] (NA)
| |
| − | | style="background:#fff"| {{brown}} / {{brown}}
| |
| − | | style="background:#fff"| Rustic
| |
| − | | style="background:#fff"| Iconic
| |
| − | | style="background:#fff"| {{small}}
| |
| − | | style="background:#fff"| -
| |
| − | | style="background:#fff"| No
| |
| − | |-
| |
| − | | style="background:#fff"| Wheat Field
| |
| − | | style="background:#fff"| [[File:Wheat Field HHD Icon.png]]
| |
| − | | style="background:#fff"| 380
| |
| − | | style="background:#fff"| 95
| |
| − | | style="background:#fff"| [[Timmy and Tommy's store|Timmy & Tommy]]
| |
| − | | style="background:#fff"| {{yellow}} / {{yellow}}
| |
| − | | style="background:#fff"| Rustic
| |
| − | | style="background:#fff"| Basic
| |
| − | | style="background:#fff"| {{small}}
| |
| − | | style="background:#fff"| Can walk on
| |
| − | | style="background:#fff"| No
| |
| − | |-
| |
| − | | style="background:#fff"| Pile of Leaves
| |
| − | | style="background:#fff"| [[File:Pile of Leaves HHD Icon.png]]
| |
| − | | style="background:#fff"| 400
| |
| − | | style="background:#fff"| 100
| |
| − | | style="background:#fff"| [[DLC]]
| |
| − | | style="background:#fff"| {{brown}} / {{yellow}}
| |
| − | | style="background:#fff"| Rustic
| |
| − | | style="background:#fff"| ???
| |
| − | | style="background:#fff"| {{small}}
| |
| − | | style="background:#fff"| Can walk on
| |
| − | | style="background:#fff"| No
| |
| − | |-
| |
| − | | style="background:#fff"| Songpyeon
| |
| − | | style="background:#fff"| [[File:Songpyeon HHD Icon.png]]
| |
| − | | style="background:#fff"| -
| |
| − | | style="background:#fff"| 300
| |
| − | | style="background:#fff"| [[Chuseok]] (KOR)
| |
| − | | style="background:#fff"| {{colorful}} / {{red}}
| |
| − | | style="background:#fff"| Harmonious
| |
| − | | style="background:#fff"| Iconic
| |
| − | | style="background:#fff"| {{small}}
| |
| − | | style="background:#fff"| -
| |
| − | | style="background:#fff"| No
| |
| − | |-
| |
| − | | style="background:#fff"| Cornucopia
| |
| − | | style="background:#fff"| [[File:Cornucopia HHD Icon.png]]
| |
| − | | style="background:#fff"| -
| |
| − | | style="background:#fff"| 875
| |
| − | | style="background:#fff"| [[Harvest Festival]]
| |
| − | | style="background:#fff"| {{brown}} / {{colorful}}
| |
| − | | style="background:#fff"| Rustic
| |
| − | | style="background:#fff"| Iconic
| |
| − | | style="background:#fff"| {{small}}
| |
| − | | style="background:#fff"| Can place on table, can't recycle
| |
| − | | style="background:#fff"| No
| |
| − | |-
| |
| − | | style="background:#fff"| Turkey
| |
| − | | style="background:#fff"| [[File:Turkey HHD Icon.png]]
| |
| − | | style="background:#fff"| -
| |
| − | | style="background:#fff"| 750
| |
| − | | style="background:#fff"| [[DLC]]
| |
| − | | style="background:#fff"| ??? / {{brown}}
| |
| − | | style="background:#fff"| None
| |
| − | | style="background:#fff"| ???
| |
| − | | style="background:#fff"| {{small}}
| |
| − | | style="background:#fff"| Can place on table
| |
| − | | style="background:#fff"| No
| |
| − | |-
| |
| − | | style="background:#fff"| Festive Candle
| |
| − | | style="background:#fff"| [[File:Festive Candle HHD Icon.png]]
| |
| − | | style="background:#fff"| 1,600
| |
| − | | style="background:#fff"| 400
| |
| − | | style="background:#fff"| Limited (December 1 to 23) (NA)
| |
| − | | style="background:#fff"| {{colorful}} / {{orange}}
| |
| − | | style="background:#fff"| None
| |
| − | | style="background:#fff"| Iconic
| |
| − | | style="background:#fff"| {{small}}
| |
| − | | style="background:#fff"| Lamp, can place on table
| |
| − | | style="background:#fff"| No
| |
| − | |-
| |
| − | | style="background:#fff"| Festive Flag
| |
| − | | style="background:#fff"| [[File:Festive Flag HHD Icon.png]]
| |
| − | | style="background:#fff"| 680
| |
| − | | style="background:#fff"| 170
| |
| − | | style="background:#fff"| Limited (December 1 to 23) (NA)
| |
| − | | style="background:#fff"| {{colorful}} / {{colorful}}
| |
| − | | style="background:#fff"| None
| |
| − | | style="background:#fff"| Iconic
| |
| − | | style="background:#fff"| {{small}}
| |
| − | | style="background:#fff"| Can place on table
| |
| − | | style="background:#fff"| No
| |
| − | |-
| |
| − | | style="background:#fff"| Festive Tree
| |
| − | | style="background:#fff"| [[File:Festive Tree HHD Icon.png]]
| |
| − | | style="background:#fff"| 1,300
| |
| − | | style="background:#fff"| 325
| |
| − | | style="background:#fff"| Limited (December 1 to 23)
| |
| − | | style="background:#fff"| {{colorful}} / {{green}}
| |
| − | | style="background:#fff"| Rustic<br>Toy Shop
| |
| − | | style="background:#fff"| Cute
| |
| − | | style="background:#fff"| {{small}}
| |
| − | | style="background:#fff"| -
| |
| − | | style="background:#fff"| No
| |
| − | |-
| |
| − | | style="background:#fff"| Big Festive Tree
| |
| − | | style="background:#fff"| [[File:Big Festive Tree HHD Icon.png]]
| |
| − | | style="background:#fff"| 2,480
| |
| − | | style="background:#fff"| 620
| |
| − | | style="background:#fff"| Limited (December 1 to 23)
| |
| − | | style="background:#fff"| {{colorful}} / {{green}}
| |
| − | | style="background:#fff"| Rustic<br>Toy Shop
| |
| − | | style="background:#fff"| Cute
| |
| − | | style="background:#fff"| {{large}}
| |
| − | | style="background:#fff"| -
| |
| − | | style="background:#fff"| No
| |
| − | |-
| |
| − | | style="background:#fff"| Holiday Candle
| |
| − | | style="background:#fff"| [[File:Holiday Candle HHD Icon.png]]
| |
| − | | style="background:#fff"| 4,896
| |
| − | | style="background:#fff"| 1,224
| |
| − | | style="background:#fff"| Limited (December 1 to 23)
| |
| − | | style="background:#fff"| {{red}} / {{red}}
| |
| − | | style="background:#fff"| Toy Shop
| |
| − | | style="background:#fff"| Cute
| |
| − | | style="background:#fff"| {{small}}
| |
| − | | style="background:#fff"| Lamp, can place on table
| |
| − | | style="background:#fff"| No
| |
| − | |-
| |
| − | | style="background:#fff"| Holiday Stocking
| |
| − | | style="background:#fff"| [[File:Holiday Stocking HHD Icon.png]]
| |
| − | | style="background:#fff"| -
| |
| − | | style="background:#fff"| 200
| |
| − | | style="background:#fff"| [[Naughty-or-Nice Day]] (EU)
| |
| − | | style="background:#fff"| {{red}} / {{red}}
| |
| − | | style="background:#fff"| Toy Shop
| |
| − | | style="background:#fff"| Cute
| |
| − | | style="background:#fff"| {{small}}
| |
| − | | style="background:#fff"| -
| |
| − | | style="background:#fff"| No
| |
| − | |-
| |
| − | | style="background:#fff"| Stuffed Stocking
| |
| − | | style="background:#fff"| [[File:Stuffed Stocking HHD Icon.png]]
| |
| − | | style="background:#fff"| 1,200
| |
| − | | style="background:#fff"| 300
| |
| − | | style="background:#fff"| Limited (December 1 to 23)
| |
| − | | style="background:#fff"| {{aqua}} / {{colorful}}
| |
| − | | style="background:#fff"| Toy Shop
| |
| − | | style="background:#fff"| Cute
| |
| − | | style="background:#fff"| {{small}}
| |
| − | | style="background:#fff"| Can place on table
| |
| − | | style="background:#fff"| No
| |
| − | |-
| |
| − | | style="background:#fff"| Festive Wreath
| |
| − | | style="background:#fff"| [[File:Festive Wreath HHD Icon.png]]
| |
| − | | style="background:#fff"| -
| |
| − | | style="background:#fff"| 320
| |
| − | | style="background:#fff"| [[Toy Day]]
| |
| − | | style="background:#fff"| {{green}} / {{green}}
| |
| − | | style="background:#fff"| Toy Shop
| |
| − | | style="background:#fff"| Cute
| |
| − | | style="background:#fff"| {{small}}
| |
| − | | style="background:#fff"| Wall furniture, can't recycle
| |
| − | | style="background:#fff"| No
| |
| − | |-
| |
| − | | style="background:#fff"| Yule Log
| |
| − | | style="background:#fff"| [[File:Yule Log HHD Icon.png]]
| |
| − | | style="background:#fff"| -
| |
| − | | style="background:#fff"| 250
| |
| − | | style="background:#fff"| [[DLC]]
| |
| − | | style="background:#fff"| ??? / {{brown}}
| |
| − | | style="background:#fff"| Fairy Tale
| |
| − | | style="background:#fff"| ???
| |
| − | | style="background:#fff"| {{small}}
| |
| − | | style="background:#fff"| Can place on table
| |
| − | | style="background:#fff"| No
| |
| − | |-
| |
| − | | style="background:#fff"| Bell Knickknack
| |
| − | | style="background:#fff"| [[File:Bell Knickknack HHD Icon.png]]
| |
| − | | style="background:#fff"| -
| |
| − | | style="background:#fff"| 500
| |
| − | | style="background:#fff"| [[New Year's]] (KOR)
| |
| − | | style="background:#fff"| {{yellow}} / {{yellow}}
| |
| − | | style="background:#fff"| Harmonious
| |
| − | | style="background:#fff"| Iconic
| |
| − | | style="background:#fff"| {{small}}
| |
| − | | style="background:#fff"| -
| |
| − | | style="background:#fff"| No
| |
| − | |-
| |
| − | | style="background:#fff"| Yut Board
| |
| − | | style="background:#fff"| [[File:Yut Board HHD Icon.png]]
| |
| − | | style="background:#fff"| -
| |
| − | | style="background:#fff"| 125
| |
| − | | style="background:#fff"| [[Lunar New Year's Day]] (KOR)
| |
| − | | style="background:#fff"| {{colorful}} / {{white}}
| |
| − | | style="background:#fff"| Harmonious<br>Toy Shop
| |
| − | | style="background:#fff"| Iconic
| |
| − | | style="background:#fff"| {{small}}
| |
| − | | style="background:#fff"| -
| |
| − | | style="background:#fff"| No
| |
| − | |-
| |
| − | | style="background:#fff"| Tteok Plate
| |
| − | | style="background:#fff"| [[File:Tteok Plate HHD Icon.png]]
| |
| − | | style="background:#fff"| -
| |
| − | | style="background:#fff"| 80
| |
| − | | style="background:#fff"| [[DLC]]
| |
| − | | style="background:#fff"| ??? / {{brown}}
| |
| − | | style="background:#fff"| Harmonious
| |
| − | | style="background:#fff"| ???
| |
| − | | style="background:#fff"| {{small}}
| |
| − | | style="background:#fff"| Can place on table
| |
| − | | style="background:#fff"| No
| |
| − | |-
| |
| − | | style="background:#fff"| New Year's Noodles
| |
| − | | style="background:#fff"| [[File:New Year's Noodles HHD Icon.png]]
| |
| − | | style="background:#fff"| -
| |
| − | | style="background:#fff"| 875
| |
| − | | style="background:#fff"| [[New Year's]] (JP)
| |
| − | | style="background:#fff"| {{black}} / {{red}}
| |
| − | | style="background:#fff"| Harmonious
| |
| − | | style="background:#fff"| Iconic
| |
| − | | style="background:#fff"| {{small}}
| |
| − | | style="background:#fff"| Can place on table, can't recycle
| |
| − | | style="background:#fff"| No
| |
| − | |-
| |
| − | | style="background:#fff"| Berliner
| |
| − | | style="background:#fff"| [[File:Berliner HHD Icon.png]]
| |
| − | | style="background:#fff"| -
| |
| − | | style="background:#fff"| 240
| |
| − | | style="background:#fff"| [[New Year's]] (EU:Ger)
| |
| − | | style="background:#fff"| {{white}} / {{white}}
| |
| − | | style="background:#fff"| Fairy Tale
| |
| − | | style="background:#fff"| Iconic
| |
| − | | style="background:#fff"| {{small}}
| |
| − | | style="background:#fff"| -
| |
| − | | style="background:#fff"| No
| |
| − | |-
| |
| − | | style="background:#fff"| Twelve-Grape Plate
| |
| − | | style="background:#fff"| [[File:Twelve-Grape Plate HHD Icon.png]]
| |
| − | | style="background:#fff"| -
| |
| − | | style="background:#fff"| 120
| |
| − | | style="background:#fff"| [[New Year's]] (NA:Sp) (EU:Sp)
| |
| − | | style="background:#fff"| {{green}} / {{white}}
| |
| − | | style="background:#fff"| None
| |
| − | | style="background:#fff"| Iconic
| |
| − | | style="background:#fff"| {{small}}
| |
| − | | style="background:#fff"| -
| |
| − | | style="background:#fff"| No
| |
| − | |-
| |
| − | | style="background:#fff"| Small Igloo
| |
| − | | style="background:#fff"| [[File:Small Igloo HHD Icon.png]]
| |
| − | | style="background:#fff"| -
| |
| − | | style="background:#fff"| 150
| |
| − | | style="background:#fff"| [[Snowtyke]]
| |
| − | | style="background:#fff"| {{white}} / {{white}}
| |
| − | | style="background:#fff"| Harmonious
| |
| − | | style="background:#fff"| Cute
| |
| − | | style="background:#fff"| {{small}}
| |
| − | | style="background:#fff"| Can place on table, can't recycle
| |
| − | | style="background:#fff"| No
| |
| − | |-
| |
| − | | style="background:#fff"| Snow Globe
| |
| − | | style="background:#fff"| [[File:Snow Globe HHD Icon.png]]
| |
| − | | style="background:#fff"| 1,200
| |
| − | | style="background:#fff"| 300
| |
| − | | style="background:#fff"| Limited (December 1 to 23)
| |
| − | | style="background:#fff"| {{red}} / {{white}}
| |
| − | | style="background:#fff"| Fairy Tale
| |
| − | | style="background:#fff"| Cute
| |
| − | | style="background:#fff"| {{small}}
| |
| − | | style="background:#fff"| Can use, can place on table
| |
| − | | style="background:#fff"| No
| |
| − | |-
| |
| − | | style="background:#fff"| Snow Bunny
| |
| − | | style="background:#fff"| [[File:Snow Bunny HHD Icon.png]]
| |
| − | | style="background:#fff"| -
| |
| − | | style="background:#fff"| 150
| |
| − | | style="background:#fff"| [[Snowtyke]]
| |
| − | | style="background:#fff"| {{brown}} / {{white}}
| |
| − | | style="background:#fff"| Harmonious<br>Fairy Tale
| |
| − | | style="background:#fff"| Cute
| |
| − | | style="background:#fff"| {{small}}
| |
| − | | style="background:#fff"| Can place on table, can't recycle
| |
| − | | style="background:#fff"| No
| |
| − | |-
| |
| − | | style="background:#fff"| Snowman
| |
| − | | style="background:#fff"| [[File:Snowman HHD Icon.png]]
| |
| − | | style="background:#fff"| -
| |
| − | | style="background:#fff"| 3,000
| |
| − | | style="background:#fff"| [[Snowboy]]
| |
| − | | style="background:#fff"| {{white}} / {{white}}
| |
| − | | style="background:#fff"| Fairy Tale
| |
| − | | style="background:#fff"| Cute
| |
| − | | style="background:#fff"| {{small}}
| |
| − | | style="background:#fff"| Can't recycle
| |
| − | | style="background:#fff"| No
| |
| − | |-
| |
| − | | style="background:#fff"| Snowman Matryoshka
| |
| − | | style="background:#fff"| [[File:Snowman Matryoshka HHD Icon.png]]
| |
| − | | style="background:#fff"| -
| |
| − | | style="background:#fff"| 2,000
| |
| − | | style="background:#fff"| [[Snowtyke]]
| |
| − | | style="background:#fff"| {{white}} / {{white}}
| |
| − | | style="background:#fff"| Fairy Tale<br>Toy Shop
| |
| − | | style="background:#fff"| Cute
| |
| − | | style="background:#fff"| {{medium}}
| |
| − | | style="background:#fff"| Can use, can't recycle
| |
| − | | style="background:#fff"| No
| |
| − | |-
| |
| − | | style="background:#fff"| Bobsled
| |
| − | | style="background:#fff"| [[File:Bobsled HHD Icon.png]]
| |
| − | | style="background:#fff"| -
| |
| − | | style="background:#fff"| 1,200
| |
| − | | style="background:#fff"| [[Snowman]]
| |
| − | | style="background:#fff"| {{aqua}} / {{aqua}}
| |
| − | | style="background:#fff"| None
| |
| − | | style="background:#fff"| Sporty
| |
| − | | style="background:#fff"| {{medium}}
| |
| − | | style="background:#fff"| Can't recycle
| |
| − | | style="background:#fff"| No
| |
| − | |-
| |
| − | | style="background:#fff"| Lift Chair
| |
| − | | style="background:#fff"| [[File:Lift Chair HHD Icon.png]]
| |
| − | | style="background:#fff"| -
| |
| − | | style="background:#fff"| 1,200
| |
| − | | style="background:#fff"| [[Snowman]]
| |
| − | | style="background:#fff"| {{gray}} / {{gray}}
| |
| − | | style="background:#fff"| None
| |
| − | | style="background:#fff"| Sporty
| |
| − | | style="background:#fff"| {{medium}}
| |
| − | | style="background:#fff"| Chair, can't recycle
| |
| − | | style="background:#fff"| No
| |
| − | |-
| |
| − | | style="background:#fff"| Ski Rack
| |
| − | | style="background:#fff"| [[File:Ski Rack HHD Icon.png]]
| |
| − | | style="background:#fff"| -
| |
| − | | style="background:#fff"| 500
| |
| − | | style="background:#fff"| [[Snowman]]
| |
| − | | style="background:#fff"| {{brown}} / {{colorful}}
| |
| − | | style="background:#fff"| None
| |
| − | | style="background:#fff"| Sporty
| |
| − | | style="background:#fff"| {{small}}
| |
| − | | style="background:#fff"| Can't recycle
| |
| − | | style="background:#fff"| No
| |
| − | |-
| |
| − | | style="background:#fff"| Slalom Gate
| |
| − | | style="background:#fff"| [[File:Slalom Gate HHD Icon.png]]
| |
| − | | style="background:#fff"| -
| |
| − | | style="background:#fff"| 600
| |
| − | | style="background:#fff"| [[Snowman]]
| |
| − | | style="background:#fff"| {{red}} / {{red}}
| |
| − | | style="background:#fff"| None
| |
| − | | style="background:#fff"| Sporty
| |
| − | | style="background:#fff"| {{small}}
| |
| − | | style="background:#fff"| Can't recycle
| |
| − | | style="background:#fff"| Yes
| |
| − | |-
| |
| − | | style="background:#fff"| Snowboard
| |
| − | | style="background:#fff"| [[File:Snowboard HHD Icon.png]]
| |
| − | | style="background:#fff"| -
| |
| − | | style="background:#fff"| 350
| |
| − | | style="background:#fff"| [[Snowman]]
| |
| − | | style="background:#fff"| {{red}} / {{red}}
| |
| − | | style="background:#fff"| None
| |
| − | | style="background:#fff"| Sporty
| |
| − | | style="background:#fff"| {{small}}
| |
| − | | style="background:#fff"| Can't recycle
| |
| − | | style="background:#fff"| Yes
| |
| − | |-
| |
| − | | style="background:#fff"| Curling Stone
| |
| − | | style="background:#fff"| [[File:Curling Stone HHD Icon.png]]
| |
| − | | style="background:#fff"| -
| |
| − | | style="background:#fff"| 400
| |
| − | | style="background:#fff"| [[Snowman]]
| |
| − | | style="background:#fff"| {{gray}} / {{yellow}}
| |
| − | | style="background:#fff"| None
| |
| − | | style="background:#fff"| Sporty
| |
| − | | style="background:#fff"| {{small}}
| |
| − | | style="background:#fff"| Can place on table, can't recycle
| |
| − | | style="background:#fff"| Yes
| |
| − | |-
| |
| − | | style="background:#fff"| Sleigh
| |
| − | | style="background:#fff"| [[File:Sleigh HHD Icon.png]]
| |
| − | | style="background:#fff"| -
| |
| − | | style="background:#fff"| 300
| |
| − | | style="background:#fff"| [[Snowtyke]]
| |
| − | | style="background:#fff"| {{brown}} / {{red}}
| |
| − | | style="background:#fff"| None
| |
| − | | style="background:#fff"| Sporty
| |
| − | | style="background:#fff"| {{small}}
| |
| − | | style="background:#fff"| Can't recycle
| |
| − | | style="background:#fff"| No
| |
| − | |-
| |
| − | | style="background:#fff"| Snowmobile
| |
| − | | style="background:#fff"| [[File:Snowmobile HHD Icon.png]]
| |
| − | | style="background:#fff"| -
| |
| − | | style="background:#fff"| 900
| |
| − | | style="background:#fff"| [[Snowman]]
| |
| − | | style="background:#fff"| {{black}} / {{yellow}}
| |
| − | | style="background:#fff"| None
| |
| − | | style="background:#fff"| Sporty
| |
| − | | style="background:#fff"| {{medium}}
| |
| − | | style="background:#fff"| Can't recycle
| |
| − | | style="background:#fff"| No
| |
| − | |-
| |
| − | | style="background:#fff"| Snow Machine
| |
| − | | style="background:#fff"| [[File:Snow Machine HHD Icon.png]]
| |
| − | | style="background:#fff"| -
| |
| − | | style="background:#fff"| 1,400
| |
| − | | style="background:#fff"| [[Snowman]]
| |
| − | | style="background:#fff"| {{blue}} / {{blue}}
| |
| − | | style="background:#fff"| None
| |
| − | | style="background:#fff"| Sporty
| |
| − | | style="background:#fff"| {{medium}}
| |
| − | | style="background:#fff"| Can use, can't recycle
| |
| − | | style="background:#fff"| No
| |
| − | |-
| |
| − | | style="background:#fff"| Bronze Fish Trophy
| |
| − | | style="background:#fff"| [[File:Bronze Fish Trophy HHD Icon.png]]
| |
| − | | style="background:#fff"| -
| |
| − | | style="background:#fff"| 1,150
| |
| − | | style="background:#fff"| [[Chip]]
| |
| − | | style="background:#fff"| None / None
| |
| − | | style="background:#fff"| None
| |
| − | | style="background:#fff"| Ornate
| |
| − | | style="background:#fff"| {{small}}
| |
| − | | style="background:#fff"| Can place on table, can't recycle
| |
| − | | style="background:#fff"| No
| |
| − | |-
| |
| − | | style="background:#fff"| Silver Fish Trophy
| |
| − | | style="background:#fff"| [[File:Silver Fish Trophy HHD Icon.png]]
| |
| − | | style="background:#fff"| -
| |
| − | | style="background:#fff"| 1,800
| |
| − | | style="background:#fff"| [[Chip]]
| |
| − | | style="background:#fff"| None / None
| |
| − | | style="background:#fff"| None
| |
| − | | style="background:#fff"| Ornate
| |
| − | | style="background:#fff"| {{small}}
| |
| − | | style="background:#fff"| Can place on table, can't recycle
| |
| − | | style="background:#fff"| -
| |
| − | |-
| |
| − | | style="background:#fff"| Gold Fish Trophy
| |
| − | | style="background:#fff"| [[File:Gold Fish Trophy HHD Icon.png]]
| |
| − | | style="background:#fff"| -
| |
| − | | style="background:#fff"| 2,450
| |
| − | | style="background:#fff"| [[Chip]]
| |
| − | | style="background:#fff"| None / None
| |
| − | | style="background:#fff"| None
| |
| − | | style="background:#fff"| Ornate
| |
| − | | style="background:#fff"| {{small}}
| |
| − | | style="background:#fff"| Can place on table, can't recycle
| |
| − | | style="background:#fff"| No
| |
| − | |-
| |
| − | | style="background:#fff"| Bronze Bug Trophy
| |
| − | | style="background:#fff"| [[File:Bronze Bug Trophy HHD Icon.png]]
| |
| − | | style="background:#fff"| -
| |
| − | | style="background:#fff"| 1,150
| |
| − | | style="background:#fff"| [[Nat]]
| |
| − | | style="background:#fff"| None / None
| |
| − | | style="background:#fff"| None
| |
| − | | style="background:#fff"| Ornate
| |
| − | | style="background:#fff"| {{small}}
| |
| − | | style="background:#fff"| Can place on table, can't recycle
| |
| − | | style="background:#fff"| No
| |
| − | |-
| |
| − | | style="background:#fff"| Silver Bug Trophy
| |
| − | | style="background:#fff"| [[File:Silver Bug Trophy HHD Icon.png]]
| |
| − | | style="background:#fff"| -
| |
| − | | style="background:#fff"| 1,800
| |
| − | | style="background:#fff"| [[Nat]]
| |
| − | | style="background:#fff"| None / None
| |
| − | | style="background:#fff"| None
| |
| − | | style="background:#fff"| Ornate
| |
| − | | style="background:#fff"| {{small}}
| |
| − | | style="background:#fff"| Can place on table, can't recycle
| |
| − | | style="background:#fff"| No
| |
| − | |-
| |
| − | | style="background:#fff"| Gold Bug Trophy
| |
| − | | style="background:#fff"| [[File:Gold Bug Trophy HHD Icon.png]]
| |
| − | | style="background:#fff"| -
| |
| − | | style="background:#fff"| 2,450
| |
| − | | style="background:#fff"| [[Nat]]
| |
| − | | style="background:#fff"| None / None
| |
| − | | style="background:#fff"| None
| |
| − | | style="background:#fff"| Ornate
| |
| − | | style="background:#fff"| {{small}}
| |
| − | | style="background:#fff"| Can place on table, can't recycle
| |
| − | | style="background:#fff"| No
| |
| − | |-
| |
| − | | style="background:#fff"| HHA Pennant
| |
| − | | style="background:#fff"| [[File:HHA Pennant HHD Icon.png]]
| |
| − | | style="background:#fff"| -
| |
| − | | style="background:#fff"| 450
| |
| − | | style="background:#fff"| [[HHA]]
| |
| − | | style="background:#fff"| None / None
| |
| − | | style="background:#fff"| None
| |
| − | | style="background:#fff"| Basic
| |
| − | | style="background:#fff"| {{medium}}
| |
| − | | style="background:#fff"| Wall furniture, can't recycle
| |
| − | | style="background:#fff"| No
| |
| − | |-
| |
| − | | style="background:#fff"| Silver HHA Plaque
| |
| − | | style="background:#fff"| [[File:Silver HHA Plaque HHD Icon.png]]
| |
| − | | style="background:#fff"| -
| |
| − | | style="background:#fff"| 450
| |
| − | | style="background:#fff"| [[HHA]]
| |
| − | | style="background:#fff"| None / None
| |
| − | | style="background:#fff"| None
| |
| − | | style="background:#fff"| Basic
| |
| − | | style="background:#fff"| {{small}}
| |
| − | | style="background:#fff"| Can place on table, can't recycle
| |
| − | | style="background:#fff"| No
| |
| − | |-
| |
| − | | style="background:#fff"| Gold HHA Plaque
| |
| − | | style="background:#fff"| [[File:Gold HHA Plaque HHD Icon.png]]
| |
| − | | style="background:#fff"| -
| |
| − | | style="background:#fff"| 450
| |
| − | | style="background:#fff"| [[HHA]]
| |
| − | | style="background:#fff"| None / None
| |
| − | | style="background:#fff"| None
| |
| − | | style="background:#fff"| Basic
| |
| − | | style="background:#fff"| {{small}}
| |
| − | | style="background:#fff"| Can place on table, can't recycle
| |
| − | | style="background:#fff"| No
| |
| − | |-
| |
| − | | style="background:#fff"| Silver HHA Trophy
| |
| − | | style="background:#fff"| [[File:Silver HHA Trophy HHD Icon.png]]
| |
| − | | style="background:#fff"| -
| |
| − | | style="background:#fff"| 450
| |
| − | | style="background:#fff"| [[HHA]]
| |
| − | | style="background:#fff"| None / None
| |
| − | | style="background:#fff"| None
| |
| − | | style="background:#fff"| Basic
| |
| − | | style="background:#fff"| {{small}}
| |
| − | | style="background:#fff"| Can place on table, can't recycle
| |
| − | | style="background:#fff"| No
| |
| − | |-
| |
| − | | style="background:#fff"| Gold HHA Trophy
| |
| − | | style="background:#fff"| [[File:Gold HHA Trophy HHD Icon.png]]
| |
| − | | style="background:#fff"| -
| |
| − | | style="background:#fff"| 450
| |
| − | | style="background:#fff"| [[HHA]]
| |
| − | | style="background:#fff"| None / None
| |
| − | | style="background:#fff"| None
| |
| − | | style="background:#fff"| Basic
| |
| − | | style="background:#fff"| {{small}}
| |
| − | | style="background:#fff"| Can place on table, can't recycle
| |
| − | | style="background:#fff"| No
| |
| − | |-
| |
| − | | style="background:#fff"| Gold House Model
| |
| − | | style="background:#fff"| [[File:Gold House Model HHD Icon.png]]
| |
| − | | style="background:#fff"| -
| |
| − | | style="background:#fff"| 450
| |
| − | | style="background:#fff"| [[HHA]]
| |
| − | | style="background:#fff"| {{brown}} / {{yellow}}
| |
| − | | style="background:#fff"| None
| |
| − | | style="background:#fff"| Basic
| |
| − | | style="background:#fff"| {{small}}
| |
| − | | style="background:#fff"| Can use, can place on table, can't recycle
| |
| − | | style="background:#fff"| No
| |
| − | |-
| |
| − | | style="background:#fff"| Ball Catcher
| |
| − | | style="background:#fff"| [[File:Ball Catcher HHD Icon.png]]
| |
| − | | style="background:#fff"| 2,040
| |
| − | | style="background:#fff"| 510
| |
| − | | style="background:#fff"| [[Timmy and Tommy's store|Timmy & Tommy]]
| |
| − | | style="background:#fff"| {{blue}} / {{brown}}
| |
| − | | style="background:#fff"| None
| |
| − | | style="background:#fff"| Sporty
| |
| − | | style="background:#fff"| {{large}}
| |
| − | | style="background:#fff"| -
| |
| − | | style="background:#fff"| Yes
| |
| − | |-
| |
| − | | style="background:#fff"| Hurdle
| |
| − | | style="background:#fff"| [[File:Hurdle HHD Icon.png]]
| |
| − | | style="background:#fff"| 980
| |
| − | | style="background:#fff"| 245
| |
| − | | style="background:#fff"| [[Timmy and Tommy's store|Timmy & Tommy]]
| |
| − | | style="background:#fff"| {{blue}} / {{white}}
| |
| − | | style="background:#fff"| None
| |
| − | | style="background:#fff"| Sporty
| |
| − | | style="background:#fff"| {{small}}
| |
| − | | style="background:#fff"| -
| |
| − | | style="background:#fff"| No
| |
| − | |-
| |
| − | | style="background:#fff"| Vaulting Horse
| |
| − | | style="background:#fff"| [[File:Vaulting Horse HHD Icon.png]]
| |
| − | | style="background:#fff"| 1,200
| |
| − | | style="background:#fff"| 300
| |
| − | | style="background:#fff"| [[Timmy and Tommy's store|Timmy & Tommy]]
| |
| − | | style="background:#fff"| {{beige}} / {{brown}}
| |
| − | | style="background:#fff"| None
| |
| − | | style="background:#fff"| Sporty
| |
| − | | style="background:#fff"| {{small}}
| |
| − | | style="background:#fff"| -
| |
| − | | style="background:#fff"| No
| |
| − | |-
| |
| − | | style="background:#fff"| High-Jump Mat
| |
| − | | style="background:#fff"| [[File:High-Jump Mat HHD Icon.png]]
| |
| − | | style="background:#fff"| 2,980
| |
| − | | style="background:#fff"| 745
| |
| − | | style="background:#fff"| [[Timmy and Tommy's store|Timmy & Tommy]]
| |
| − | | style="background:#fff"| {{brown}} / {{green}}
| |
| − | | style="background:#fff"| None
| |
| − | | style="background:#fff"| Sporty
| |
| − | | style="background:#fff"| {{large}}
| |
| − | | style="background:#fff"| Bed
| |
| − | | style="background:#fff"| No
| |
| − | |-
| |
| − | | style="background:#fff"| Scoreboard
| |
| − | | style="background:#fff"| [[File:Scoreboard HHD Icon.png]]
| |
| − | | style="background:#fff"| 2,200
| |
| − | | style="background:#fff"| 550
| |
| − | | style="background:#fff"| [[Timmy and Tommy's store|Timmy & Tommy]]
| |
| − | | style="background:#fff"| {{orange}} / {{white}}
| |
| − | | style="background:#fff"| None
| |
| − | | style="background:#fff"| Sporty
| |
| − | | style="background:#fff"| {{small}}}
| |
| − | | style="background:#fff"| -
| |
| − | | style="background:#fff"| No
| |
| − | |-
| |
| − | | style="background:#fff"| Tennis Table
| |
| − | | style="background:#fff"| [[File:Tennis Table HHD Icon.png]]
| |
| − | | style="background:#fff"| 1,800
| |
| − | | style="background:#fff"| 450
| |
| − | | style="background:#fff"| [[Timmy and Tommy's store|Timmy & Tommy]]
| |
| − | | style="background:#fff"| {{green}} / {{green}}
| |
| − | | style="background:#fff"| Toy Shop
| |
| − | | style="background:#fff"| Sporty
| |
| − | | style="background:#fff"| {{medium}}
| |
| − | | style="background:#fff"| -
| |
| − | | style="background:#fff"| No
| |
| − | |-
| |
| − | | style="background:#fff"| Bowling Pins
| |
| − | | style="background:#fff"| [[File:Bowling Pins HHD Icon.png]]
| |
| − | | style="background:#fff"| 1,200
| |
| − | | style="background:#fff"| 300
| |
| − | | style="background:#fff"| [[Timmy and Tommy's store|Timmy & Tommy]]
| |
| − | | style="background:#fff"| {{white}} / {{white}}
| |
| − | | style="background:#fff"| Toy Shop
| |
| − | | style="background:#fff"| Sporty
| |
| − | | style="background:#fff"| {{small}}
| |
| − | | style="background:#fff"| Can use
| |
| − | | style="background:#fff"| No
| |
| − | |-
| |
| − | | style="background:#fff"| Ball Return
| |
| − | | style="background:#fff"| [[File:Ball Return HHD Icon.png]]
| |
| − | | style="background:#fff"| 6,200
| |
| − | | style="background:#fff"| 1,500
| |
| − | | style="background:#fff"| [[Timmy and Tommy's store|Timmy & Tommy]]
| |
| − | | style="background:#fff"| {{colorful}} / {{white}}
| |
| − | | style="background:#fff"| Toy Shop
| |
| − | | style="background:#fff"| Sporty
| |
| − | | style="background:#fff"| {{medium}}
| |
| − | | style="background:#fff"| Can use
| |
| − | | style="background:#fff"| No
| |
| − | |-
| |
| − | | style="background:#fff"| Golf Bag
| |
| − | | style="background:#fff"| [[File:Golf Bag HHD Icon.png]]
| |
| − | | style="background:#fff"| 1,600
| |
| − | | style="background:#fff"| 400
| |
| − | | style="background:#fff"| [[Timmy and Tommy's store|Timmy & Tommy]]
| |
| − | | style="background:#fff"| {{aqua}} / {{blue}}
| |
| − | | style="background:#fff"| None
| |
| − | | style="background:#fff"| Sporty
| |
| − | | style="background:#fff"| {{small}}
| |
| − | | style="background:#fff"| -
| |
| − | | style="background:#fff"| Yes
| |
| − | |-
| |
| − | | style="background:#fff"| Basketball Hoop
| |
| − | | style="background:#fff"| [[File:Basketball Hoop HHD Icon.png]]
| |
| − | | style="background:#fff"| 2,120
| |
| − | | style="background:#fff"| 530
| |
| − | | style="background:#fff"| [[Timmy and Tommy's store|Timmy & Tommy]]
| |
| − | | style="background:#fff"| {{gray}} / {{white}}
| |
| − | | style="background:#fff"| None
| |
| − | | style="background:#fff"| Sporty
| |
| − | | style="background:#fff"| {{large}}
| |
| − | | style="background:#fff"| -
| |
| − | | style="background:#fff"| No
| |
| − | |-
| |
| − | | style="background:#fff"| Volleyball Net
| |
| − | | style="background:#fff"| [[File:Volleyball Net HHD Icon.png]]
| |
| − | | style="background:#fff"| 1,800
| |
| − | | style="background:#fff"| 450
| |
| − | | style="background:#fff"| [[Timmy and Tommy's store|Timmy & Tommy]]
| |
| − | | style="background:#fff"| {{black}} / {{gray}}
| |
| − | | style="background:#fff"| None
| |
| − | | style="background:#fff"| Sporty
| |
| − | | style="background:#fff"| {{medium}}
| |
| − | | style="background:#fff"| -
| |
| − | | style="background:#fff"| No
| |
| − | |-
| |
| − | | style="background:#fff"| Billiard Table
| |
| − | | style="background:#fff"| [[File:Billiard Table HHD Icon.png]]
| |
| − | | style="background:#fff"| 1,800
| |
| − | | style="background:#fff"| 450
| |
| − | | style="background:#fff"| [[Timmy and Tommy's store|Timmy & Tommy]]
| |
| − | | style="background:#fff"| {{brown}} / {{green}}
| |
| − | | style="background:#fff"| Toy Shop
| |
| − | | style="background:#fff"| Rock 'n' Roll
| |
| − | | style="background:#fff"| {{medium}}
| |
| − | | style="background:#fff"| -
| |
| − | | style="background:#fff"| No
| |
| − | |-
| |
| − | | style="background:#fff"| Foosball Table
| |
| − | | style="background:#fff"| [[File:Foosball Table HHD Icon.png]]
| |
| − | | style="background:#fff"| 1,800
| |
| − | | style="background:#fff"| 450
| |
| − | | style="background:#fff"| [[Timmy and Tommy's store|Timmy & Tommy]]
| |
| − | | style="background:#fff"| {{brown}} / {{colorful}}
| |
| − | | style="background:#fff"| Toy Shop
| |
| − | | style="background:#fff"| Sporty
| |
| − | | style="background:#fff"| {{medium}}
| |
| − | | style="background:#fff"| -
| |
| − | | style="background:#fff"| No
| |
| − | |-
| |
| − | | style="background:#fff"| Mahjong Table
| |
| − | | style="background:#fff"| [[File:Mahjong Table HHD Icon.png]]
| |
| − | | style="background:#fff"| 4,200
| |
| − | | style="background:#fff"| 1,050
| |
| − | | style="background:#fff"| [[Timmy and Tommy's store|Timmy & Tommy]]
| |
| − | | style="background:#fff"| {{brown}} / {{green}}
| |
| − | | style="background:#fff"| Harmonious<br>Toy Shop
| |
| − | | style="background:#fff"| Rock 'n' Roll
| |
| − | | style="background:#fff"| {{small}}
| |
| − | | style="background:#fff"| -
| |
| − | | style="background:#fff"| No
| |
| − | |-
| |
| − | | style="background:#fff"| Bingo Wheel
| |
| − | | style="background:#fff"| [[File:Bingo Wheel HHD Icon.png]]
| |
| − | | style="background:#fff"| 2,400
| |
| − | | style="background:#fff"| 600
| |
| − | | style="background:#fff"| [[Timmy and Tommy's store|Timmy & Tommy]]
| |
| − | | style="background:#fff"| {{black}} / {{yellow}}
| |
| − | | style="background:#fff"| Toy Shop
| |
| − | | style="background:#fff"| Rock 'n' Roll
| |
| − | | style="background:#fff"| {{small}}
| |
| − | | style="background:#fff"| Can use, can place on table
| |
| − | | style="background:#fff"| No
| |
| − | |-
| |
| − | | style="background:#fff"| Reversi Piece
| |
| − | | style="background:#fff"| [[File:Reversi Piece HHD Icon.png]]
| |
| − | | style="background:#fff"| 1,200
| |
| − | | style="background:#fff"| 300
| |
| − | | style="background:#fff"| [[Timmy and Tommy's store|Timmy & Tommy]]
| |
| − | | style="background:#fff"| {{black}} / {{white}}
| |
| − | | style="background:#fff"| Toy Shop
| |
| − | | style="background:#fff"| Iconic
| |
| − | | style="background:#fff"| {{small}}
| |
| − | | style="background:#fff"| Can use, can place on table
| |
| − | | style="background:#fff"| No
| |
| − | |-
| |
| − | | style="background:#fff"| Shogi Piece
| |
| − | | style="background:#fff"| [[File:Shogi Piece HHD Icon.png]]
| |
| − | | style="background:#fff"| 1,200
| |
| − | | style="background:#fff"| 300
| |
| − | | style="background:#fff"| [[Timmy and Tommy's store|Timmy & Tommy]]
| |
| − | | style="background:#fff"| {{black}} / {{brown}}
| |
| − | | style="background:#fff"| Harmonious<br>Toy Shop
| |
| − | | style="background:#fff"| Iconic
| |
| − | | style="background:#fff"| {{small}}
| |
| − | | style="background:#fff"| Can place on table
| |
| − | | style="background:#fff"| Yes
| |
| − | |-
| |
| − | | style="background:#fff"| Shogi Board
| |
| − | | style="background:#fff"| [[File:Shogi Board HHD Icon.png]]
| |
| − | | style="background:#fff"| 1,200
| |
| − | | style="background:#fff"| 300
| |
| − | | style="background:#fff"| [[Timmy and Tommy's store|Timmy & Tommy]]
| |
| − | | style="background:#fff"| {{brown}} / {{brown}}
| |
| − | | style="background:#fff"| Harmonious<br>Toy Shop
| |
| − | | style="background:#fff"| Iconic
| |
| − | | style="background:#fff"| {{small}}
| |
| − | | style="background:#fff"| Can place on table
| |
| − | | style="background:#fff"| No
| |
| − | |-
| |
| − | | style="background:#fff"| Go Board
| |
| − | | style="background:#fff"| [[File:Go Board HHD Icon.png]]
| |
| − | | style="background:#fff"| 1,200
| |
| − | | style="background:#fff"| 300
| |
| − | | style="background:#fff"| [[Timmy and Tommy's store|Timmy & Tommy]]
| |
| − | | style="background:#fff"| {{brown}} / {{brown}}
| |
| − | | style="background:#fff"| Harmonious<br>Toy Shop
| |
| − | | style="background:#fff"| Iconic
| |
| − | | style="background:#fff"| {{small}}
| |
| − | | style="background:#fff"| Can place on table
| |
| − | | style="background:#fff"| No
| |
| − | |-
| |
| − | | style="background:#fff"| Dartboard
| |
| − | | style="background:#fff"| [[File:Dartboard HHD Icon.png]]
| |
| − | | style="background:#fff"| 1,520
| |
| − | | style="background:#fff"| 380
| |
| − | | style="background:#fff"| [[Timmy and Tommy's store|Timmy & Tommy]]
| |
| − | | style="background:#fff"| {{black}} / {{black}}
| |
| − | | style="background:#fff"| Toy Shop
| |
| − | | style="background:#fff"| Sporty
| |
| − | | style="background:#fff"| {{small}}
| |
| − | | style="background:#fff"| -
| |
| − | | style="background:#fff"| No
| |
| − | |-
| |
| − | | style="background:#fff"| Ten Billion Barrel
| |
| − | | style="background:#fff"| [[File:Ten Billion Barrel HHD Icon.png]]
| |
| − | | style="background:#fff"| -
| |
| − | | style="background:#fff"| 256
| |
| − | | style="background:#fff"| [[Fireworks]]
| |
| − | | style="background:#fff"| {{black}} / {{colorful}}
| |
| − | | style="background:#fff"| Sci-Fi<br>Toy Shop
| |
| − | | style="background:#fff"| Iconic
| |
| − | | style="background:#fff"| {{small}}
| |
| − | | style="background:#fff"| Can place on table
| |
| − | | style="background:#fff"| No
| |
| − | |-
| |
| − | | style="background:#fff"| Love Tester
| |
| − | | style="background:#fff"| [[File:Love Tester HHD Icon.png]]
| |
| − | | style="background:#fff"| -
| |
| − | | style="background:#fff"| 256
| |
| − | | style="background:#fff"| [[Fireworks]]
| |
| − | | style="background:#fff"| {{red}} / {{white}}
| |
| − | | style="background:#fff"| Sci-Fi<br>Toy Shop
| |
| − | | style="background:#fff"| Modern
| |
| − | | style="background:#fff"| {{small}}
| |
| − | | style="background:#fff"| Can place on table
| |
| − | | style="background:#fff"| No
| |
| − | |-
| |
| − | | style="background:#fff"| Ultra Hand
| |
| − | | style="background:#fff"| [[File:Ultra Hand HHD Icon.png]]
| |
| − | | style="background:#fff"| -
| |
| − | | style="background:#fff"| 256
| |
| − | | style="background:#fff"| [[Fireworks]]
| |
| − | | style="background:#fff"| {{blue}} / {{blue}}
| |
| − | | style="background:#fff"| Sci-Fi<br>Toy Shop
| |
| − | | style="background:#fff"| Iconic
| |
| − | | style="background:#fff"| {{small}}
| |
| − | | style="background:#fff"| Can use
| |
| − | | style="background:#fff"| No
| |
| − | |-
| |
| − | | style="background:#fff"| Ultra Scope
| |
| − | | style="background:#fff"| [[File:Ultra Scope HHD Icon.png]]
| |
| − | | style="background:#fff"| -
| |
| − | | style="background:#fff"| 256
| |
| − | | style="background:#fff"| [[Fireworks]]
| |
| − | | style="background:#fff"| {{white}} / {{white}}
| |
| − | | style="background:#fff"| Sci-Fi<br>Toy Shop
| |
| − | | style="background:#fff"| Iconic
| |
| − | | style="background:#fff"| {{small}}
| |
| − | | style="background:#fff"| Can use
| |
| − | | style="background:#fff"| No
| |
| − | |-
| |
| − | | style="background:#fff"| Ultra Machine
| |
| − | | style="background:#fff"| [[File:Ultra Machine HHD Icon.png]]
| |
| − | | style="background:#fff"| -
| |
| − | | style="background:#fff"| 256
| |
| − | | style="background:#fff"| [[Fireworks]]
| |
| − | | style="background:#fff"| {{red}} / {{white}}
| |
| − | | style="background:#fff"| Sci-Fi<br>Toy Shop
| |
| − | | style="background:#fff"| Iconic
| |
| − | | style="background:#fff"| {{small}}
| |
| − | | style="background:#fff"| Can use, can place on table
| |
| − | | style="background:#fff"| No
| |
| − | |-
| |
| − | | style="background:#fff"| Pinball Machine
| |
| − | | style="background:#fff"| [[File:Pinball Machine HHD Icon.png]]
| |
| − | | style="background:#fff"| 1,960
| |
| − | | style="background:#fff"| 490
| |
| − | | style="background:#fff"| [[Timmy and Tommy's store|Timmy & Tommy]]
| |
| − | | style="background:#fff"| {{brown}} / {{colorful}}
| |
| − | | style="background:#fff"| Toy Shop
| |
| − | | style="background:#fff"| Rock 'n' Roll
| |
| − | | style="background:#fff"| {{small}}
| |
| − | | style="background:#fff"| Can use
| |
| − | | style="background:#fff"| No
| |
| − | |-
| |
| − | | style="background:#fff"| Arcade Machine
| |
| − | | style="background:#fff"| [[File:Arcade Machine HHD Icon.png]]
| |
| − | | style="background:#fff"| 4,400
| |
| − | | style="background:#fff"| 1,100
| |
| − | | style="background:#fff"| [[Timmy and Tommy's store|Timmy & Tommy]]
| |
| − | | style="background:#fff"| {{colorful}} / {{white}}
| |
| − | | style="background:#fff"| Toy Shop
| |
| − | | style="background:#fff"| Rock 'n' Roll
| |
| − | | style="background:#fff"| {{small}}
| |
| − | | style="background:#fff"| Can use
| |
| − | | style="background:#fff"| No
| |
| − | |-
| |
| − | | style="background:#fff"| Tabletop Game
| |
| − | | style="background:#fff"| [[File:Tabletop Game HHD Icon.png]]
| |
| − | | style="background:#fff"| 2,480
| |
| − | | style="background:#fff"| 620
| |
| − | | style="background:#fff"| [[Timmy and Tommy's store|Timmy & Tommy]]
| |
| − | | style="background:#fff"| {{black}} / {{brown}}
| |
| − | | style="background:#fff"| Toy Shop
| |
| − | | style="background:#fff"| Rock 'n' Roll
| |
| − | | style="background:#fff"| {{small}}
| |
| − | | style="background:#fff"| Table, can use
| |
| − | | style="background:#fff"| No
| |
| − | |-
| |
| − | | style="background:#fff"| Crane Game
| |
| − | | style="background:#fff"| [[File:Crane Game HHD Icon.png]]
| |
| − | | style="background:#fff"| 1,680
| |
| − | | style="background:#fff"| 420
| |
| − | | style="background:#fff"| [[Timmy and Tommy's store|Timmy & Tommy]]
| |
| − | | style="background:#fff"| {{pink}} / {{pink}}
| |
| − | | style="background:#fff"| Toy Shop
| |
| − | | style="background:#fff"| Cute
| |
| − | | style="background:#fff"| {{medium}}
| |
| − | | style="background:#fff"| Can use
| |
| − | | style="background:#fff"| No
| |
| − | |-
| |
| − | | style="background:#fff"| Capsule-Toy Machine
| |
| − | | style="background:#fff"| [[File:Capsule-Toy Machine HHD Icon.png]]
| |
| − | | style="background:#fff"| 1,480
| |
| − | | style="background:#fff"| 370
| |
| − | | style="background:#fff"| [[Timmy and Tommy's store|Timmy & Tommy]]
| |
| − | | style="background:#fff"| {{beige}} / {{red}}
| |
| − | | style="background:#fff"| Toy Shop
| |
| − | | style="background:#fff"| Cute
| |
| − | | style="background:#fff"| {{small}}
| |
| − | | style="background:#fff"| Can use
| |
| − | | style="background:#fff"| Yes
| |
| − | |-
| |
| − | | style="background:#fff"| Colorful Wheel
| |
| − | | style="background:#fff"| [[File:Colorful Wheel HHD Icon.png]]
| |
| − | | style="background:#fff"| 2,000
| |
| − | | style="background:#fff"| 500
| |
| − | | style="background:#fff"| [[Timmy and Tommy's store|Timmy & Tommy]]
| |
| − | | style="background:#fff"| {{colorful}} / {{colorful}}
| |
| − | | style="background:#fff"| Toy Shop
| |
| − | | style="background:#fff"| Rock 'n' Roll
| |
| − | | style="background:#fff"| {{medium}}
| |
| − | | style="background:#fff"| Can use
| |
| − | | style="background:#fff"| No
| |
| − | |-
| |
| − | | style="background:#fff"| Game-Show Stand
| |
| − | | style="background:#fff"| [[File:Game-Show Stand HHD Icon.png]]
| |
| − | | style="background:#fff"| 2,400
| |
| − | | style="background:#fff"| 600
| |
| − | | style="background:#fff"| [[Timmy and Tommy's store|Timmy & Tommy]]
| |
| − | | style="background:#fff"| {{red}} / {{red}}
| |
| − | | style="background:#fff"| Toy Shop
| |
| − | | style="background:#fff"| Cute
| |
| − | | style="background:#fff"| {{small}}
| |
| − | | style="background:#fff"| Can use
| |
| − | | style="background:#fff"| Yes
| |
| − | |-
| |
| − | | style="background:#fff"| Standing Spotlight
| |
| − | | style="background:#fff"| [[File:Standing Spotlight HHD Icon.png]]
| |
| − | | style="background:#fff"| 1,800
| |
| − | | style="background:#fff"| 450
| |
| − | | style="background:#fff"| [[Timmy and Tommy's store|Timmy & Tommy]]
| |
| − | | style="background:#fff"| {{black}} / {{yellow}}
| |
| − | | style="background:#fff"| Trendy
| |
| − | | style="background:#fff"| Official
| |
| − | | style="background:#fff"| {{small}}
| |
| − | | style="background:#fff"| Lamp
| |
| − | | style="background:#fff"| No
| |
| − | |-
| |
| − | | style="background:#fff"| Small Spotlight
| |
| − | | style="background:#fff"| [[File:Small Spotlight HHD Icon.png]]
| |
| − | | style="background:#fff"| 1,400
| |
| − | | style="background:#fff"| 350
| |
| − | | style="background:#fff"| [[Timmy and Tommy's store|Timmy & Tommy]]
| |
| − | | style="background:#fff"| {{black}} / {{yellow}}
| |
| − | | style="background:#fff"| Trendy
| |
| − | | style="background:#fff"| Official
| |
| − | | style="background:#fff"| {{small}}
| |
| − | | style="background:#fff"| Lamp, wall furniture
| |
| − | | style="background:#fff"| No
| |
| − | |-
| |
| − | | style="background:#fff"| TV Camera
| |
| − | | style="background:#fff"| [[File:TV Camera HHD Icon.png]]
| |
| − | | style="background:#fff"| 5,600
| |
| − | | style="background:#fff"| 1,400
| |
| − | | style="background:#fff"| [[Timmy and Tommy's store|Timmy & Tommy]]
| |
| − | | style="background:#fff"| {{gray}} / {{gray}}
| |
| − | | style="background:#fff"| Trendy<br>Sci-Fi
| |
| − | | style="background:#fff"| Official
| |
| − | | style="background:#fff"| {{small}}
| |
| − | | style="background:#fff"| -
| |
| − | | style="background:#fff"| No
| |
| − | |-
| |
| − | | style="background:#fff"| Director's Chair
| |
| − | | style="background:#fff"| [[File:Director's Chair HHD Icon.png]]
| |
| − | | style="background:#fff"| 1,480
| |
| − | | style="background:#fff"| 370
| |
| − | | style="background:#fff"| [[Timmy and Tommy's store|Timmy & Tommy]]
| |
| − | | style="background:#fff"| {{brown}} / {{white}}
| |
| − | | style="background:#fff"| None
| |
| − | | style="background:#fff"| Basic
| |
| − | | style="background:#fff"| {{small}}
| |
| − | | style="background:#fff"| Chair
| |
| − | | style="background:#fff"| Yes
| |
| − | |-
| |
| − | | style="background:#fff"| Lily Lamp
| |
| − | | style="background:#fff"| [[File:Lily Lamp HHD Icon.png]]
| |
| − | | style="background:#fff"| -
| |
| − | | style="background:#fff"| 700
| |
| − | | style="background:#fff"| [[Weeding Day]] / [[Leif]]
| |
| − | | style="background:#fff"| {{white}} / {{yellow}}
| |
| − | | style="background:#fff"| Antique<br>Fairy Tale
| |
| − | | style="background:#fff"| Cite
| |
| − | | style="background:#fff"| {{small}}
| |
| − | | style="background:#fff"| Lamp, can't recycle
| |
| − | | style="background:#fff"| No
| |
| − | |-
| |
| − | | style="background:#fff"| Lily Record Player
| |
| − | | style="background:#fff"| [[File:Lily Record Player HHD Icon.png]]
| |
| − | | style="background:#fff"| -
| |
| − | | style="background:#fff"| 620
| |
| − | | style="background:#fff"| [[Weeding Day]] / [[Leif]]
| |
| − | | style="background:#fff"| {{white}} / {{white}}
| |
| − | | style="background:#fff"| Rustic<br>Fairy Tale
| |
| − | | style="background:#fff"| Cute
| |
| − | | style="background:#fff"| {{small}}
| |
| − | | style="background:#fff"| Stereo, can't recycle
| |
| − | | style="background:#fff"| Yes
| |
| − | |-
| |
| − | | style="background:#fff"| Rose Sofa
| |
| − | | style="background:#fff"| [[File:Rose Sofa HHD Icon.png]]
| |
| − | | style="background:#fff"| -
| |
| − | | style="background:#fff"| 600
| |
| − | | style="background:#fff"| [[Weeding Day]] / [[Leif]]
| |
| − | | style="background:#fff"| {{red}} / {{red}}
| |
| − | | style="background:#fff"| Rustic<br>Fairy Tale
| |
| − | | style="background:#fff"| Cute
| |
| − | | style="background:#fff"| {{small}}
| |
| − | | style="background:#fff"| Chair, can't recycle
| |
| − | | style="background:#fff"| Yes
| |
| − | |-
| |
| − | | style="background:#fff"| Sunflower Stereo
| |
| − | | style="background:#fff"| [[File:Sunflower Stereo HHD Icon.png]]
| |
| − | | style="background:#fff"| -
| |
| − | | style="background:#fff"| 620
| |
| − | | style="background:#fff"| [[Weeding Day]] / [[Leif]]
| |
| − | | style="background:#fff"| {{orange}} / {{yellow}}
| |
| − | | style="background:#fff"| Rustic<br>Fairy Tale
| |
| − | | style="background:#fff"| Cute
| |
| − | | style="background:#fff"| {{medium}}
| |
| − | | style="background:#fff"| Stereo, can't recycle
| |
| − | | style="background:#fff"| No
| |
| − | |-
| |
| − | | style="background:#fff"| Tulip Dresser
| |
| − | | style="background:#fff"| [[File:Tulip Dresser HHD Icon.png]]
| |
| − | | style="background:#fff"| -
| |
| − | | style="background:#fff"| 550
| |
| − | | style="background:#fff"| [[Weeding Day]] / [[Leif]]
| |
| − | | style="background:#fff"| {{yellow}} / {{yellow}}
| |
| − | | style="background:#fff"| Rustic<br>Fairy Tale
| |
| − | | style="background:#fff"| Cute
| |
| − | | style="background:#fff"| {{small}}
| |
| − | | style="background:#fff"| Storage, can't recycle
| |
| − | | style="background:#fff"| Yes
| |
| − | |-
| |
| − | | style="background:#fff"| Violet Screen
| |
| − | | style="background:#fff"| [[File:Violet Screen HHD Icon.png]]
| |
| − | | style="background:#fff"| -
| |
| − | | style="background:#fff"| 595
| |
| − | | style="background:#fff"| [[Weeding Day]] / [[Leif]]
| |
| − | | style="background:#fff"| {{purple}} / {{purple}}
| |
| − | | style="background:#fff"| Rustic<br>Fairy Tale
| |
| − | | style="background:#fff"| Cute
| |
| − | | style="background:#fff"| {{medium}}
| |
| − | | style="background:#fff"| Can't recycle
| |
| − | | style="background:#fff"| Yes
| |
| − | |-
| |
| − | | style="background:#fff"| Hydrangea Bed
| |
| − | | style="background:#fff"| [[File:Hydrangea Bed HHD Icon.png]]
| |
| − | | style="background:#fff"| -
| |
| − | | style="background:#fff"| 620
| |
| − | | style="background:#fff"| [[Weeding Day]] / [[Leif]]
| |
| − | | style="background:#fff"| {{blue}} / {{blue}}
| |
| − | | style="background:#fff"| Rustic<br>Fairy Tale
| |
| − | | style="background:#fff"| Cute
| |
| − | | style="background:#fff"| {{medium}}
| |
| − | | style="background:#fff"| Bed, can't recycle
| |
| − | | style="background:#fff"| Yes
| |
| − | |-
| |
| − | | style="background:#fff"| Azalea Stool
| |
| − | | style="background:#fff"| [[File:Azalea Stool HHD Icon.png]]
| |
| − | | style="background:#fff"| -
| |
| − | | style="background:#fff"| 550
| |
| − | | style="background:#fff"| [[Weeding Day]] / [[Leif]]
| |
| − | | style="background:#fff"| {{pink}} / {{pink}}
| |
| − | | style="background:#fff"| Rustic<br>Fairy Tale
| |
| − | | style="background:#fff"| Cute
| |
| − | | style="background:#fff"| {{small}}
| |
| − | | style="background:#fff"| Chair, can't recycle
| |
| − | | style="background:#fff"| Yes
| |
| − | |-
| |
| − | | style="background:#fff"| Pansy Table
| |
| − | | style="background:#fff"| [[File:Pansy Table HHD Icon.png]]
| |
| − | | style="background:#fff"| -
| |
| − | | style="background:#fff"| 600
| |
| − | | style="background:#fff"| [[Weeding Day]] / [[Leif]]
| |
| − | | style="background:#fff"| {{brown}} / {{yellow}}
| |
| − | | style="background:#fff"| Rustic<br>Fairy Tale
| |
| − | | style="background:#fff"| Cute
| |
| − | | style="background:#fff"| {{small}}
| |
| − | | style="background:#fff"| Table, can't recycle
| |
| − | | style="background:#fff"| Yes
| |
| − | |-
| |
| − | | style="background:#fff"| Cosmos Fan
| |
| − | | style="background:#fff"| [[File:Cosmos Fan HHD Icon.png]]
| |
| − | | style="background:#fff"| -
| |
| − | | style="background:#fff"| 595
| |
| − | | style="background:#fff"| [[Weeding Day]] / [[Leif]]
| |
| − | | style="background:#fff"| {{green}} / {{white}}
| |
| − | | style="background:#fff"| Rustic<br>Fairy Tale
| |
| − | | style="background:#fff"| Cute
| |
| − | | style="background:#fff"| {{small}}
| |
| − | | style="background:#fff"| Can use, can't recycle
| |
| − | | style="background:#fff"| Yes
| |
| − | |-
| |
| − | | style="background:#fff"| Hibiscus Clock
| |
| − | | style="background:#fff"| [[File:Hibiscus Clock HHD Icon.png]]
| |
| − | | style="background:#fff"| -
| |
| − | | style="background:#fff"| 550
| |
| − | | style="background:#fff"| [[Weeding Day]] / [[Leif]]
| |
| − | | style="background:#fff"| {{red}} / {{red}}
| |
| − | | style="background:#fff"| Rustic<br>Fairy Tale
| |
| − | | style="background:#fff"| Cute
| |
| − | | style="background:#fff"| {{small}}
| |
| − | | style="background:#fff"| Clock, wall furniture, can't recycle
| |
| − | | style="background:#fff"| Yes
| |
| − | |-
| |
| − | | style="background:#fff"| Cherry-Blossom Clock
| |
| − | | style="background:#fff"| [[File:Cherry-Blossom Clock HHD Icon.png]]
| |
| − | | style="background:#fff"| 4,160
| |
| − | | style="background:#fff"| 1,040
| |
| − | | style="background:#fff"| [[DLC]]
| |
| − | | style="background:#fff"| {{pink}} / {{pink}}
| |
| − | | style="background:#fff"| Rustic
| |
| − | | style="background:#fff"| ???
| |
| − | | style="background:#fff"| {{small}}
| |
| − | | style="background:#fff"| Clock, wall furniture
| |
| − | | style="background:#fff"| No
| |
| − | |-
| |
| − | | style="background:#fff"| Shamrock Clock
| |
| − | | style="background:#fff"| [[File:Shamrock Clock HHD Icon.png]]
| |
| − | | style="background:#fff"| 1,800
| |
| − | | style="background:#fff"| 450
| |
| − | | style="background:#fff"| Gulliver
| |
| − | | style="background:#fff"| {{green}} / {{green}}
| |
| − | | style="background:#fff"| Rustic
| |
| − | | style="background:#fff"| Iconic
| |
| − | | style="background:#fff"| {{small}}
| |
| − | | style="background:#fff"| Clock, wall furniture
| |
| − | | style="background:#fff"| No
| |
| − | |-
| |
| − | | style="background:#fff"| Morning Glory
| |
| − | | style="background:#fff"| [[File:Morning Glory HHD Icon.png]]
| |
| − | | style="background:#fff"| 1,600
| |
| − | | style="background:#fff"| 400
| |
| − | | style="background:#fff"| [[Garden Corner]]
| |
| − | | style="background:#fff"| {{blue}} / {{brown}}
| |
| − | | style="background:#fff"| Rustic
| |
| − | | style="background:#fff"| Basic
| |
| − | | style="background:#fff"| {{small}}
| |
| − | | style="background:#fff"| Can place on table
| |
| − | | style="background:#fff"| Yes
| |
| − | |-
| |
| − | | style="background:#fff"| Hedge Standee
| |
| − | | style="background:#fff"| [[File:Hedge Standee HHD Icon.png]]
| |
| − | | style="background:#fff"| 1,200
| |
| − | | style="background:#fff"| 300
| |
| − | | style="background:#fff"| [[Timmy and Tommy's store|Timmy & Tommy]]
| |
| − | | style="background:#fff"| {{green}} / {{green}}
| |
| − | | style="background:#fff"| None
| |
| − | | style="background:#fff"| Cute
| |
| − | | style="background:#fff"| {{small}}
| |
| − | | style="background:#fff"| -
| |
| − | | style="background:#fff"| No
| |
| − | |-
| |
| − | | style="background:#fff"| Grass Standee
| |
| − | | style="background:#fff"| [[File:Grass Standee HHD Icon.png]]
| |
| − | | style="background:#fff"| 1,200
| |
| − | | style="background:#fff"| 300
| |
| − | | style="background:#fff"| [[Timmy and Tommy's store|Timmy & Tommy]]
| |
| − | | style="background:#fff"| {{green}} / {{green}}
| |
| − | | style="background:#fff"| None
| |
| − | | style="background:#fff"| Cute
| |
| − | | style="background:#fff"| {{small}}
| |
| − | | style="background:#fff"| -
| |
| − | | style="background:#fff"| No
| |
| − | |-
| |
| − | | style="background:#fff"| Mountain Standee
| |
| − | | style="background:#fff"| [[File:Mountain Standee HHD Icon.png]]
| |
| − | | style="background:#fff"| 1,200
| |
| − | | style="background:#fff"| 300
| |
| − | | style="background:#fff"| [[Timmy and Tommy's store|Timmy & Tommy]]
| |
| − | | style="background:#fff"| {{green}} / {{green}}
| |
| − | | style="background:#fff"| None
| |
| − | | style="background:#fff"| Cute
| |
| − | | style="background:#fff"| {{medium}}
| |
| − | | style="background:#fff"| -
| |
| − | | style="background:#fff"| No
| |
| − | |-
| |
| − | | style="background:#fff"| Tree Standee
| |
| − | | style="background:#fff"| [[File:Tree Standee HHD Icon.png]]
| |
| − | | style="background:#fff"| 1,200
| |
| − | | style="background:#fff"| 300
| |
| − | | style="background:#fff"| [[Timmy and Tommy's store|Timmy & Tommy]]
| |
| − | | style="background:#fff"| {{brown}} / {{green}}
| |
| − | | style="background:#fff"| None
| |
| − | | style="background:#fff"| Cute
| |
| − | | style="background:#fff"| {{medium}}
| |
| − | | style="background:#fff"| -
| |
| − | | style="background:#fff"| No
| |
| − | |-
| |
| − | | style="background:#fff"| Sprout Table
| |
| − | | style="background:#fff"| [[File:Sprout Table HHD Icon.png]]
| |
| − | | style="background:#fff"| 4,120
| |
| − | | style="background:#fff"| 1,030
| |
| − | | style="background:#fff"| [[DLC]]
| |
| − | | style="background:#fff"| {{green}} / {{green}}
| |
| − | | style="background:#fff"| Rustic
| |
| − | | style="background:#fff"| ???
| |
| − | | style="background:#fff"| {{medium}}
| |
| − | | style="background:#fff"| Table
| |
| − | | style="background:#fff"| No
| |
| − | |-
| |
| − | | style="background:#fff"| Leaf Bed
| |
| − | | style="background:#fff"| [[File:Leaf Bed HHD Icon.png]]
| |
| − | | style="background:#fff"| 4,200
| |
| − | | style="background:#fff"| 1,050
| |
| − | | style="background:#fff"| [[DLC]]
| |
| − | | style="background:#fff"| {{green}} / {{green}}
| |
| − | | style="background:#fff"| Rustic
| |
| − | | style="background:#fff"| ???
| |
| − | | style="background:#fff"| {{medium}}
| |
| − | | style="background:#fff"| Bed
| |
| − | | style="background:#fff"| No
| |
| − | |-
| |
| − | | style="background:#fff"| Palm-Tree Lamp
| |
| − | | style="background:#fff"| [[File:Palm-Tree Lamp HHD Icon.png]]
| |
| − | | style="background:#fff"| 4,280
| |
| − | | style="background:#fff"| 1,070
| |
| − | | style="background:#fff"| [[DLC]]
| |
| − | | style="background:#fff"| ??? / {{brown}}
| |
| − | | style="background:#fff"| Rustic
| |
| − | | style="background:#fff"| ???
| |
| − | | style="background:#fff"| {{small}}
| |
| − | | style="background:#fff"| Lamp
| |
| − | | style="background:#fff"| No
| |
| − | |-
| |
| − | | style="background:#fff"| Autumn-Leaf Chair
| |
| − | | style="background:#fff"| [[File:Autumn-Leaf Chair HHD Icon.png]]
| |
| − | | style="background:#fff"| 4,440
| |
| − | | style="background:#fff"| 1,110
| |
| − | | style="background:#fff"| [[DLC]]
| |
| − | | style="background:#fff"| {{orange}} / {{orange}}
| |
| − | | style="background:#fff"| Rustic
| |
| − | | style="background:#fff"| ???
| |
| − | | style="background:#fff"| {{small}}
| |
| − | | style="background:#fff"| Chair
| |
| − | | style="background:#fff"| No
| |
| − | |-
| |
| − | | style="background:#fff"| Tree-Stump Chair
| |
| − | | style="background:#fff"| [[File:Tree-Stump Chair HHD Icon.png]]
| |
| − | | style="background:#fff"| 4,480
| |
| − | | style="background:#fff"| 1,120
| |
| − | | style="background:#fff"| [[DLC]]
| |
| − | | style="background:#fff"| {{beige}} / {{brown}}
| |
| − | | style="background:#fff"| Rustic
| |
| − | | style="background:#fff"| ???
| |
| − | | style="background:#fff"| {{small}}
| |
| − | | style="background:#fff"| Chair
| |
| − | | style="background:#fff"| No
| |
| − | |-
| |
| − | | style="background:#fff"| Rainbow Screen
| |
| − | | style="background:#fff"| [[File:Rainbow Screen HHD Icon.png]]
| |
| − | | style="background:#fff"| 4,240
| |
| − | | style="background:#fff"| 1,060
| |
| − | | style="background:#fff"| [[DLC]]
| |
| − | | style="background:#fff"| {{colorful}} / {{white}}
| |
| − | | style="background:#fff"| Sci-Fi
| |
| − | | style="background:#fff"| ???
| |
| − | | style="background:#fff"| {{medium}}
| |
| − | | style="background:#fff"| -
| |
| − | | style="background:#fff"| No
| |
| − | |-
| |
| − | | style="background:#fff"| Aurora Screen
| |
| − | | style="background:#fff"| [[File:Aurora Screen HHD Icon.png]]
| |
| − | | style="background:#fff"| 4,080
| |
| − | | style="background:#fff"| 1,020
| |
| − | | style="background:#fff"| [[DLC]]
| |
| − | | style="background:#fff"| {{black}} / {{colorful}}
| |
| − | | style="background:#fff"| Sci-Fi
| |
| − | | style="background:#fff"| ???
| |
| − | | style="background:#fff"| {{medium}}
| |
| − | | style="background:#fff"| Changes color
| |
| − | | style="background:#fff"| No
| |
| − | |-
| |
| − | | style="background:#fff"| Full-Moon Vanity
| |
| − | | style="background:#fff"| [[File:Full-Moon Vanity HHD Icon.png]]
| |
| − | | style="background:#fff"| 4,360
| |
| − | | style="background:#fff"| 1,090
| |
| − | | style="background:#fff"| [[DLC]]
| |
| − | | style="background:#fff"| {{white}} / {{yellow}}
| |
| − | | style="background:#fff"| None
| |
| − | | style="background:#fff"| ???
| |
| − | | style="background:#fff"| {{medium}}
| |
| − | | style="background:#fff"| -
| |
| − | | style="background:#fff"| No
| |
| − | |-
| |
| − | | style="background:#fff"| Sunrise Lamp
| |
| − | | style="background:#fff"| [[File:Sunrise Lamp HHD Icon.png]]
| |
| − | | style="background:#fff"| 4,040
| |
| − | | style="background:#fff"| 1,010
| |
| − | | style="background:#fff"| [[DLC]]
| |
| − | | style="background:#fff"| {{brown}} / {{orange}}
| |
| − | | style="background:#fff"| None
| |
| − | | style="background:#fff"| ???
| |
| − | | style="background:#fff"| {{small}}
| |
| − | | style="background:#fff"| Lamp, wall furniture
| |
| − | | style="background:#fff"| No
| |
| − | |-
| |
| − | | style="background:#fff"| Aries Rocking Chair
| |
| − | | style="background:#fff"| [[File:Aries Rocking Chair HHD Icon.png]]
| |
| − | | style="background:#fff"| 4,800
| |
| − | | style="background:#fff"| 1,200
| |
| − | | style="background:#fff"| [[DLC]]
| |
| − | | style="background:#fff"| {{beige}} / {{beige}}
| |
| − | | style="background:#fff"| None
| |
| − | | style="background:#fff"| ???
| |
| − | | style="background:#fff"| {{small}}
| |
| − | | style="background:#fff"| Can use
| |
| − | | style="background:#fff"| No
| |
| − | |-
| |
| − | | style="background:#fff"| Taurus Bathtub
| |
| − | | style="background:#fff"| [[File:Taurus Bathtub HHD Icon.png]]
| |
| − | | style="background:#fff"| 4,800
| |
| − | | style="background:#fff"| 1,200
| |
| − | | style="background:#fff"| [[DLC]]
| |
| − | | style="background:#fff"| {{black}} / {{black}}
| |
| − | | style="background:#fff"| None
| |
| − | | style="background:#fff"| ???
| |
| − | | style="background:#fff"| {{medium}}
| |
| − | | style="background:#fff"| -
| |
| − | | style="background:#fff"| No
| |
| − | |-
| |
| − | | style="background:#fff"| Gemini Closet
| |
| − | | style="background:#fff"| [[File:Gemini Closet HHD Icon.png]]
| |
| − | | style="background:#fff"| 4,800
| |
| − | | style="background:#fff"| 1,090
| |
| − | | style="background:#fff"| [[DLC]]
| |
| − | | style="background:#fff"| {{blue}} / {{blue}}
| |
| − | | style="background:#fff"| None
| |
| − | | style="background:#fff"| ???
| |
| − | | style="background:#fff"| {{small}}
| |
| − | | style="background:#fff"| Storage
| |
| − | | style="background:#fff"| No
| |
| − | |-
| |
| − | | style="background:#fff"| Cancer Table
| |
| − | | style="background:#fff"| [[File:Cancer Table HHD Icon.png]]
| |
| − | | style="background:#fff"| 4,800
| |
| − | | style="background:#fff"| 1,200
| |
| − | | style="background:#fff"| [[DLC]]
| |
| − | | style="background:#fff"| {{yellow}} / {{yellow}}
| |
| − | | style="background:#fff"| None
| |
| − | | style="background:#fff"| ???
| |
| − | | style="background:#fff"| {{small}}
| |
| − | | style="background:#fff"| Table
| |
| − | | style="background:#fff"| No
| |
| − | |-
| |
| − | | style="background:#fff"| Leo Sculpture
| |
| − | | style="background:#fff"| [[File:Leo Sculpture HHD Icon.png]]
| |
| − | | style="background:#fff"| 4,800
| |
| − | | style="background:#fff"| 1,200
| |
| − | | style="background:#fff"| [[DLC]]
| |
| − | | style="background:#fff"| {{gray}} / {{gray}}
| |
| − | | style="background:#fff"| Quirky
| |
| − | | style="background:#fff"| ???
| |
| − | | style="background:#fff"| {{small}}
| |
| − | | style="background:#fff"| Wall furniture
| |
| − | | style="background:#fff"| No
| |
| − | |-
| |
| − | | style="background:#fff"| Virgo Harp
| |
| − | | style="background:#fff"| [[File:Virgo Harp HHD Icon.png]]
| |
| − | | style="background:#fff"| 4,800
| |
| − | | style="background:#fff"| 1,200
| |
| − | | style="background:#fff"| [[DLC]]
| |
| − | | style="background:#fff"| {{brown}} / {{brown}}
| |
| − | | style="background:#fff"| None
| |
| − | | style="background:#fff"| ???
| |
| − | | style="background:#fff"| {{small}}
| |
| − | | style="background:#fff"| Can use
| |
| − | | style="background:#fff"| No
| |
| − | |-
| |
| − | | style="background:#fff"| Libra Scale
| |
| − | | style="background:#fff"| [[File:Libra Scale HHD Icon.png]]
| |
| − | | style="background:#fff"| 4,800
| |
| − | | style="background:#fff"| 1,200
| |
| − | | style="background:#fff"| [[DLC]]
| |
| − | | style="background:#fff"| {{brown}} / {{brown}}
| |
| − | | style="background:#fff"| None
| |
| − | | style="background:#fff"| ???
| |
| − | | style="background:#fff"| {{small}}
| |
| − | | style="background:#fff"| Can place on table
| |
| − | | style="background:#fff"| No
| |
| − | |-
| |
| − | | style="background:#fff"| Scorpio Lamp
| |
| − | | style="background:#fff"| [[File:Scorpio Lamp HHD Icon.png]]
| |
| − | | style="background:#fff"| 4,800
| |
| − | | style="background:#fff"| 1,200
| |
| − | | style="background:#fff"| [[DLC]]
| |
| − | | style="background:#fff"| {{purple}} / {{purple}}
| |
| − | | style="background:#fff"| Quirky
| |
| − | | style="background:#fff"| ???
| |
| − | | style="background:#fff"| {{small}}
| |
| − | | style="background:#fff"| Lamp
| |
| − | | style="background:#fff"| No
| |
| − | |-
| |
| − | | style="background:#fff"| Sagittarius Arrow
| |
| − | | style="background:#fff"| [[File:Sagittarius Arrow HHD Icon.png]]
| |
| − | | style="background:#fff"| 4,800
| |
| − | | style="background:#fff"| 1,200
| |
| − | | style="background:#fff"| [[DLC]]
| |
| − | | style="background:#fff"| {{black}} / {{black}}
| |
| − | | style="background:#fff"| Quirky
| |
| − | | style="background:#fff"| ???
| |
| − | | style="background:#fff"| {{small}}
| |
| − | | style="background:#fff"| Wall furniture
| |
| − | | style="background:#fff"| No
| |
| − | |-
| |
| − | | style="background:#fff"| Capricorn Ornament
| |
| − | | style="background:#fff"| [[File:Capricorn Ornament HHD Icon.png]]
| |
| − | | style="background:#fff"| 4,800
| |
| − | | style="background:#fff"| 1,200
| |
| − | | style="background:#fff"| [[DLC]]
| |
| − | | style="background:#fff"| {{white}} / {{white}}
| |
| − | | style="background:#fff"| None
| |
| − | | style="background:#fff"| ???
| |
| − | | style="background:#fff"| {{medium}}
| |
| − | | style="background:#fff"| Storage
| |
| − | | style="background:#fff"| No
| |
| − | |-
| |
| − | | style="background:#fff"| Aquarius Urn
| |
| − | | style="background:#fff"| [[File:Aquarius Urn HHD Icon.png]]
| |
| − | | style="background:#fff"| 4,800
| |
| − | | style="background:#fff"| 1,200
| |
| − | | style="background:#fff"| [[DLC]]
| |
| − | | style="background:#fff"| {{aqua}} / {{aqua}}
| |
| − | | style="background:#fff"| None
| |
| − | | style="background:#fff"| ???
| |
| − | | style="background:#fff"| {{small}}
| |
| − | | style="background:#fff"| -
| |
| − | | style="background:#fff"| No
| |
| − | |-
| |
| − | | style="background:#fff"| Pisces Lamp
| |
| − | | style="background:#fff"| [[File:Pisces Lamp HHD Icon.png]]
| |
| − | | style="background:#fff"| 4,800
| |
| − | | style="background:#fff"| 1,200
| |
| − | | style="background:#fff"| [[DLC]]
| |
| − | | style="background:#fff"| {{aqua}} / {{blue}}
| |
| − | | style="background:#fff"| None
| |
| − | | style="background:#fff"| ???
| |
| − | | style="background:#fff"| {{small}}
| |
| − | | style="background:#fff"| Lamp
| |
| − | | style="background:#fff"| No
| |
| − | |-
| |
| − | | style="background:#fff"| Mountain Bike
| |
| − | | style="background:#fff"| [[File:Mountain Bike HHD Icon.png]]
| |
| − | | style="background:#fff"| 3,380
| |
| − | | style="background:#fff"| 845
| |
| − | | style="background:#fff"| [[Timmy and Tommy's store|Timmy & Tommy]]
| |
| − | | style="background:#fff"| {{green}} / {{yellow]}
| |
| − | | style="background:#fff"| None
| |
| − | | style="background:#fff"| Sporty
| |
| − | | style="background:#fff"| {{medium}}
| |
| − | | style="background:#fff"| -
| |
| − | | style="background:#fff"| Yes
| |
| − | |-
| |
| − | | style="background:#fff"| Kayak
| |
| − | | style="background:#fff"| [[File:Kayak HHD Icon.png]]
| |
| − | | style="background:#fff"| 3,460
| |
| − | | style="background:#fff"| 865
| |
| − | | style="background:#fff"| [[Tent Camper]]
| |
| − | | style="background:#fff"| {{yellow}} / {{yellow}}
| |
| − | | style="background:#fff"| None
| |
| − | | style="background:#fff"| Sporty
| |
| − | | style="background:#fff"| {{medium}}
| |
| − | | style="background:#fff"| -
| |
| − | | style="background:#fff"| No
| |
| − | |-
| |
| − | | style="background:#fff"| Backpack
| |
| − | | style="background:#fff"| [[File:Backpack HHD Icon.png]]
| |
| − | | style="background:#fff"| 1,980
| |
| − | | style="background:#fff"| 495
| |
| − | | style="background:#fff"| [[Tent Camper]]
| |
| − | | style="background:#fff"| {{blue}} / {{brown}}
| |
| − | | style="background:#fff"| None
| |
| − | | style="background:#fff"| Sporty
| |
| − | | style="background:#fff"| {{small}}
| |
| − | | style="background:#fff"| -
| |
| − | | style="background:#fff"| No
| |
| − | |-
| |
| − | | style="background:#fff"| Sleeping Bag
| |
| − | | style="background:#fff"| [[File:Sleeping Bag HHD Icon.png]]
| |
| − | | style="background:#fff"| 1,960
| |
| − | | style="background:#fff"| 490
| |
| − | | style="background:#fff"| [[Tent Camper]]
| |
| − | | style="background:#fff"| {{green}} / {{green}}
| |
| − | | style="background:#fff"| None
| |
| − | | style="background:#fff"| Sporty
| |
| − | | style="background:#fff"| {{medium}}
| |
| − | | style="background:#fff"| -
| |
| − | | style="background:#fff"| No
| |
| − | |-
| |
| − | | style="background:#fff"| Compass
| |
| − | | style="background:#fff"| [[File:Compass HHD Icon.png]]
| |
| − | | style="background:#fff"| 1,280
| |
| − | | style="background:#fff"| 320
| |
| − | | style="background:#fff"| [[Timmy and Tommy's store|Timmy & Tommy]]
| |
| − | | style="background:#fff"| {{gray}} / {{gray}}
| |
| − | | style="background:#fff"| Sci-Fi
| |
| − | | style="background:#fff"| Basic
| |
| − | | style="background:#fff"| {{small}}
| |
| − | | style="background:#fff"| Can place on table
| |
| − | | style="background:#fff"| No
| |
| − | |-
| |
| − | | style="background:#fff"| Lantern
| |
| − | | style="background:#fff"| [[File:Lantern HHD Icon.png]]
| |
| − | | style="background:#fff"| 1,180
| |
| − | | style="background:#fff"| 295
| |
| − | | style="background:#fff"| [[Isabelle]] / [[Timmy and Tommy's store|Timmy & Tommy]]
| |
| − | | style="background:#fff"| {{red}} / {{white}}
| |
| − | | style="background:#fff"| None
| |
| − | | style="background:#fff"| Sporty
| |
| − | | style="background:#fff"| {{small}}
| |
| − | | style="background:#fff"| Lamp, can place on table
| |
| − | | style="background:#fff"| No
| |
| − | |-
| |
| − | | style="background:#fff"| Smoker
| |
| − | | style="background:#fff"| [[File:Smoker HHD Icon.png]]
| |
| − | | style="background:#fff"| 3,000
| |
| − | | style="background:#fff"| 750
| |
| − | | style="background:#fff"| [[Igloo Camper]]
| |
| − | | style="background:#fff"| {{black}} / {{black}}
| |
| − | | style="background:#fff"| None
| |
| − | | style="background:#fff"| Modern
| |
| − | | style="background:#fff"| {{small}}
| |
| − | | style="background:#fff"| -
| |
| − | | style="background:#fff"| No
| |
| − | |-
| |
| − | | style="background:#fff"| Propane Stove
| |
| − | | style="background:#fff"| [[File:Propane Stove HHD Icon.png]]
| |
| − | | style="background:#fff"| 1,470
| |
| − | | style="background:#fff"| 367
| |
| − | | style="background:#fff"| [[Tent Camper]]
| |
| − | | style="background:#fff"| {{gray}} / {{gray}}
| |
| − | | style="background:#fff"| None
| |
| − | | style="background:#fff"| Sporty
| |
| − | | style="background:#fff"| {{small}}
| |
| − | | style="background:#fff"| -
| |
| − | | style="background:#fff"| No
| |
| − | |-
| |
| − | | style="background:#fff"| Camp Stove
| |
| − | | style="background:#fff"| [[File:Camp Stove HHD Icon.png]]
| |
| − | | style="background:#fff"| 1,200
| |
| − | | style="background:#fff"| 300
| |
| − | | style="background:#fff"| [[Igloo Camper]]
| |
| − | | style="background:#fff"| {{black}} / {{yellow}}
| |
| − | | style="background:#fff"| None
| |
| − | | style="background:#fff"| Sporty
| |
| − | | style="background:#fff"| {{small}}
| |
| − | | style="background:#fff"| Can use, can place on table
| |
| − | | style="background:#fff"| No
| |
| − | |-
| |
| − | | style="background:#fff"| Fish Grill
| |
| − | | style="background:#fff"| [[File:Fish Grill HHD Icon.png]]
| |
| − | | style="background:#fff"| 2,800
| |
| − | | style="background:#fff"| 700
| |
| − | | style="background:#fff"| [[Igloo Camper]]
| |
| − | | style="background:#fff"| {{gray}} / {{gray}}
| |
| − | | style="background:#fff"| Harmonious
| |
| − | | style="background:#fff"| Iconic
| |
| − | | style="background:#fff"| {{small}}
| |
| − | | style="background:#fff"| -
| |
| − | | style="background:#fff"| No
| |
| − | |-
| |
| − | | style="background:#fff"| Campfire Cookware
| |
| − | | style="background:#fff"| [[File:Campfire Cookware HHD Icon.png]]
| |
| − | | style="background:#fff"| 800
| |
| − | | style="background:#fff"| 200
| |
| − | | style="background:#fff"| [[Tent Camper]]
| |
| − | | style="background:#fff"| {{black}} / {{brown}}
| |
| − | | style="background:#fff"| None
| |
| − | | style="background:#fff"| Iconic
| |
| − | | style="background:#fff"| {{small}}
| |
| − | | style="background:#fff"| -
| |
| − | | style="background:#fff"| No
| |
| − | |-
| |
| − | | style="background:#fff"| Campfire
| |
| − | | style="background:#fff"| [[File:Campfire HHD Icon.png]]
| |
| − | | style="background:#fff"| 1,360
| |
| − | | style="background:#fff"| 340
| |
| − | | style="background:#fff"| [[Igloo Camper]]
| |
| − | | style="background:#fff"| {{brown}} / {{red}}
| |
| − | | style="background:#fff"| None
| |
| − | | style="background:#fff"| Sporty
| |
| − | | style="background:#fff"| {{small}}
| |
| − | | style="background:#fff"| -
| |
| − | | style="background:#fff"| No
| |
| − | |-
| |
| − | | style="background:#fff"| Bonfire
| |
| − | | style="background:#fff"| [[File:Bonfire HHD Icon.png]]
| |
| − | | style="background:#fff"| 2,240
| |
| − | | style="background:#fff"| 560
| |
| − | | style="background:#fff"| [[Tent Camper]]
| |
| − | | style="background:#fff"| {{brown}} / {{red}}
| |
| − | | style="background:#fff"| None
| |
| − | | style="background:#fff"| Sporty
| |
| − | | style="background:#fff"| {{large}}
| |
| − | | style="background:#fff"| -
| |
| − | | style="background:#fff"| No
| |
| − | |-
| |
| − | | style="background:#fff"| Wave Breaker
| |
| − | | style="background:#fff"| [[File:Wave Breaker HHD Icon.png]]
| |
| − | | style="background:#fff"| 35 medals
| |
| − | | style="background:#fff"| 437 bells
| |
| − | | style="background:#fff"| [[Island]]
| |
| − | | style="background:#fff"| {{gray}} / {{gray}}
| |
| − | | style="background:#fff"| None
| |
| − | | style="background:#fff"| Rock 'n' Roll
| |
| − | | style="background:#fff"| {{large}}
| |
| − | | style="background:#fff"| -
| |
| − | | style="background:#fff"| No
| |
| − | |-
| |
| − | | style="background:#fff"| Surfboard
| |
| − | | style="background:#fff"| [[File:Surfboard HHD Icon.png]]
| |
| − | | style="background:#fff"| 1,400
| |
| − | | style="background:#fff"| 350
| |
| − | | style="background:#fff"| [[Tent Camper]]
| |
| − | | style="background:#fff"| {{aqua}} / {{blue}}
| |
| − | | style="background:#fff"| None
| |
| − | | style="background:#fff"| Sporty
| |
| − | | style="background:#fff"| {{small}}
| |
| − | | style="background:#fff"| -
| |
| − | | style="background:#fff"| Yes
| |
| − | |-
| |
| − | | style="background:#fff"| Beach Chair
| |
| − | | style="background:#fff"| [[File:Beach Chair HHD Icon.png]]
| |
| − | | style="background:#fff"| 35 medals
| |
| − | | style="background:#fff"| 437 bells
| |
| − | | style="background:#fff"| [[Island]]
| |
| − | | style="background:#fff"| {{white}} / {{white}}
| |
| − | | style="background:#fff"| None
| |
| − | | style="background:#fff"| Sporty
| |
| − | | style="background:#fff"| {{medium}}
| |
| − | | style="background:#fff"| -
| |
| − | | style="background:#fff"| No
| |
| − | |-
| |
| − | | style="background:#fff"| Beach Table
| |
| − | | style="background:#fff"| [[File:Beach Table HHD Icon.png]]
| |
| − | | style="background:#fff"| 30 medals
| |
| − | | style="background:#fff"| 375 bells
| |
| − | | style="background:#fff"| [[Island]]
| |
| − | | style="background:#fff"| {{blue}} / {{white}}
| |
| − | | style="background:#fff"| None
| |
| − | | style="background:#fff"| Sporty
| |
| − | | style="background:#fff"| {{small}}
| |
| − | | style="background:#fff"| -
| |
| − | | style="background:#fff"| Yes
| |
| − | |-
| |
| − | | style="background:#fff"| Sea Globe
| |
| − | | style="background:#fff"| [[File:Sea Globe HHD Icon.png]]
| |
| − | | style="background:#fff"| 20 medals
| |
| − | | style="background:#fff"| 250 bells
| |
| − | | style="background:#fff"| [[Club Tortimer]]
| |
| − | | style="background:#fff"| {{aqua}} / {{white}}
| |
| − | | style="background:#fff"| Rustic
| |
| − | | style="background:#fff"| Cute
| |
| − | | style="background:#fff"| {{small}}
| |
| − | | style="background:#fff"| Can place on table
| |
| − | | style="background:#fff"| No
| |
| − | |-
| |
| − | | style="background:#fff"| Diver Dan
| |
| − | | style="background:#fff"| [[File:Diver Dan HHD Icon.png]]
| |
| − | | style="background:#fff"| 60 medals
| |
| − | | style="background:#fff"| 750 bells
| |
| − | | style="background:#fff"| [[Island]]
| |
| − | | style="background:#fff"| {{colorful}} / {{yellow}}
| |
| − | | style="background:#fff"| Sci-Fi
| |
| − | | style="background:#fff"| Sporty
| |
| − | | style="background:#fff"| {{small}}
| |
| − | | style="background:#fff"| -
| |
| − | | style="background:#fff"| No
| |
| − | |-
| |
| − | | style="background:#fff"| Treasure Chest
| |
| − | | style="background:#fff"| [[File:Treasure Chest HHD Icon.png]]
| |
| − | | style="background:#fff"| 150 medals
| |
| − | | style="background:#fff"| 875 bells
| |
| − | | style="background:#fff"| [[Island]]
| |
| − | | style="background:#fff"| {{green}} / {{yellow}}
| |
| − | | style="background:#fff"| Toy Shop
| |
| − | | style="background:#fff"| Historical
| |
| − | | style="background:#fff"| {{small}}
| |
| − | | style="background:#fff"| Can use, can place on table
| |
| − | | style="background:#fff"| No
| |
| − | |-
| |
| − | | style="background:#fff"| Life Preserver
| |
| − | | style="background:#fff"| [[File:Life Preserver HHD Icon.png]]
| |
| − | | style="background:#fff"| 25 medals
| |
| − | | style="background:#fff"| 312 bells
| |
| − | | style="background:#fff"| [[Island]]
| |
| − | | style="background:#fff"| {{aqua}} / {{white}}
| |
| − | | style="background:#fff"| None
| |
| − | | style="background:#fff"| Sporty
| |
| − | | style="background:#fff"| {{small}}
| |
| − | | style="background:#fff"| Wall furniture
| |
| − | | style="background:#fff"| Yes
| |
| − | |-
| |
| − | | style="background:#fff"| Life Ring
| |
| − | | style="background:#fff"| [[File:Life Ring HHD Icon.png]]
| |
| − | | style="background:#fff"| 20 medals
| |
| − | | style="background:#fff"| 250 bells
| |
| − | | style="background:#fff"| [[Island]]
| |
| − | | style="background:#fff"| {{red}} / {{white}}
| |
| − | | style="background:#fff"| None
| |
| − | | style="background:#fff"| Sporty
| |
| − | | style="background:#fff"| {{small}}
| |
| − | | style="background:#fff"| -
| |
| − | | style="background:#fff"| Yes
| |
| − | |-
| |
| − | | style="background:#fff"| Notebook Wardrobe
| |
| − | | style="background:#fff"| [[File:Notebook Wardrobe HHD Icon.png]]
| |
| − | | style="background:#fff"| 23,760
| |
| − | | style="background:#fff"| 5,940
| |
| − | | style="background:#fff"| [[DLC]]
| |
| − | | style="background:#fff"| ??? / {{pink}}
| |
| − | | style="background:#fff"| Trendy
| |
| − | | style="background:#fff"| ???
| |
| − | | style="background:#fff"| {{small}}
| |
| − | | style="background:#fff"| Storage
| |
| − | | style="background:#fff"| Yes
| |
| − | |-
| |
| − | | style="background:#fff"| Eraser Sofa
| |
| − | | style="background:#fff"| [[File:Eraser Sofa HHD Icon.png]]
| |
| − | | style="background:#fff"| 23,760
| |
| − | | style="background:#fff"| 5,940
| |
| − | | style="background:#fff"| [[DLC]]
| |
| − | | style="background:#fff"| {{white}} / {{white}}
| |
| − | | style="background:#fff"| Trendy
| |
| − | | style="background:#fff"| ???
| |
| − | | style="background:#fff"| {{medium}}
| |
| − | | style="background:#fff"| Chair
| |
| − | | style="background:#fff"| Yes
| |
| − | |-
| |
| − | | style="background:#fff"| Notebook Bed
| |
| − | | style="background:#fff"| [[File:Notebook Bed HHD Icon.png]]
| |
| − | | style="background:#fff"| 23,760
| |
| − | | style="background:#fff"| 5,940
| |
| − | | style="background:#fff"| [[DLC]]
| |
| − | | style="background:#fff"| ??? / {{pink}}
| |
| − | | style="background:#fff"| Trendy
| |
| − | | style="background:#fff"| ???
| |
| − | | style="background:#fff"| {{medium}}
| |
| − | | style="background:#fff"| Bed
| |
| − | | style="background:#fff"| Yes
| |
| − | |-
| |
| − | | style="background:#fff"| Pencil Screen
| |
| − | | style="background:#fff"| [[File:Pencil Screen HHD Icon.png]]
| |
| − | | style="background:#fff"| 23,760
| |
| − | | style="background:#fff"| 5,940
| |
| − | | style="background:#fff"| [[DLC]]
| |
| − | | style="background:#fff"| ??? / ???
| |
| − | | style="background:#fff"| Trendy
| |
| − | | style="background:#fff"| ???
| |
| − | | style="background:#fff"| {{medium}}
| |
| − | | style="background:#fff"| -
| |
| − | | style="background:#fff"| No
| |
| − | |-
| |
| − | | style="background:#fff"| Sticker Tape Liner
| |
| − | | style="background:#fff"| [[File:Sticker Tape Liner HHD Icon.png]]
| |
| − | | style="background:#fff"| 23,760
| |
| − | | style="background:#fff"| 5,940
| |
| − | | style="background:#fff"| [[DLC]]
| |
| − | | style="background:#fff"| ??? / {{blue}}
| |
| − | | style="background:#fff"| Trendy
| |
| − | | style="background:#fff"| ???
| |
| − | | style="background:#fff"| {{small}}
| |
| − | | style="background:#fff"| -
| |
| − | | style="background:#fff"| Yes
| |
| − | |-
| |
| − | | style="background:#fff"| Set Square Table
| |
| − | | style="background:#fff"| [[File:Set Square Table HHD Icon.png]]
| |
| − | | style="background:#fff"| 23,760
| |
| − | | style="background:#fff"| 5,940
| |
| − | | style="background:#fff"| [[DLC]]
| |
| − | | style="background:#fff"| ??? / ???
| |
| − | | style="background:#fff"| Trendy
| |
| − | | style="background:#fff"| ???
| |
| − | | style="background:#fff"| {{large}}
| |
| − | | style="background:#fff"| Table
| |
| − | | style="background:#fff"| No
| |
| − | |-
| |
| − | | style="background:#fff"| Whiteboard
| |
| − | | style="background:#fff"| [[File:Whiteboard HHD Icon.png]]
| |
| − | | style="background:#fff"| 1,800
| |
| − | | style="background:#fff"| 450
| |
| − | | style="background:#fff"| [[Timmy and Tommy's store|Timmy & Tommy]]
| |
| − | | style="background:#fff"| {{gray}} / {{white}}
| |
| − | | style="background:#fff"| Sci-Fi
| |
| − | | style="background:#fff"| Official
| |
| − | | style="background:#fff"| {{medium}}
| |
| − | | style="background:#fff"| -
| |
| − | | style="background:#fff"| Yes
| |
| − | |-
| |
| − | | style="background:#fff"| Microscope
| |
| − | | style="background:#fff"| [[File:Microscope HHD Icon.png]]
| |
| − | | style="background:#fff"| 1,600
| |
| − | | style="background:#fff"| 400
| |
| − | | style="background:#fff"| [[Timmy and Tommy's store|Timmy & Tommy]]
| |
| − | | style="background:#fff"| {{white}} / {{white}}
| |
| − | | style="background:#fff"| Sci-Fi
| |
| − | | style="background:#fff"| Basic
| |
| − | | style="background:#fff"| {{small}}
| |
| − | | style="background:#fff"| Can place on table
| |
| − | | style="background:#fff"| No
| |
| − | |-
| |
| − | | style="background:#fff"| Drinking Fountain
| |
| − | | style="background:#fff"| [[File:Drinking Fountain HHD Icon.png]]
| |
| − | | style="background:#fff"| 2,000
| |
| − | | style="background:#fff"| 500
| |
| − | | style="background:#fff"| [[Timmy and Tommy's store|Timmy & Tommy]]
| |
| − | | style="background:#fff"| {{gray}} / {{gray}}
| |
| − | | style="background:#fff"| Sci-Fi
| |
| − | | style="background:#fff"| Modern
| |
| − | | style="background:#fff"| {{small}}
| |
| − | | style="background:#fff"| Can use
| |
| − | | style="background:#fff"| No
| |
| − | |-
| |
| − | | style="background:#fff"| School Speaker
| |
| − | | style="background:#fff"| [[File:School Speaker HHD Icon.png]]
| |
| − | | style="background:#fff"| 1,600
| |
| − | | style="background:#fff"| 400
| |
| − | | style="background:#fff"| [[Timmy and Tommy's store|Timmy & Tommy]]
| |
| − | | style="background:#fff"| {{brown}} / {{gray}}
| |
| − | | style="background:#fff"| Sci-Fi
| |
| − | | style="background:#fff"| Iconic
| |
| − | | style="background:#fff"| {{small}}
| |
| − | | style="background:#fff"| Wall furniture
| |
| − | | style="background:#fff"| No
| |
| − | |-
| |
| − | | style="background:#fff"| Blue Certificate
| |
| − | | style="background:#fff"| [[File:Blue Certificate HHD Icon.png]]
| |
| − | | style="background:#fff"| 960
| |
| − | | style="background:#fff"| 240
| |
| − | | style="background:#fff"| [[Timmy and Tommy's store|Timmy & Tommy]]
| |
| − | | style="background:#fff"| {{brown}} / {{white}}
| |
| − | | style="background:#fff"| None
| |
| − | | style="background:#fff"| Iconic
| |
| − | | style="background:#fff"| {{small}}
| |
| − | | style="background:#fff"| Wall furniture
| |
| − | | style="background:#fff"| No
| |
| − | |-
| |
| − | | style="background:#fff"| Yellow Certificate
| |
| − | | style="background:#fff"| [[File:Yellow Certificate HHD Icon.png]]
| |
| − | | style="background:#fff"| 960
| |
| − | | style="background:#fff"| 240
| |
| − | | style="background:#fff"| [[Timmy and Tommy's store|Timmy & Tommy]]
| |
| − | | style="background:#fff"| {{brown}} / {{white}}
| |
| − | | style="background:#fff"| None
| |
| − | | style="background:#fff"| Iconic
| |
| − | | style="background:#fff"| {{small}}
| |
| − | | style="background:#fff"| Wall furniture
| |
| − | | style="background:#fff"| No
| |
| − | |-
| |
| − | | style="background:#fff"| Metronome
| |
| − | | style="background:#fff"| [[File:Metronome HHD Icon.png]]
| |
| − | | style="background:#fff"| 1,000
| |
| − | | style="background:#fff"| 250
| |
| − | | style="background:#fff"| [[Timmy and Tommy's store|Timmy & Tommy]]
| |
| − | | style="background:#fff"| {{red}} / {{red}}
| |
| − | | style="background:#fff"| None
| |
| − | | style="background:#fff"| Basic
| |
| − | | style="background:#fff"| {{small}}
| |
| − | | style="background:#fff"| Usable
| |
| − | | style="background:#fff"| No
| |
| − | |-
| |
| − | | style="background:#fff"| Mic Stand
| |
| − | | style="background:#fff"| [[File:Mic Stand HHD Icon.png]]
| |
| − | | style="background:#fff"| 1,800
| |
| − | | style="background:#fff"| 450
| |
| − | | style="background:#fff"| [[Timmy and Tommy's store|Timmy & Tommy]]
| |
| − | | style="background:#fff"| {{gray}} / {{black}}
| |
| − | | style="background:#fff"| None
| |
| − | | style="background:#fff"| Rock 'n' Roll
| |
| − | | style="background:#fff"| {{small}}
| |
| − | | style="background:#fff"| -
| |
| − | | style="background:#fff"| No
| |
| − | |-
| |
| − | | style="background:#fff"| Music Stand
| |
| − | | style="background:#fff"| [[File:Music Stand HHD Icon.png]]
| |
| − | | style="background:#fff"| 1,280
| |
| − | | style="background:#fff"| 320
| |
| − | | style="background:#fff"| [[Timmy and Tommy's store|Timmy & Tommy]]
| |
| − | | style="background:#fff"| {{brown}} / {{white}}
| |
| − | | style="background:#fff"| None
| |
| − | | style="background:#fff"| Basic
| |
| − | | style="background:#fff"| {{small}}
| |
| − | | style="background:#fff"| -
| |
| − | | style="background:#fff"| No
| |
| − | |-
| |
| − | | style="background:#fff"| Double-Neck Guitar
| |
| − | | style="background:#fff"| [[File:Double-Neck Guitar HHD Icon.png]]
| |
| − | | style="background:#fff"| 2,800
| |
| − | | style="background:#fff"| 700
| |
| − | | style="background:#fff"| [[DLC]]
| |
| − | | style="background:#fff"| {{yellow}} / {{yellow}}
| |
| − | | style="background:#fff"| Trendy
| |
| − | | style="background:#fff"| ???
| |
| − | | style="background:#fff"| {{small}}
| |
| − | | style="background:#fff"| Can use
| |
| − | | style="background:#fff"| Yes
| |
| − | |-
| |
| − | | style="background:#fff"| Amp
| |
| − | | style="background:#fff"| [[File:Amp HHD Icon.png]]
| |
| − | | style="background:#fff"| 2,400
| |
| − | | style="background:#fff"| 600
| |
| − | | style="background:#fff"| [[Timmy and Tommy's store|Timmy & Tommy]]
| |
| − | | style="background:#fff"| {{black}} / {{black}}
| |
| − | | style="background:#fff"| Sci-Fi
| |
| − | | style="background:#fff"| Rock 'n' Roll
| |
| − | | style="background:#fff"| {{small}}
| |
| − | | style="background:#fff"| -
| |
| − | | style="background:#fff"| No
| |
| − | |-
| |
| − | | style="background:#fff"| Effects Rack
| |
| − | | style="background:#fff"| [[File:Effects Rack HHD Icon.png]]
| |
| − | | style="background:#fff"| 2,800
| |
| − | | style="background:#fff"| 700
| |
| − | | style="background:#fff"| [[Timmy and Tommy's store|Timmy & Tommy]]
| |
| − | | style="background:#fff"| {{black}} / {{black}}
| |
| − | | style="background:#fff"| Sci-Fi
| |
| − | | style="background:#fff"| Rock 'n' Roll
| |
| − | | style="background:#fff"| {{small}}
| |
| − | | style="background:#fff"| Table
| |
| − | | style="background:#fff"| No
| |
| − | |-
| |
| − | | style="background:#fff"| Record Player
| |
| − | | style="background:#fff"| [[File:Record Player HHD Icon.png]]
| |
| − | | style="background:#fff"| 1,400
| |
| − | | style="background:#fff"| 350
| |
| − | | style="background:#fff"| [[Timmy and Tommy's store|Timmy & Tommy]]
| |
| − | | style="background:#fff"| {{black}} / {{black}}
| |
| − | | style="background:#fff"| None
| |
| − | | style="background:#fff"| Historical
| |
| − | | style="background:#fff"| {{small}}
| |
| − | | style="background:#fff"| Stereo, can place on table
| |
| − | | style="background:#fff"| No
| |
| − | |-
| |
| − | | style="background:#fff"| DJ's Turntable
| |
| − | | style="background:#fff"| [[File:DJ's Turntable HHD Icon.png]]
| |
| − | | style="background:#fff"| 3,600
| |
| − | | style="background:#fff"| 900
| |
| − | | style="background:#fff"| [[Timmy and Tommy's store|Timmy & Tommy]]
| |
| − | | style="background:#fff"| {{black}} / {{gray}}
| |
| − | | style="background:#fff"| Trendy
| |
| − | | style="background:#fff"| Rock 'n' Roll
| |
| − | | style="background:#fff"| {{medium}}
| |
| − | | style="background:#fff"| Stereo
| |
| − | | style="background:#fff"| No
| |
| − | |-
| |
| − | | style="background:#fff"| Wall-Mounted Speaker
| |
| − | | style="background:#fff"| [[File:Wall-Mounted Speaker HHD Icon.png]]
| |
| − | | style="background:#fff"| 1,600
| |
| − | | style="background:#fff"| 400
| |
| − | | style="background:#fff"| [[Timmy and Tommy's store|Timmy & Tommy]]
| |
| − | | style="background:#fff"| {{black}} / {{white}}
| |
| − | | style="background:#fff"| Trendy<br>Sci-Fi
| |
| − | | style="background:#fff"| Rock 'n' Roll
| |
| − | | style="background:#fff"| {{small}}
| |
| − | | style="background:#fff"| Wall furniture
| |
| − | | style="background:#fff"| No
| |
| − | |-
| |
| − | | style="background:#fff"| Stepladder
| |
| − | | style="background:#fff"| [[File:Stepladder HHD Icon.png]]
| |
| − | | style="background:#fff"| 1,200
| |
| − | | style="background:#fff"| 300
| |
| − | | style="background:#fff"| [[Timmy and Tommy's store|Timmy & Tommy]]
| |
| − | | style="background:#fff"| {{gray}} / {{gray}}
| |
| − | | style="background:#fff"| None
| |
| − | | style="background:#fff"| Basic
| |
| − | | style="background:#fff"| {{small}}
| |
| − | | style="background:#fff"| -
| |
| − | | style="background:#fff"| No
| |
| − | |-
| |
| − | | style="background:#fff"| Cardboard Table
| |
| − | | style="background:#fff"| [[File:Cardboard Table HHD Icon.png]]
| |
| − | | style="background:#fff"| -
| |
| − | | style="background:#fff"| 240
| |
| − | | style="background:#fff"| [[Re-Tail]] / [[Police Station]]
| |
| − | | style="background:#fff"| {{brown}} / {{brown}}
| |
| − | | style="background:#fff"| Quirky
| |
| − | | style="background:#fff"| Flashy
| |
| − | | style="background:#fff"| {{large}}
| |
| − | | style="background:#fff"| Table
| |
| − | | style="background:#fff"| No
| |
| − | |-
| |
| − | | style="background:#fff"| Cardboard Chair
| |
| − | | style="background:#fff"| [[File:Cardboard Chair HHD Icon.png]]
| |
| − | | style="background:#fff"| -
| |
| − | | style="background:#fff"| 200
| |
| − | | style="background:#fff"| [[Re-Tail]] / [[Police Station]]
| |
| − | | style="background:#fff"| {{brown}} / {{brown}}
| |
| − | | style="background:#fff"| Quirky
| |
| − | | style="background:#fff"| Flashy
| |
| − | | style="background:#fff"| {{small}}
| |
| − | | style="background:#fff"| Chair
| |
| − | | style="background:#fff"| No
| |
| − | |-
| |
| − | | style="background:#fff"| Cardboard Sofa
| |
| − | | style="background:#fff"| [[File:Cardboard Sofa HHD Icon.png]]
| |
| − | | style="background:#fff"| -
| |
| − | | style="background:#fff"| 240
| |
| − | | style="background:#fff"| [[Re-Tail]] / [[Police Station]]
| |
| − | | style="background:#fff"| {{brown}} / {{brown}}
| |
| − | | style="background:#fff"| Quirky
| |
| − | | style="background:#fff"| Flashy
| |
| − | | style="background:#fff"| {{medium}}
| |
| − | | style="background:#fff"| Chair
| |
| − | | style="background:#fff"| No
| |
| − | |-
| |
| − | | style="background:#fff"| Cardboard Closet
| |
| − | | style="background:#fff"| [[File:Cardboard Closet HHD Icon.png]]
| |
| − | | style="background:#fff"| -
| |
| − | | style="background:#fff"| 230
| |
| − | | style="background:#fff"| [[Re-Tail]] / [[Police Station]]
| |
| − | | style="background:#fff"| {{brown}} / {{brown}}
| |
| − | | style="background:#fff"| Quirky
| |
| − | | style="background:#fff"| Flashy
| |
| − | | style="background:#fff"| {{small}}
| |
| − | | style="background:#fff"| Storage
| |
| − | | style="background:#fff"| No
| |
| − | |-
| |
| − | | style="background:#fff"| Cardboard Bed
| |
| − | | style="background:#fff"| [[File:Cardboard Bed HHD Icon.png]]
| |
| − | | style="background:#fff"| -
| |
| − | | style="background:#fff"| 250
| |
| − | | style="background:#fff"| [[Re-Tail]] / [[Police Station]]
| |
| − | | style="background:#fff"| {{brown}} / {{brown}}
| |
| − | | style="background:#fff"| Quirky
| |
| − | | style="background:#fff"| Flashy
| |
| − | | style="background:#fff"| {{medium}}
| |
| − | | style="background:#fff"| Bed
| |
| − | | style="background:#fff"| No
| |
| − | |-
| |
| − | | style="background:#fff"| Cardboard Box
| |
| − | | style="background:#fff"| [[File:Cardboard Box HHD Icon.png]]
| |
| − | | style="background:#fff"| 100
| |
| − | | style="background:#fff"| 25
| |
| − | | style="background:#fff"| [[Timmy and Tommy's store|Timmy & Tommy]]
| |
| − | | style="background:#fff"| {{brown}} / {{brown}}
| |
| − | | style="background:#fff"| None
| |
| − | | style="background:#fff"| Flashy
| |
| − | | style="background:#fff"| {{small}}
| |
| − | | style="background:#fff"| Table
| |
| − | | style="background:#fff"| Yes
| |
| − | |-
| |
| − | | style="background:#fff"| Wooden Box
| |
| − | | style="background:#fff"| [[File:Wooden Box HHD Icon.png]]
| |
| − | | style="background:#fff"| 200
| |
| − | | style="background:#fff"| 50
| |
| − | | style="background:#fff"| [[Timmy and Tommy's store|Timmy & Tommy]]
| |
| − | | style="background:#fff"| {{brown}} / {{brown}}
| |
| − | | style="background:#fff"| None
| |
| − | | style="background:#fff"| Basic
| |
| − | | style="background:#fff"| {{small}}
| |
| − | | style="background:#fff"| Table
| |
| − | | style="background:#fff"| No
| |
| − | |-
| |
| − | | style="background:#fff"| Corkboard
| |
| − | | style="background:#fff"| [[File:Corkboard HHD Icon.png]]
| |
| − | | style="background:#fff"| 1,600
| |
| − | | style="background:#fff"| 400
| |
| − | | style="background:#fff"| [[Timmy and Tommy's store|Timmy & Tommy]]
| |
| − | | style="background:#fff"| {{brown}} / {{orange}}
| |
| − | | style="background:#fff"| Trendy<br>Sci-Fi
| |
| − | | style="background:#fff"| Basic
| |
| − | | style="background:#fff"| {{medium}}
| |
| − | | style="background:#fff"| Wall furniture
| |
| − | | style="background:#fff"| Yes
| |
| − | |-
| |
| − | | style="background:#fff"| Cool Globe
| |
| − | | style="background:#fff"| [[File:Cool Globe HHD Icon.png]]
| |
| − | | style="background:#fff"| -
| |
| − | | style="background:#fff"| 1,200
| |
| − | | style="background:#fff"| [[Nature Day]] (NA)
| |
| − | | style="background:#fff"| {{brown}} / {{brown}}
| |
| − | | style="background:#fff"| Antique<br>Sci-Fi
| |
| − | | style="background:#fff"| Modern
| |
| − | | style="background:#fff"| {{small}}
| |
| − | | style="background:#fff"| -
| |
| − | | style="background:#fff"| No
| |
| − | |-
| |
| − | | style="background:#fff"| Letter Set
| |
| − | | style="background:#fff"| [[File:Letter Set HHD Icon.png]]
| |
| − | | style="background:#fff"| -
| |
| − | | style="background:#fff"| 300
| |
| − | | style="background:#fff"| [[Savings]]
| |
| − | | style="background:#fff"| None / None
| |
| − | | style="background:#fff"| None
| |
| − | | style="background:#fff"| Basic
| |
| − | | style="background:#fff"| {{small}}
| |
| − | | style="background:#fff"| Can place on table, can't recycle
| |
| − | | style="background:#fff"| No
| |
| − | |-
| |
| − | | style="background:#fff"| Typewriter
| |
| − | | style="background:#fff"| [[File:Typewriter HHD Icon.png]]
| |
| − | | style="background:#fff"| 2,400
| |
| − | | style="background:#fff"| 600
| |
| − | | style="background:#fff"| [[Timmy and Tommy's store|Timmy & Tommy]]
| |
| − | | style="background:#fff"| {{black}} / {{white}}
| |
| − | | style="background:#fff"| None
| |
| − | | style="background:#fff"| Historical
| |
| − | | style="background:#fff"| {{small}}
| |
| − | | style="background:#fff"| Can use, can place on table
| |
| − | | style="background:#fff"| No
| |
| − | |-
| |
| − | | style="background:#fff"| Editor's Chair
| |
| − | | style="background:#fff"| [[File:Editor's Chair HHD Icon.png]]
| |
| − | | style="background:#fff"| 5,600
| |
| − | | style="background:#fff"| 1,400
| |
| − | | style="background:#fff"| [[Timmy and Tommy's store|Timmy & Tommy]]
| |
| − | | style="background:#fff"| {{black}} / {{black}}
| |
| − | | style="background:#fff"| Trendy
| |
| − | | style="background:#fff"| Official
| |
| − | | style="background:#fff"| {{small}}
| |
| − | | style="background:#fff"| Chair
| |
| − | | style="background:#fff"| No
| |
| − | |-
| |
| − | | style="background:#fff"| Editor's Desk
| |
| − | | style="background:#fff"| [[File:Editor's Desk HHD Icon.png]]
| |
| − | | style="background:#fff"| 5,200
| |
| − | | style="background:#fff"| 1,300
| |
| − | | style="background:#fff"| [[Timmy and Tommy's store|Timmy & Tommy]]
| |
| − | | style="background:#fff"| {{brown}} / {{brown}}
| |
| − | | style="background:#fff"| Trendy
| |
| − | | style="background:#fff"| Official
| |
| − | | style="background:#fff"| {{medium}}
| |
| − | | style="background:#fff"| -
| |
| − | | style="background:#fff"| No
| |
| − | |-
| |
| − | | style="background:#fff"| Executive Toy
| |
| − | | style="background:#fff"| [[File:Executive Toy HHD Icon.png]]
| |
| − | | style="background:#fff"| 1,100
| |
| − | | style="background:#fff"| 275
| |
| − | | style="background:#fff"| [[Timmy and Tommy's store|Timmy & Tommy]]
| |
| − | | style="background:#fff"| {{red}} / {{red}}
| |
| − | | style="background:#fff"| Trendy<br>Toy Shop
| |
| − | | style="background:#fff"| Cute
| |
| − | | style="background:#fff"| {{small}}
| |
| − | | style="background:#fff"| Can place on table
| |
| − | | style="background:#fff"| Yes
| |
| − | |-
| |
| − | | style="background:#fff"| Bottled Ship
| |
| − | | style="background:#fff"| [[File:Bottled Ship HHD Icon.png]]
| |
| − | | style="background:#fff"| 60 medals
| |
| − | | style="background:#fff"| 750
| |
| − | | style="background:#fff"| [[Club Tortimer]]
| |
| − | | style="background:#fff"| {{brown}} / {{gray}}
| |
| − | | style="background:#fff"| Toy Shop
| |
| − | | style="background:#fff"| Iconic
| |
| − | | style="background:#fff"| {{small}}
| |
| − | | style="background:#fff"| Can place on table
| |
| − | | style="background:#fff"| No
| |
| − | |-
| |
| − | | style="background:#fff"| Telescope
| |
| − | | style="background:#fff"| [[File:Telescope HHD Icon.png]]
| |
| − | | style="background:#fff"| 5,800
| |
| − | | style="background:#fff"| 1,450
| |
| − | | style="background:#fff"| [[Timmy and Tommy's store|Timmy & Tommy]]
| |
| − | | style="background:#fff"| {{black}} / {{white}}
| |
| − | | style="background:#fff"| Sci-Fi<br>Toy Shop
| |
| − | | style="background:#fff"| Sporty
| |
| − | | style="background:#fff"| {{small}}
| |
| − | | style="background:#fff"| -
| |
| − | | style="background:#fff"| No
| |
| − | |-
| |
| − | | style="background:#fff"| Star Globe
| |
| − | | style="background:#fff"| [[File:Star Globe HHD Icon.png]]
| |
| − | | style="background:#fff"| 2,400
| |
| − | | style="background:#fff"| 600
| |
| − | | style="background:#fff"| [[Timmy and Tommy's store|Timmy & Tommy]]
| |
| − | | style="background:#fff"| {{blue}} / {{gray}}
| |
| − | | style="background:#fff"| Sci-Fi
| |
| − | | style="background:#fff"| Official
| |
| − | | style="background:#fff"| {{small}}
| |
| − | | style="background:#fff"| Can use, can place on table
| |
| − | | style="background:#fff"| No
| |
| − | |-
| |
| − | | style="background:#fff"| Star Projector
| |
| − | | style="background:#fff"| [[File:Star Projector HHD Icon.png]]
| |
| − | | style="background:#fff"| 2,400
| |
| − | | style="background:#fff"| 600
| |
| − | | style="background:#fff"| [[Timmy and Tommy's store|Timmy & Tommy]]
| |
| − | | style="background:#fff"| {{black}} / {{black}}
| |
| − | | style="background:#fff"| Sci-Fi
| |
| − | | style="background:#fff"| Modern
| |
| − | | style="background:#fff"| {{large}}
| |
| − | | style="background:#fff"| -
| |
| − | | style="background:#fff"| No
| |
| − | |-
| |
| − | | style="background:#fff"| Computer Desk
| |
| − | | style="background:#fff"| [[File:Computer Desk HHD Icon.png]]
| |
| − | | style="background:#fff"| 3,600
| |
| − | | style="background:#fff"| 900
| |
| − | | style="background:#fff"| [[Timmy and Tommy's store|Timmy & Tommy]]
| |
| − | | style="background:#fff"| {{black}} / {{white}}
| |
| − | | style="background:#fff"| Trendy<br>Sci-Fi
| |
| − | | style="background:#fff"| Official
| |
| − | | style="background:#fff"| {{small}}
| |
| − | | style="background:#fff"| Can use
| |
| − | | style="background:#fff"| No
| |
| − | |-
| |
| − | | style="background:#fff"| Laptop
| |
| − | | style="background:#fff"| [[File:Laptop HHD Icon.png]]
| |
| − | | style="background:#fff"| 2,000
| |
| − | | style="background:#fff"| 500
| |
| − | | style="background:#fff"| [[Timmy and Tommy's store|Timmy & Tommy]]
| |
| − | | style="background:#fff"| {{white}} / {{white}}
| |
| − | | style="background:#fff"| Trendy<br>Sci-Fi
| |
| − | | style="background:#fff"| Modern
| |
| − | | style="background:#fff"| {{small}}
| |
| − | | style="background:#fff"| Can use, can place on table
| |
| − | | style="background:#fff"| Yes
| |
| − | |-
| |
| − | | style="background:#fff"| Server
| |
| − | | style="background:#fff"| [[File:Server HHD Icon.png]]
| |
| − | | style="background:#fff"| 3,400
| |
| − | | style="background:#fff"| 850
| |
| − | | style="background:#fff"| [[Timmy and Tommy's store|Timmy & Tommy]]
| |
| − | | style="background:#fff"| {{black}} / {{white}}
| |
| − | | style="background:#fff"| Sci-Fi
| |
| − | | style="background:#fff"| Modern
| |
| − | | style="background:#fff"| {{small}}
| |
| − | | style="background:#fff"| -
| |
| − | | style="background:#fff"| No
| |
| − | |-
| |
| − | | style="background:#fff"| Breaker
| |
| − | | style="background:#fff"| [[File:Breaker HHD Icon.png]]
| |
| − | | style="background:#fff"| 800
| |
| − | | style="background:#fff"| 200
| |
| − | | style="background:#fff"| [[Timmy and Tommy's store|Timmy & Tommy]]
| |
| − | | style="background:#fff"| {{white}} / {{white}}
| |
| − | | style="background:#fff"| Sci-Fi
| |
| − | | style="background:#fff"| Basic
| |
| − | | style="background:#fff"| {{small}}
| |
| − | | style="background:#fff"| Wall furniture
| |
| − | | style="background:#fff"| No
| |
| − | |-
| |
| − | | style="background:#fff"| Copy Machine
| |
| − | | style="background:#fff"| [[File:Copy Machine HHD Icon.png]]
| |
| − | | style="background:#fff"| 3,200
| |
| − | | style="background:#fff"| 800
| |
| − | | style="background:#fff"| [[Timmy and Tommy's store|Timmy & Tommy]]
| |
| − | | style="background:#fff"| {{white}} / {{white}}
| |
| − | | style="background:#fff"| Sci-Fi
| |
| − | | style="background:#fff"| Modern
| |
| − | | style="background:#fff"| {{medium}}
| |
| − | | style="background:#fff"| Can use
| |
| − | | style="background:#fff"| Yes
| |
| − | |-
| |
| − | | style="background:#fff"| Time Clock
| |
| − | | style="background:#fff"| [[File:Time Clock HHD Icon.png]]
| |
| − | | style="background:#fff"| 1,800
| |
| − | | style="background:#fff"| 450
| |
| − | | style="background:#fff"| [[Timmy and Tommy's store|Timmy & Tommy]]
| |
| − | | style="background:#fff"| {{black}} / {{white}}
| |
| − | | style="background:#fff"| Sci-Fi
| |
| − | | style="background:#fff"| Modern
| |
| − | | style="background:#fff"| {{small}}
| |
| − | | style="background:#fff"| Can use, can place on table
| |
| − | | style="background:#fff"| No
| |
| − | |-
| |
| − | | style="background:#fff"| Partition Screen
| |
| − | | style="background:#fff"| [[File:Partition Screen HHD Icon.png]]
| |
| − | | style="background:#fff"| 1,600
| |
| − | | style="background:#fff"| 400
| |
| − | | style="background:#fff"| [[Timmy and Tommy's store|Timmy & Tommy]]
| |
| − | | style="background:#fff"| {{gray}} / {{gray}}
| |
| − | | style="background:#fff"| Trendy
| |
| − | | style="background:#fff"| Iconic
| |
| − | | style="background:#fff"| {{medium}}
| |
| − | | style="background:#fff"| -
| |
| − | | style="background:#fff"| No
| |
| − | |-
| |
| − | | style="background:#fff"| Water Cooler
| |
| − | | style="background:#fff"| [[File:Water Cooler HHD Icon.png]]
| |
| − | | style="background:#fff"| 2,200
| |
| − | | style="background:#fff"| 550
| |
| − | | style="background:#fff"| [[Timmy and Tommy's store|Timmy & Tommy]]
| |
| − | | style="background:#fff"| {{aqua}} / {{white}}
| |
| − | | style="background:#fff"| Trendy<br>Sci-Fi
| |
| − | | style="background:#fff"| Basic
| |
| − | | style="background:#fff"| {{small}}
| |
| − | | style="background:#fff"| Can use
| |
| − | | style="background:#fff"| No
| |
| − | |-
| |
| − | | style="background:#fff"| Shopping Cart
| |
| − | | style="background:#fff"| [[File:Shopping Cart HHD Icon.png]]
| |
| − | | style="background:#fff"| 3,980
| |
| − | | style="background:#fff"| 995
| |
| − | | style="background:#fff"| [[Spotlight]] / [[Wishy]]
| |
| − | | style="background:#fff"| {{gray}} / {{gray}}
| |
| − | | style="background:#fff"| None
| |
| − | | style="background:#fff"| Basic
| |
| − | | style="background:#fff"| {{small}}
| |
| − | | style="background:#fff"| -
| |
| − | | style="background:#fff"| No
| |
| − | |-
| |
| − | | style="background:#fff"| Soda Fountain
| |
| − | | style="background:#fff"| [[File:Soda Fountain HHD Icon.png]]
| |
| − | | style="background:#fff"| 2,400
| |
| − | | style="background:#fff"| 600
| |
| − | | style="background:#fff"| [[Timmy and Tommy's store|Timmy & Tommy]]
| |
| − | | style="background:#fff"| {{colorful}} / {{gray}}
| |
| − | | style="background:#fff"| None
| |
| − | | style="background:#fff"| Basic
| |
| − | | style="background:#fff"| {{small}}
| |
| − | | style="background:#fff"| Can use
| |
| − | | style="background:#fff"| No
| |
| − | |-
| |
| − | | style="background:#fff"| Slushie Machine
| |
| − | | style="background:#fff"| [[File:Slushie Machine HHD Icon.png]]
| |
| − | | style="background:#fff"| 2,400
| |
| − | | style="background:#fff"| 600
| |
| − | | style="background:#fff"| [[DLC]]
| |
| − | | style="background:#fff"| {{colorful}} / {{gray}}
| |
| − | | style="background:#fff"| None
| |
| − | | style="background:#fff"| ???
| |
| − | | style="background:#fff"| {{small}}
| |
| − | | style="background:#fff"| -
| |
| − | | style="background:#fff"| No
| |
| − | |-
| |
| − | | style="background:#fff"| Soda Case
| |
| − | | style="background:#fff"| [[File:Soda Case HHD Icon.png]]
| |
| − | | style="background:#fff"| 1,800
| |
| − | | style="background:#fff"| 450
| |
| − | | style="background:#fff"| [[Timmy and Tommy's store|Timmy & Tommy]]
| |
| − | | style="background:#fff"| {{colorful}} / {{gray}}
| |
| − | | style="background:#fff"| None
| |
| − | | style="background:#fff"| Cute
| |
| − | | style="background:#fff"| {{small}}
| |
| − | | style="background:#fff"| -
| |
| − | | style="background:#fff"| No
| |
| − | |-
| |
| − | | style="background:#fff"| Salad Bar
| |
| − | | style="background:#fff"| [[File:Salad Bar HHD Icon.png]]
| |
| − | | style="background:#fff"| 3,000
| |
| − | | style="background:#fff"| 750
| |
| − | | style="background:#fff"| [[Timmy and Tommy's store|Timmy & Tommy]]
| |
| − | | style="background:#fff"| {{brown}} / {{gray}}
| |
| − | | style="background:#fff"| None
| |
| − | | style="background:#fff"| Modern
| |
| − | | style="background:#fff"| {{medium}}
| |
| − | | style="background:#fff"| -
| |
| − | | style="background:#fff"| No
| |
| − | |-
| |
| − | | style="background:#fff"| Conveyor-Belt Sushi
| |
| − | | style="background:#fff"| [[File:Conveyor-Belt Sushi HHD Icon.png]]
| |
| − | | style="background:#fff"| 3,600
| |
| − | | style="background:#fff"| 900
| |
| − | | style="background:#fff"| [[Timmy and Tommy's store|Timmy & Tommy]]
| |
| − | | style="background:#fff"| {{colorful}} / {{gray}}
| |
| − | | style="background:#fff"| Harmonious
| |
| − | | style="background:#fff"| Modern
| |
| − | | style="background:#fff"| {{large}}
| |
| − | | style="background:#fff"| -
| |
| − | | style="background:#fff"| Yes
| |
| − | |-
| |
| − | | style="background:#fff"| Neon Sign
| |
| − | | style="background:#fff"| [[File:Neon Sign HHD Icon.png]]
| |
| − | | style="background:#fff"| 2,400
| |
| − | | style="background:#fff"| 600
| |
| − | | style="background:#fff"| [[Timmy and Tommy's store|Timmy & Tommy]]
| |
| − | | style="background:#fff"| {{black}} / {{colorful}}
| |
| − | | style="background:#fff"| Toy Shop
| |
| − | | style="background:#fff"| Flashy
| |
| − | | style="background:#fff"| {{small}}
| |
| − | | style="background:#fff"| Lights flash
| |
| − | | style="background:#fff"| No
| |
| − | |-
| |
| − | | style="background:#fff"| Surveillance Camera
| |
| − | | style="background:#fff"| [[File:Surveillance Camera HHD Icon.png]]
| |
| − | | style="background:#fff"| 1,800
| |
| − | | style="background:#fff"| 450
| |
| − | | style="background:#fff"| [[Timmy and Tommy's store|Timmy & Tommy]]
| |
| − | | style="background:#fff"| {{gray}} / {{gray}}
| |
| − | | style="background:#fff"| Trendy<br>Sci-Fi
| |
| − | | style="background:#fff"| Basic
| |
| − | | style="background:#fff"| {{small}}
| |
| − | | style="background:#fff"| Wall furniture
| |
| − | | style="background:#fff"| No
| |
| − | |-
| |
| − | | style="background:#fff"| Exit Sign
| |
| − | | style="background:#fff"| [[File:Exit Sign HHD Icon.png]]
| |
| − | | style="background:#fff"| 1,600
| |
| − | | style="background:#fff"| 400
| |
| − | | style="background:#fff"| [[Timmy and Tommy's store|Timmy & Tommy]]
| |
| − | | style="background:#fff"| {{green}} / {{white}}
| |
| − | | style="background:#fff"| Sci-Fi<br>Quirky
| |
| − | | style="background:#fff"| Basic
| |
| − | | style="background:#fff"| {{medium}}
| |
| − | | style="background:#fff"| Wall furniture
| |
| − | | style="background:#fff"| No
| |
| − | |-
| |
| − | | style="background:#fff"| 24-Hour-Shop Model
| |
| − | | style="background:#fff"| [[File:24-Hour-Shop Model HHD Icon.png]]
| |
| − | | style="background:#fff"| -
| |
| − | | style="background:#fff"| 711
| |
| − | | style="background:#fff"| [[DLC]]
| |
| − | | style="background:#fff"| {{brown}} / {{colorful}}
| |
| − | | style="background:#fff"| Toy Shop
| |
| − | | style="background:#fff"| ???
| |
| − | | style="background:#fff"| {{small}}
| |
| − | | style="background:#fff"| Can place on table
| |
| − | | style="background:#fff"| No
| |
| − | |-
| |
| − | | style="background:#fff"| 24-Hour-Shop ABD
| |
| − | | style="background:#fff"| [[File:24-Hour-Shop ABD HHD Icon.png]]
| |
| − | | style="background:#fff"| -
| |
| − | | style="background:#fff"| 711
| |
| − | | style="background:#fff"| [[DLC]]
| |
| − | | style="background:#fff"| {{red}} / {{white}}
| |
| − | | style="background:#fff"| None
| |
| − | | style="background:#fff"| ???
| |
| − | | style="background:#fff"| {{small}}
| |
| − | | style="background:#fff"| Can use
| |
| − | | style="background:#fff"| No
| |
| − | |-
| |
| − | | style="background:#fff"| Soft-Drink Display
| |
| − | | style="background:#fff"| [[File:Soft-Drink Display HHD Icon.png]]
| |
| − | | style="background:#fff"| -
| |
| − | | style="background:#fff"| 711
| |
| − | | style="background:#fff"| [[DLC]]
| |
| − | | style="background:#fff"| {{colorful}} / {{white}}
| |
| − | | style="background:#fff"| None
| |
| − | | style="background:#fff"| ???
| |
| − | | style="background:#fff"| {{medium}}
| |
| − | | style="background:#fff"| -
| |
| − | | style="background:#fff"| No
| |
| − | |-
| |
| − | | style="background:#fff"| Sandwich Display
| |
| − | | style="background:#fff"| [[File:Sandwich Display HHD Icon.png]]
| |
| − | | style="background:#fff"| -
| |
| − | | style="background:#fff"| 711
| |
| − | | style="background:#fff"| [[DLC]]
| |
| − | | style="background:#fff"| {{colorful}} / {{white}}
| |
| − | | style="background:#fff"| None
| |
| − | | style="background:#fff"| ???
| |
| − | | style="background:#fff"| {{small}}
| |
| − | | style="background:#fff"| -
| |
| − | | style="background:#fff"| No
| |
| − | |-
| |
| − | | style="background:#fff"| 24-Hour-Shop Sign
| |
| − | | style="background:#fff"| [[File:24-Hour-Shop Sign HHD Icon.png]]
| |
| − | | style="background:#fff"| -
| |
| − | | style="background:#fff"| 711
| |
| − | | style="background:#fff"| [[DLC]]
| |
| − | | style="background:#fff"| {{colorful}} / {{gray}}
| |
| − | | style="background:#fff"| None
| |
| − | | style="background:#fff"| ???
| |
| − | | style="background:#fff"| {{small}}
| |
| − | | style="background:#fff"| Can use
| |
| − | | style="background:#fff"| No
| |
| − | |-
| |
| − | | style="background:#fff"| 24-Hour-Shop Counter
| |
| − | | style="background:#fff"| [[File:24-Hour-Shop Counter HHD Icon.png]]
| |
| − | | style="background:#fff"| -
| |
| − | | style="background:#fff"| 711
| |
| − | | style="background:#fff"| [[DLC]]
| |
| − | | style="background:#fff"| {{white}} / {{white}}
| |
| − | | style="background:#fff"| None
| |
| − | | style="background:#fff"| ???
| |
| − | | style="background:#fff"| {{medium}}
| |
| − | | style="background:#fff"| -
| |
| − | | style="background:#fff"| No
| |
| − | |-
| |
| − | | style="background:#fff"| Barbecue Bed
| |
| − | | style="background:#fff"| [[File:Barbecue Bed HHD Icon.png]]
| |
| − | | style="background:#fff"| -
| |
| − | | style="background:#fff"| 711
| |
| − | | style="background:#fff"| [[DLC]]
| |
| − | | style="background:#fff"| {{black}} / {{brown}}
| |
| − | | style="background:#fff"| None
| |
| − | | style="background:#fff"| ???
| |
| − | | style="background:#fff"| {{large}}
| |
| − | | style="background:#fff"| Bed
| |
| − | | style="background:#fff"| No
| |
| − | |-
| |
| − | | style="background:#fff"| Steamed-Bun Case
| |
| − | | style="background:#fff"| [[File:Steamed-Bun Case HHD Icon.png]]
| |
| − | | style="background:#fff"| -
| |
| − | | style="background:#fff"| 711
| |
| − | | style="background:#fff"| [[DLC]]
| |
| − | | style="background:#fff"| ??? / {{white}}
| |
| − | | style="background:#fff"| Harmonious
| |
| − | | style="background:#fff"| ???
| |
| − | | style="background:#fff"| {{small}}
| |
| − | | style="background:#fff"| Can place on table
| |
| − | | style="background:#fff"| No
| |
| − | |-
| |
| − | | style="background:#fff"| Buffet Server
| |
| − | | style="background:#fff"| [[File:Buffet Server HHD Icon.png]]
| |
| − | | style="background:#fff"| -
| |
| − | | style="background:#fff"| 711
| |
| − | | style="background:#fff"| [[DLC]]
| |
| − | | style="background:#fff"| {{brown}} / {{gray}}
| |
| − | | style="background:#fff"| Harmonious
| |
| − | | style="background:#fff"| ???
| |
| − | | style="background:#fff"| {{small}}
| |
| − | | style="background:#fff"| Can use, can place on table
| |
| − | | style="background:#fff"| No
| |
| − | |-
| |
| − | |}
| |
| − | |}
| |
| − | </div>
| |
| − | </div> | |
| − | <br clear=all>
| |
| | | | |
| − | ==See also== | + | ==By theme challenge category== |
| − | *[[List of items in Dōbutsu no Mori]]
| + | <gallery> |
| − | *[[List of items in Doubutsu no Mori+]]
| + | Antique Shelf NL Model.png|[[Furniture/New Leaf/Antique|Antique]]|link=Furniture/New Leaf/Antique |
| − | *[[List of items in Animal Crossing]]
| + | Candy House NL Model.png|[[Furniture/New Leaf/Fairy tale|Fairy tale]]|link=Furniture/New Leaf/Fairy tale |
| − | *[[List of items in Doubutsu no Mori e+]]
| + | Pagoda NL Model.png|[[Furniture/New Leaf/Harmonious|Harmonious]]|link=Furniture/New Leaf/Harmonious |
| − | *[[List of items in Animal Crossing: Wild World]]
| + | Skeleton Figurine NL Model.png|[[Furniture/New Leaf/Quirky|Quirky]]|link=Furniture/New Leaf/Quirky |
| − | *[[List of items in Animal Crossing: City Folk]]
| + | Storefront NL Model.png|[[Furniture/New Leaf/Rustic|Rustic]]|link=Furniture/New Leaf/Rustic |
| − | *[[List of items in Animal Crossing: New Leaf]]
| + | Astro Chair (Orange and White) NL Model.png|[[Furniture/New Leaf/Sci-fi|Sci-fi]]|link=Furniture/New Leaf/Sci-fi |
| − | <br> | + | Mama Bear (Blank) NL Model.png|[[Furniture/New Leaf/Toy shop|Toy shop]]|link=Furniture/New Leaf/Toy shop |
| − | {{construction}}<br>
| + | Sleek Lamp (Black) NL Model.png|[[Furniture/New Leaf/Trendy|Trendy]]|link=Furniture/New Leaf/Trendy |
| − | {{furniture}} | + | </gallery> |
| − | [[Category:Lists]] | + | |
| | + | ==By style== |
| | + | <gallery> |
| | + | Minimalist Chair (Ivory) NL Model.png|[[Clothing/New Leaf/Basic|Basic]]|link=Clothing/New Leaf/Basic |
| | + | Kiki and Lala Clock NL Model.png|[[Clothing/New Leaf/Cute|Cute]]|link=Clothing/New Leaf/Cute |
| | + | LED Display (Star) NL Model.png|[[Clothing/New Leaf/Flashy|Flashy]]|link=Clothing/New Leaf/Flashy |
| | + | Ship Cannon NL Model.png|[[Clothing/New Leaf/Historical|Historical]]|link=Clothing/New Leaf/Historical |
| | + | Eiffel Tower NL Model.png|[[Clothing/New Leaf/Iconic|Iconic]]|link=Clothing/New Leaf/Iconic |
| | + | Modern Cash Register NL Model.png|[[Clothing/New Leaf/Modern|Modern]]|link=Clothing/New Leaf/Modern |
| | + | Museum Mat (Entrance) NL Model.png|[[Clothing/New Leaf/Official|Official]]|link=Clothing/New Leaf/Official |
| | + | Gorgeous Lamp NL Model.png|[[Clothing/New Leaf/Ornate|Ornate]]|link=Clothing/New Leaf/Ornate |
| | + | Electric Guitar (Fire Red) NL Model.png|[[Clothing/New Leaf/Rock 'n' roll|Rock 'n' roll]]|link=Clothing/New Leaf/Rock 'n' roll |
| | + | High-Jump Mat NL Model.png|[[Clothing/New Leaf/Sporty|Sporty]]|link=Clothing/New Leaf/Sporty |
| | + | </gallery> |
| | + | |
| | + | ==By collection== |
| | + | ===Series=== |
| | + | <gallery> |
| | + | Alpine Bed (Natural - Nature) NL Model.png|[[Alpine Series#Animal Crossing: New Leaf|Alpine Series]]|link=Alpine Series#Animal Crossing: New Leaf |
| | + | Astro Bed (Orange and White) NL Model.png|[[Astro Series#Animal Crossing: New Leaf|Astro Series]]|link=Astro Series#Animal Crossing: New Leaf |
| | + | Balloon Bed NL Model.png|[[Balloon Series#Animal Crossing: New Leaf|Balloon Series]]|link=Balloon Series#Animal Crossing: New Leaf |
| | + | Blue Bed (Blue - Yellow) NL Model.png|[[Blue Series#Animal Crossing: New Leaf|Blue Series]]|link=Blue Series#Animal Crossing: New Leaf |
| | + | Cabana Bed (Plain - White) NL Model.png|[[Cabana Series#Animal Crossing: New Leaf|Cabana Series]]|link=Cabana Series#Animal Crossing: New Leaf |
| | + | Cabin Bed (Normal Tree - Normal) NL Model.png|[[Cabin Series#Animal Crossing: New Leaf|Cabin Series]]|link=Cabin Series#Animal Crossing: New Leaf |
| | + | Card Bed (Red) NL Model.png|[[Card Series#Animal Crossing: New Leaf|Card Series]]|link=Card Series#Animal Crossing: New Leaf |
| | + | Classic Bed (Brown - White) NL Model.png|[[Classic Series#Animal Crossing: New Leaf|Classic Series]]|link=Classic Series#Animal Crossing: New Leaf |
| | + | Egg Bed NL Model.png|[[Egg Series#Animal Crossing: New Leaf|Egg Series]]|link=Egg Series#Animal Crossing: New Leaf |
| | + | Exotic Bed (Brown - Gray) NL Model.png|[[Exotic Series#Animal Crossing: New Leaf|Exotic Series]]|link=Exotic Series#Animal Crossing: New Leaf |
| | + | Golden Bed NL Model.png|[[Golden Series#Animal Crossing: New Leaf|Golden Series]]|link=Golden Series#Animal Crossing: New Leaf |
| | + | Gorgeous Bed NL Model.png|[[Gorgeous Series#Animal Crossing: New Leaf|Gorgeous Series]]|link=Gorgeous Series#Animal Crossing: New Leaf |
| | + | Gracie Bed NL Model.png|[[Gracie Series#Animal Crossing: New Leaf|Gracie Series]]|link=Gracie Series#Animal Crossing: New Leaf |
| | + | Green Bed (Middle Green - Orange) NL Model.png|[[Green Series#Animal Crossing: New Leaf|Green Series]]|link=Green Series#Animal Crossing: New Leaf |
| | + | Harvest Bed NL Model.png|[[Harvest Series#Animal Crossing: New Leaf|Harvest Series]]|link=Harvest Series#Animal Crossing: New Leaf |
| | + | Ice Bed NL Model.png|[[Ice Series#Animal Crossing: New Leaf|Ice Series]]|link=Ice Series#Animal Crossing: New Leaf |
| | + | Jingle Bed NL Model.png|[[Festive Series#Animal Crossing: New Leaf|Jingle Series]]|link=Festive Series#Animal Crossing: New Leaf |
| | + | Kiddie Bed (Colorful - Colorful) NL Model.png|[[Kiddie Series#Animal Crossing: New Leaf|Kiddie Series]]|link=Kiddie Series#Animal Crossing: New Leaf |
| | + | Lovely Bed (Lovely Pink - Lovely Pink) NL Model.png|[[Lovely Series#Animal Crossing: New Leaf|Lovely Series]]|link=Lovely Series#Animal Crossing: New Leaf |
| | + | Mermaid Bed NL Model.png|[[Mermaid Series#Animal Crossing: New Leaf|Mermaid Series]]|link=Mermaid Series#Animal Crossing: New Leaf |
| | + | Minimalist Bed (Ivory) NL Model.png|[[Simple Series#Animal Crossing: New Leaf|Minimalist Series]]|link=Simple Series#Animal Crossing: New Leaf |
| | + | Modern Bed (Monochromatic - Modern Plaid) NL Model.png|[[Modern Series#Animal Crossing: New Leaf|Modern Series]]|link=Modern Series#Animal Crossing: New Leaf |
| | + | Modern Wood Bed (Standard - Tree) NL Model.png|[[Modern Wood Series#Animal Crossing: New Leaf|Modern Wood Series]]|link=Modern Wood Series#Animal Crossing: New Leaf |
| | + | Mush Bed NL Model.png|[[Mush Series#Animal Crossing: New Leaf|Mush Series]]|link=Mush Series#Animal Crossing: New Leaf |
| | + | Pavé Bed NL Model.png|[[Festivale Series#Animal Crossing: New Leaf|Pavé Series]]|link=Festivale Series#Animal Crossing: New Leaf |
| | + | Polka-Dot Bed (Red and White - Red and White) NL Model.png|[[Polka-Dot Series#Animal Crossing: New Leaf|Polka-Dot Series]]|link=Polka-Dot Series#Animal Crossing: New Leaf |
| | + | Princess Bed NL Model.png|[[Princess Series#Animal Crossing: New Leaf|Princess Series]]|link=Princess Series#Animal Crossing: New Leaf |
| | + | Ranch Bed (Natural - White) NL Model.png|[[Ranch Series#Animal Crossing: New Leaf|Ranch Series]]|link=Ranch Series#Animal Crossing: New Leaf |
| | + | Regal Bed (Royal Yellow) NL Model.png|[[Regal Series#Animal Crossing: New Leaf|Regal Series]]|link=Regal Series#Animal Crossing: New Leaf |
| | + | Robo-Bed (White Robot) NL Model.png|[[Robo Series#Animal Crossing: New Leaf|Robo Series]]|link=Robo Series#Animal Crossing: New Leaf |
| | + | Rococo Bed (Gothic Brown) NL Model.png|[[Rococo Series#Animal Crossing: New Leaf|Rococo Series]]|link=Rococo Series#Animal Crossing: New Leaf |
| | + | Sleek Bed (Black) NL Model.png|[[Sleek Series#Animal Crossing: New Leaf|Sleek Series]]|link=Sleek Series#Animal Crossing: New Leaf |
| | + | Sloppy Bed (Aqua) NL Model.png|[[Sloppy Series#Animal Crossing: New Leaf|Sloppy Series]]|link=Sloppy Series#Animal Crossing: New Leaf |
| | + | Snowman Bed NL Model.png|[[Snowman Series#Animal Crossing: New Leaf|Snowman Series]]|link=Snowman Series#Animal Crossing: New Leaf |
| | + | Spooky Bed NL Model.png|[[Spooky Series#Animal Crossing: New Leaf|Spooky Series]]|link=Spooky Series#Animal Crossing: New Leaf |
| | + | Stripe Bed (Blue Stripe - Blue Stripe) NL Model.png|[[Stripe Series#Animal Crossing: New Leaf|Stripe Series]]|link=Stripe Series#Animal Crossing: New Leaf |
| | + | Sweets Bed NL Model.png|[[Sweets Series#Animal Crossing: New Leaf|Sweets Series]]|link=Sweets Series#Animal Crossing: New Leaf |
| | + | </gallery> |
| | + | |
| | + | ===Themes=== |
| | + | <gallery> |
| | + | Boxing Barricade NL Model.png|[[Boxing Theme#Animal Crossing: New Leaf|Boxing Theme]]|link=Boxing Theme#Animal Crossing: New Leaf |
| | + | Detour Arrow NL Model.png|[[Construction Theme#Animal Crossing: New Leaf|Construction Theme]]|link=Construction Theme#Animal Crossing: New Leaf |
| | + | Creepy Crystal NL Model.png|[[Creepy Theme#Animal Crossing: New Leaf|Creepy Theme]]|link=Creepy Theme#Animal Crossing: New Leaf |
| | + | Lab Bench NL Model.png|[[Mad Scientist Theme#Animal Crossing: New Leaf|Mad Scientist Theme]]|link=Mad Scientist Theme#Animal Crossing: New Leaf |
| | + | Block NL Model.png|[[Mario Theme#Animal Crossing: New Leaf|Mario Theme]]|link=Mario Theme#Animal Crossing: New Leaf |
| | + | Birdhouse NL Model.png|[[Mossy Garden Theme#Animal Crossing: New Leaf|Mossy Garden Theme]]|link=Mossy Garden Theme#Animal Crossing: New Leaf |
| | + | Elephant Slide NL Model.png|[[Nursery Theme#Animal Crossing: New Leaf|Nursery Theme]]|link=Nursery Theme#Animal Crossing: New Leaf |
| | + | Helm NL Model.png|[[Pirate Ship Theme#Animal Crossing: New Leaf|Pirate Ship Theme]]|link=Pirate Ship Theme#Animal Crossing: New Leaf |
| | + | Space Console NL Model.png|[[Sci-Fi Theme#Animal Crossing: New Leaf|Sci-Fi Theme]]|link=Sci-Fi Theme#Animal Crossing: New Leaf |
| | + | Bathtub (Tile) NL Model.png|[[Spa Theme#Animal Crossing: New Leaf|Spa Theme]]|link=Spa Theme#Animal Crossing: New Leaf |
| | + | Asteroid NL Model.png|[[Space Theme#Animal Crossing: New Leaf|Space Theme]]|link=Space Theme#Animal Crossing: New Leaf |
| | + | Cow Skull NL Model.png|[[Western Theme#Animal Crossing: New Leaf|Western Theme]]|link=Western Theme#Animal Crossing: New Leaf |
| | + | </gallery> |
| | + | |
| | + | ===Sets=== |
| | + | <gallery> |
| | + | Juicy-Apple TV (Red Apple) NL Model.png|[[Apple Set#Animal Crossing: New Leaf|Apple Set]]|link=Apple Set#Animal Crossing: New Leaf |
| | + | Papa Bear (Blank) NL Model.png|[[Bear Set#Animal Crossing: New Leaf|Bear Set]]|link=Bear Set#Animal Crossing: New Leaf |
| | + | Plum Bonsai NL Model.png|[[Bonsai Set#Animal Crossing: New Leaf|Bonsai Set]]|link=Bonsai Set#Animal Crossing: New Leaf |
| | + | Tall Cactus NL Model.png|[[Cactus Set#Animal Crossing: New Leaf|Cactus Set]]|link=Cactus Set#Animal Crossing: New Leaf |
| | + | Coffeemaker NL Model.png|[[Café Set#Animal Crossing: New Leaf|Café Set]]|link=Café Set#Animal Crossing: New Leaf |
| | + | Pawn (Natural Brown) NL Model.png|[[Chess Set#Animal Crossing: New Leaf|Chess Set]]|link=Chess Set#Animal Crossing: New Leaf |
| | + | Grapefruit Table NL Model.png|[[Citrus Set#Animal Crossing: New Leaf|Citrus Set]]|link=Citrus Set#Animal Crossing: New Leaf |
| | + | Hamster Cage NL Model.png|[[School Set#Animal Crossing: New Leaf|Classroom Set]]|link=School Set#Animal Crossing: New Leaf |
| | + | Giant Dharma (Red) NL Model.png|[[Dharma Set#Animal Crossing: New Leaf|Dharma Set]]|link=Dharma Set#Animal Crossing: New Leaf |
| | + | Vision Tester NL Model.png|[[Dr.'s Office Set#Animal Crossing: New Leaf|Dr.'s Office Set]]|link=Dr.'s Office Set#Animal Crossing: New Leaf |
| | + | Conga Drum NL Model.png|[[Drum Set#Animal Crossing: New Leaf|Drum Set]]|link=Drum Set#Animal Crossing: New Leaf |
| | + | Football-Fish Lamp NL Model.png|[[Fish Set#Animal Crossing: New Leaf|Fish Set]]|link=Fish Set#Animal Crossing: New Leaf |
| | + | Flower Chair (Pink) NL Model.png|[[Flower Set#Animal Crossing: New Leaf|Flower Set]]|link=Flower Set#Animal Crossing: New Leaf |
| | + | Lily-Pad Table NL Model.png|[[Frog Set#Animal Crossing: New Leaf|Frog Set]]|link=Frog Set#Animal Crossing: New Leaf |
| | + | Folk Guitar NL Model.png|[[Guitar Set#Animal Crossing: New Leaf|Guitar Set]]|link=Guitar Set#Animal Crossing: New Leaf |
| | + | Writing Desk NL Model.png|[[Study Set#Animal Crossing: New Leaf|Homework Set]]|link=Study Set#Animal Crossing: New Leaf |
| | + | Pothos NL Model.png|[[House Plant Set#Animal Crossing: New Leaf|House Plant Set]]|link=House Plant Set#Animal Crossing: New Leaf |
| | + | Honeybee Chest NL Model.png|[[Insect Set#Animal Crossing: New Leaf|Insect Set]]|link=Insect Set#Animal Crossing: New Leaf |
| | + | Lucky Cat NL Model.png|[[Lucky Cat Set#Animal Crossing: New Leaf|Lucky Cat Set]]|link=Lucky Cat Set#Animal Crossing: New Leaf |
| | + | Fancy Frame (Flower) NL Model.png|[[Museum Set#Animal Crossing: New Leaf|Museum Set]]|link=Museum Set#Animal Crossing: New Leaf |
| | + | Master Sword NL Model.png|[[Nintendo Set#Animal Crossing: New Leaf|Nintendo Set]]|link=Nintendo Set#Animal Crossing: New Leaf |
| | + | Office Desk NL Model.png|[[Office Set#Animal Crossing: New Leaf|Office Set]]|link=Office Set#Animal Crossing: New Leaf |
| | + | Papa Panda NL Model.png|[[Panda Set#Animal Crossing: New Leaf|Panda Set]]|link=Panda Set#Animal Crossing: New Leaf |
| | + | Pear Wardrobe NL Model.png|[[Pear Set#Animal Crossing: New Leaf|Pear Set]]|link=Pear Set#Animal Crossing: New Leaf |
| | + | Pine Chair NL Model.png|[[Pine Set#Animal Crossing: New Leaf|Pine Set]]|link=Pine Set#Animal Crossing: New Leaf |
| | + | Pine Bonsai NL Model.png|[[Pine Tree Set#Animal Crossing: New Leaf|Pine Tree Set]]|link=Pine Tree Set#Animal Crossing: New Leaf |
| | + | Violin NL Model.png|[[String Section Set#Animal Crossing: New Leaf|String Section Set]]|link=String Section Set#Animal Crossing: New Leaf |
| | + | Bear Pole NL Model.png|[[Totem Pole Set#Animal Crossing: New Leaf|Totem Pole Set]]|link=Totem Pole Set#Animal Crossing: New Leaf |
| | + | Tea Vase NL Model.png|[[Vase Set#Animal Crossing: New Leaf|Vase Set]]|link=Vase Set#Animal Crossing: New Leaf |
| | + | Watermelon Chair (Red Watermelon) NL Model.png|[[Watermelon Set#Animal Crossing: New Leaf|Watermelon Set]]|link=Watermelon Set#Animal Crossing: New Leaf |
| | + | Samurai Suit NL Model.png|[[Zen Set#Animal Crossing: New Leaf|Zen Set]]|link=Zen Set#Animal Crossing: New Leaf |
| | + | Deer Scare NL Model.png|[[Zen Garden Set#Animal Crossing: New Leaf|Zen Garden Set]]|link=Zen Garden Set#Animal Crossing: New Leaf |
| | + | </gallery> |
| | + | |
| | + | ===Miscellaneous=== |
| | + | The following are collections of furniture that share a theme but are not part of any official [[Happy Home Academy|HHA]] collection. |
| | + | <gallery> |
| | + | Cancer Table NL Model.png|[[Distributed item/New Leaf|Astrology furniture collection]]|link=Distributed item/New Leaf |
| | + | Cinnamoroll Sofa NL Model.png|[[Cinnamoroll Series#Animal Crossing: New Leaf - Welcome amiibo|Cinnamoroll furniture collection]]|link=Cinnamoroll Series#Animal Crossing: New Leaf - Welcome amiibo |
| | + | Fueki Table NL Model.png|[[Animal Crossing × Fueki#Item list|Fueki furniture collection]]|link=Animal Crossing × Fueki#Item list |
| | + | Hello Kitty Bed NL Model.png|[[Hello Kitty Series#Animal Crossing: New Leaf - Welcome amiibo|Hello Kitty furniture collection]]|link=Hello Kitty Series#Animal Crossing: New Leaf - Welcome amiibo |
| | + | Kerokerokeroppi Cake NL Model.png|[[Kerokerokeroppi Series#Animal Crossing: New Leaf - Welcome amiibo|Kerokerokeroppi furniture collection]]|link=Kerokerokeroppi Series#Animal Crossing: New Leaf - Welcome amiibo |
| | + | Kiki and Lala Bed NL Model.png|[[Kiki & Lala Series#Animal Crossing: New Leaf - Welcome amiibo|Kiki & Lala furniture collection]]|link=Kiki & Lala Series#Animal Crossing: New Leaf - Welcome amiibo |
| | + | Notebook Bed (Pink) NL Model.png|[[Distributed item/New Leaf|Kokuyo Camlin furniture collection]]|link=Distributed item/New Leaf |
| | + | My Melody Bed NL Model.png|[[My Melody Series#Animal Crossing: New Leaf - Welcome amiibo|My Melody furniture collection]]|link=My Melody Series#Animal Crossing: New Leaf - Welcome amiibo |
| | + | Pompompurin Bed NL Model.png|[[Pompompurin Series#Animal Crossing: New Leaf - Welcome amiibo|Pompompurin furniture collection]]|link=Pompompurin Series#Animal Crossing: New Leaf - Welcome amiibo |
| | + | 24-Hour-Shop Sign NL Model.png|[[7-Eleven#Item list|7-Eleven furniture collection]]|link=7-Eleven#Item list |
| | + | Splattershot (Orange) NL Model.png|[[Splatoon#In Welcome amiibo 2|''Splatoon'' furniture collection]]|link=Splatoon#In Welcome amiibo 2 |
| | + | Hylian Shield NL Model.png|[[The Legend of Zelda#In New Leaf 2|''The Legend of Zelda'' furniture collection]]|link=The Legend of Zelda#In New Leaf 2 |
| | + | Hunter NL Model.png|[[Monster Hunter#In Welcome amiibo 2|''Monster Hunter'' furniture collection]]|link=Monster Hunter#In Welcome amiibo 2 |
| | + | </gallery> |
| | + | |
| | + | {{Navbox Furniture}} |
| | + | [[Category:Lists of furniture]] |
| | + | [[Category:Animal Crossing: New Leaf]] |