Difference between revisions of "Animal Crossing: Wild World/Gallery"
AlexBot2004 (talk | contribs) |
|||
| (15 intermediate revisions by 5 users not shown) | |||
| Line 4: | Line 4: | ||
==Logos== | ==Logos== | ||
<gallery widths=200> | <gallery widths=200> | ||
| − | + | WW Logo English.png|English logo | |
WWIngameTitle.png|English logo (in-game) | WWIngameTitle.png|English logo (in-game) | ||
| − | + | WW Logo English Early.png|Early English logo (E3 2005) | |
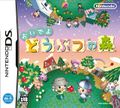
| − | WW Logo | + | WW Logo Japanese.jpg|Japanese logo |
WW Title Screen Logo JP.png|Japanese logo (in-game) | WW Title Screen Logo JP.png|Japanese logo (in-game) | ||
WW Logo Korean.png|Korean logo | WW Logo Korean.png|Korean logo | ||
| Line 15: | Line 15: | ||
<gallery> | <gallery> | ||
WW Box Japan.jpg|Japanese box art (front) | WW Box Japan.jpg|Japanese box art (front) | ||
| − | |||
WW Box NA.jpg|North American box art (front) | WW Box NA.jpg|North American box art (front) | ||
| − | WW Box | + | WW Box Australia.jpg|Australian box art (front) |
WW Box Europe.jpg|European box art (front) | WW Box Europe.jpg|European box art (front) | ||
| − | WW Box | + | WW Box Europe 2.jpg|European box art (re-rated; front) |
WW Box Germany.jpg|German box art (front) | WW Box Germany.jpg|German box art (front) | ||
| − | |||
WW Box Korea.jpg|Korean box art (front) | WW Box Korea.jpg|Korean box art (front) | ||
| + | WW Box Back Japan.jpg|Japanese box art (back) | ||
| + | WW Box Back NA.png|North American box art (back) | ||
| + | WW Box Back Europe.jpg|European box art (back) | ||
| + | WW Box Spine NA.png|North American box art (spine) | ||
WW Wii U eShop Icon.png|Wii U eShop icon | WW Wii U eShop Icon.png|Wii U eShop icon | ||
WW Game Card.png|North American Game Card | WW Game Card.png|North American Game Card | ||
| Line 245: | Line 247: | ||
<gallery> | <gallery> | ||
WW main art.jpg|Artwork for the game cover | WW main art.jpg|Artwork for the game cover | ||
| − | + | Fall WW Artwork.png|[[Fall]] | |
| − | Spring | + | Spring WW Artwork.png|[[Spring]] |
| − | + | Summer WW Artwork.png|[[Summer]] | |
| − | Winter | + | Winter WW Artwork.png|[[Winter]] |
| − | + | Seasons WW Wallpaper.jpg|A wallpaper depicting all seasons | |
| − | + | Characters WW Wallpaper.jpg | |
Gabi WW Wallpaper.jpg|[[Gabi]] | Gabi WW Wallpaper.jpg|[[Gabi]] | ||
| − | + | Mint WW Wallpaper.jpg|[[Mint]] | |
| − | + | Friends WW Wallpaper.jpg | |
K.K. Slider WW Wallpaper.jpg|[[K.K. Slider]] | K.K. Slider WW Wallpaper.jpg|[[K.K. Slider]] | ||
| − | + | WW Postcard Insert Vol 199 Front.jpg|''[[Nintendo Power]]'' postcards | |
| + | Characters WW Artwork.jpg | ||
| + | WW NBA Badge.png|''Nintendo Badge Arcade'' | ||
</gallery> | </gallery> | ||
| Line 261: | Line 265: | ||
===Special characters=== | ===Special characters=== | ||
<gallery> | <gallery> | ||
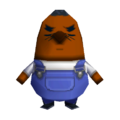
| − | Tom Nook WW Model.png|[[Tom Nook]] | + | Blanca WW Model.png|[[Blanca]] |
| + | Blathers WW Model.png|[[Blathers]] | ||
| + | Booker WW Model.png|[[Booker]] | ||
| + | Brewster WW Model.png|[[Brewster]] | ||
| + | Celeste WW Model.png|[[Celeste]] | ||
| + | Copper WW Model.png|[[Copper]] | ||
| + | Cornimer WW Model.png|[[Cornimer]] | ||
| + | Shrunk WW Model.png|[[Dr. Shrunk]] | ||
| + | Gracie WW Model.png|[[Gracie]] | ||
| + | Gulliver WW Model.png|[[Gulliver]] | ||
| + | Harriet WW Model.png|[[Harriet]] | ||
| + | Joan WW Model.png|[[Joan]] | ||
| + | K.K. WW Model.png|[[K.K. Slider]] | ||
| + | Kaitlin WW Model.png|[[Kaitlin]] | ||
| + | Kapp'n WW Model.png|[[Kapp'n]] | ||
| + | Katie WW Model.png|[[Katie]] | ||
| + | Katrina WW Model.png|[[Katrina]] | ||
| + | Lyle WW Model.png|[[Lyle]] | ||
| + | Mabel WW Model.png|[[Mabel]] | ||
| + | Resetti WW Model.png|[[Mr. Resetti]] | ||
| + | Resetti (The Roost) WW Model.png|Mr. Resetti ([[The Roost]]) | ||
| + | Pascal WW Model.png|[[Pascal]] | ||
| + | Pelly WW Model.png|[[Pelly]] | ||
| + | Pete WW Model.png|[[Pete]] | ||
| + | Phyllis WW Model.png|[[Phyllis]] | ||
| + | Redd WW Model.png|[[Redd]] | ||
| + | Rover WW Model.png|[[Rover]] | ||
| + | Sable WW Model.png|[[Sable]] | ||
| + | Saharah WW Model.png|[[Saharah]] | ||
| + | Nookling WW Model.png|[[Timmy & Tommy]] | ||
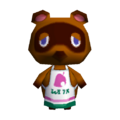
| + | Tom Nook (Nook's Cranny) WW Model.png|[[Tom Nook]] ([[Nook's Cranny]]) | ||
| + | Tom Nook (Nook 'n' Go) WW Model.png|Tom Nook ([[Nook 'n' Go]]) | ||
| + | Tom Nook (Nookway) WW Model.png|Tom Nook ([[Nookway]]) | ||
| + | Tom Nook (Nookington's) WW Model.png|Tom Nook ([[Nookington's]]) | ||
| + | Tortimer WW Model.png|[[Tortimer]] | ||
| + | Tortimer (No Hat) WW Model.png|Tortimer | ||
| + | Wendell WW Model.png|[[Wendell]] | ||
</gallery> | </gallery> | ||
| Line 299: | Line 339: | ||
===Houses=== | ===Houses=== | ||
<div style="display:inline-flex;"> | <div style="display:inline-flex;"> | ||
| − | + | {{TabStart|fit-content=yes}} | |
| − | + | {{TabHeader|House Model #1 (A)}} | |
{| cellpadding=5px | {| cellpadding=5px | ||
|- style="vertical-align:top;" | |- style="vertical-align:top;" | ||
| Line 331: | Line 371: | ||
| style="width:100px;"| {{WW icon|Cube}}{{WW icon|Cyrano}}{{WW icon|Hugh}}{{WW icon|Kid Cat}}{{WW icon|Maelle}}{{WW icon|Pecan}}{{WW icon|Victoria}} | | style="width:100px;"| {{WW icon|Cube}}{{WW icon|Cyrano}}{{WW icon|Hugh}}{{WW icon|Kid Cat}}{{WW icon|Maelle}}{{WW icon|Pecan}}{{WW icon|Victoria}} | ||
|} | |} | ||
| − | + | {{TabHeader|House Model #2 (B)}} | |
| − | |||
{| cellpadding=5px | {| cellpadding=5px | ||
|- style="vertical-align:top;" | |- style="vertical-align:top;" | ||
| Line 363: | Line 402: | ||
| style="width:100px;"| {{WW icon|Antonio}}{{WW icon|Deena}}{{WW icon|Goose}}{{WW icon|Hopper}}{{WW icon|Nibbles}}{{WW icon|Savannah}} | | style="width:100px;"| {{WW icon|Antonio}}{{WW icon|Deena}}{{WW icon|Goose}}{{WW icon|Hopper}}{{WW icon|Nibbles}}{{WW icon|Savannah}} | ||
|} | |} | ||
| − | + | {{TabHeader|House Model #3 (C)}} | |
| − | |||
{| cellpadding=5px | {| cellpadding=5px | ||
|- style="vertical-align:top;" | |- style="vertical-align:top;" | ||
| Line 395: | Line 433: | ||
| style="width:100px;"| {{WW icon|Agent S}}{{WW icon|Benedict}}{{WW icon|Elmer}}{{WW icon|Friga}}{{WW icon|Gwen}}{{WW icon|Lucy}}{{WW icon|Nana}}{{WW icon|Pango}}{{WW icon|Pompom}}{{WW icon|Teddy}} | | style="width:100px;"| {{WW icon|Agent S}}{{WW icon|Benedict}}{{WW icon|Elmer}}{{WW icon|Friga}}{{WW icon|Gwen}}{{WW icon|Lucy}}{{WW icon|Nana}}{{WW icon|Pango}}{{WW icon|Pompom}}{{WW icon|Teddy}} | ||
|} | |} | ||
| − | + | {{TabHeader|House Model #4 (D)}} | |
| − | |||
{| cellpadding=5px | {| cellpadding=5px | ||
|- style="vertical-align:top;" | |- style="vertical-align:top;" | ||
| Line 427: | Line 464: | ||
| style="width:100px;"| {{WW icon|Caroline}}{{WW icon|Curly}}{{WW icon|Egbert}}{{WW icon|Elvis}}{{WW icon|Freckles}}{{WW icon|Kitt}}{{WW icon|Mallary}}{{WW icon|Pinky}}{{WW icon|Stitches}}{{WW icon|Tammi}}{{WW icon|Tipper}} | | style="width:100px;"| {{WW icon|Caroline}}{{WW icon|Curly}}{{WW icon|Egbert}}{{WW icon|Elvis}}{{WW icon|Freckles}}{{WW icon|Kitt}}{{WW icon|Mallary}}{{WW icon|Pinky}}{{WW icon|Stitches}}{{WW icon|Tammi}}{{WW icon|Tipper}} | ||
|} | |} | ||
| − | + | {{TabHeader|House Model #5 (A)}} | |
| − | |||
{| cellpadding=5px | {| cellpadding=5px | ||
|- style="vertical-align:top;" | |- style="vertical-align:top;" | ||
| Line 459: | Line 495: | ||
| style="width:100px;"| {{WW icon|Bluebear}}{{WW icon|Curt}}{{WW icon|Mathilda}}{{WW icon|Opal}}{{WW icon|Rolf}}{{WW icon|Sally}}{{WW icon|Static}}{{WW icon|Truffles}} | | style="width:100px;"| {{WW icon|Bluebear}}{{WW icon|Curt}}{{WW icon|Mathilda}}{{WW icon|Opal}}{{WW icon|Rolf}}{{WW icon|Sally}}{{WW icon|Static}}{{WW icon|Truffles}} | ||
|} | |} | ||
| − | + | {{TabHeader|House Model #6 (B)}} | |
| − | |||
{| cellpadding=5px | {| cellpadding=5px | ||
|- style="vertical-align:top;" | |- style="vertical-align:top;" | ||
| Line 491: | Line 526: | ||
| style="width:100px;"| {{WW icon|Chow}}{{WW icon|Dizzy}}{{WW icon|Genji}}{{WW icon|Maple}}{{WW icon|Mint}}{{WW icon|Pierce}}{{WW icon|Rasher}}{{WW icon|Roscoe}}{{WW icon|Rowan}}{{WW icon|Yuka}} | | style="width:100px;"| {{WW icon|Chow}}{{WW icon|Dizzy}}{{WW icon|Genji}}{{WW icon|Maple}}{{WW icon|Mint}}{{WW icon|Pierce}}{{WW icon|Rasher}}{{WW icon|Roscoe}}{{WW icon|Rowan}}{{WW icon|Yuka}} | ||
|} | |} | ||
| − | + | {{TabHeader|House Model #7 (C)}} | |
| − | |||
{| cellpadding=5px | {| cellpadding=5px | ||
|- style="vertical-align:top;" | |- style="vertical-align:top;" | ||
| Line 523: | Line 557: | ||
| style="width:100px;"| {{WW icon|Alice}}{{WW icon|Alli}}{{WW icon|Big Top}}{{WW icon|Bunnie}}{{WW icon|Champ}}{{WW icon|Chief}}{{WW icon|Daisy}}{{WW icon|Jay}}{{WW icon|Jitters}}{{WW icon|Poncho}} | | style="width:100px;"| {{WW icon|Alice}}{{WW icon|Alli}}{{WW icon|Big Top}}{{WW icon|Bunnie}}{{WW icon|Champ}}{{WW icon|Chief}}{{WW icon|Daisy}}{{WW icon|Jay}}{{WW icon|Jitters}}{{WW icon|Poncho}} | ||
|} | |} | ||
| − | + | {{TabHeader|House Model #8 (D)}} | |
| − | |||
{| cellpadding=5px | {| cellpadding=5px | ||
|- style="vertical-align:top;" | |- style="vertical-align:top;" | ||
| Line 555: | Line 588: | ||
| style="width:100px;"| {{WW icon|Bud}}{{WW icon|Dotty}}{{WW icon|Eloise}}{{WW icon|Lobo}}{{WW icon|Pudge}}{{WW icon|Robin}}{{WW icon|Wolfgang}} | | style="width:100px;"| {{WW icon|Bud}}{{WW icon|Dotty}}{{WW icon|Eloise}}{{WW icon|Lobo}}{{WW icon|Pudge}}{{WW icon|Robin}}{{WW icon|Wolfgang}} | ||
|} | |} | ||
| − | + | {{TabHeader|House Model #9 (A)}} | |
| − | |||
{| cellpadding=5px | {| cellpadding=5px | ||
|- style="vertical-align:top;" | |- style="vertical-align:top;" | ||
| Line 587: | Line 619: | ||
| style="width:100px;"| {{WW icon|Anchovy}}{{WW icon|Coco}}{{WW icon|Dora}}{{WW icon|Jeremiah}}{{WW icon|Melba}}{{WW icon|Patty}}{{WW icon|Ribbot}} | | style="width:100px;"| {{WW icon|Anchovy}}{{WW icon|Coco}}{{WW icon|Dora}}{{WW icon|Jeremiah}}{{WW icon|Melba}}{{WW icon|Patty}}{{WW icon|Ribbot}} | ||
|} | |} | ||
| − | + | {{TabHeader|House Model #10 (B)}} | |
| − | |||
{| cellpadding=5px | {| cellpadding=5px | ||
|- style="vertical-align:top;" | |- style="vertical-align:top;" | ||
| Line 619: | Line 650: | ||
| style="width:100px;"| {{WW icon|Alfonso}}{{WW icon|Angus}}{{WW icon|Kody}}{{WW icon|Lily}}{{WW icon|Limberg}}{{WW icon|Snake}} | | style="width:100px;"| {{WW icon|Alfonso}}{{WW icon|Angus}}{{WW icon|Kody}}{{WW icon|Lily}}{{WW icon|Limberg}}{{WW icon|Snake}} | ||
|} | |} | ||
| − | + | {{TabHeader|House Model #11 (C)}} | |
| − | |||
{| cellpadding=5px | {| cellpadding=5px | ||
|- style="vertical-align:top;" | |- style="vertical-align:top;" | ||
| Line 651: | Line 681: | ||
| style="width:100px;"| {{WW icon|Bella}}{{WW icon|Bob}}{{WW icon|Frobert}}{{WW icon|Gaston}}{{WW icon|Goldie}}{{WW icon|Peewee}}{{WW icon|Rodeo}} | | style="width:100px;"| {{WW icon|Bella}}{{WW icon|Bob}}{{WW icon|Frobert}}{{WW icon|Gaston}}{{WW icon|Goldie}}{{WW icon|Peewee}}{{WW icon|Rodeo}} | ||
|} | |} | ||
| − | + | {{TabHeader|House Model #12 (D)}} | |
| − | |||
{| cellpadding=5px | {| cellpadding=5px | ||
|- style="vertical-align:top;" | |- style="vertical-align:top;" | ||
| Line 683: | Line 712: | ||
| style="width:100px;"| {{WW icon|Bree}}{{WW icon|Butch}}{{WW icon|Camofrog}}{{WW icon|Gabi}}{{WW icon|Mitzi}}{{WW icon|Rhonda}}{{WW icon|Simon}} | | style="width:100px;"| {{WW icon|Bree}}{{WW icon|Butch}}{{WW icon|Camofrog}}{{WW icon|Gabi}}{{WW icon|Mitzi}}{{WW icon|Rhonda}}{{WW icon|Simon}} | ||
|} | |} | ||
| − | + | {{TabHeader|House Model #13 (A)}} | |
| − | |||
{| cellpadding=5px | {| cellpadding=5px | ||
|- style="vertical-align:top;" | |- style="vertical-align:top;" | ||
| Line 715: | Line 743: | ||
| style="width:100px;"| {{WW icon|Drift}}{{WW icon|Lucky}}{{WW icon|Margie}}{{WW icon|Octavian}}{{WW icon|Pippy}}{{WW icon|Rosie}} | | style="width:100px;"| {{WW icon|Drift}}{{WW icon|Lucky}}{{WW icon|Margie}}{{WW icon|Octavian}}{{WW icon|Pippy}}{{WW icon|Rosie}} | ||
|} | |} | ||
| − | + | {{TabHeader|House Model #14 (B)}} | |
| − | |||
{| cellpadding=5px | {| cellpadding=5px | ||
|- style="vertical-align:top;" | |- style="vertical-align:top;" | ||
| Line 747: | Line 774: | ||
| style="width:100px;"| {{WW icon|Biskit}}{{WW icon|Boone}}{{WW icon|Elise}}{{WW icon|Marina}}{{WW icon|Olivia}}{{WW icon|Tiffany}}{{WW icon|Wart Jr.}} | | style="width:100px;"| {{WW icon|Biskit}}{{WW icon|Boone}}{{WW icon|Elise}}{{WW icon|Marina}}{{WW icon|Olivia}}{{WW icon|Tiffany}}{{WW icon|Wart Jr.}} | ||
|} | |} | ||
| − | + | {{TabHeader|House Model #15 (C)}} | |
| − | |||
{| cellpadding=5px | {| cellpadding=5px | ||
|- style="vertical-align:top;" | |- style="vertical-align:top;" | ||
| Line 779: | Line 805: | ||
| style="width:100px;"| {{WW icon|Bones}}{{WW icon|Drake}}{{WW icon|Kiki}}{{WW icon|Monique}}{{WW icon|Puddles}}{{WW icon|Queenie}}{{WW icon|Tank}}{{WW icon|Twiggy}} | | style="width:100px;"| {{WW icon|Bones}}{{WW icon|Drake}}{{WW icon|Kiki}}{{WW icon|Monique}}{{WW icon|Puddles}}{{WW icon|Queenie}}{{WW icon|Tank}}{{WW icon|Twiggy}} | ||
|} | |} | ||
| − | + | {{TabHeader|House Model #16 (D)}} | |
| − | |||
{| cellpadding=5px | {| cellpadding=5px | ||
|- style="vertical-align:top;" | |- style="vertical-align:top;" | ||
| Line 811: | Line 836: | ||
| style="width:100px;"| {{WW icon|Chevre}}{{WW icon|Gladys}}{{WW icon|Portia}}{{WW icon|Tangy}}{{WW icon|Vesta}}{{WW icon|Whitney}} | | style="width:100px;"| {{WW icon|Chevre}}{{WW icon|Gladys}}{{WW icon|Portia}}{{WW icon|Tangy}}{{WW icon|Vesta}}{{WW icon|Whitney}} | ||
|} | |} | ||
| − | + | {{TabHeader|House Model #17 (A)}} | |
| − | |||
{| cellpadding=5px | {| cellpadding=5px | ||
|- style="vertical-align:top;" | |- style="vertical-align:top;" | ||
| Line 843: | Line 867: | ||
| style="width:100px;"| {{WW icon|Apollo}}{{WW icon|Nan}}{{WW icon|Punchy}}{{WW icon|Walker}} | | style="width:100px;"| {{WW icon|Apollo}}{{WW icon|Nan}}{{WW icon|Punchy}}{{WW icon|Walker}} | ||
|} | |} | ||
| − | + | {{TabHeader|House Model #18 (B)}} | |
| − | |||
{| cellpadding=5px | {| cellpadding=5px | ||
|- style="vertical-align:top;" | |- style="vertical-align:top;" | ||
| Line 875: | Line 898: | ||
| style="width:100px;"| {{WW icon|Amelia}}{{WW icon|Anabelle}}{{WW icon|Baabara}}{{WW icon|Bill}}{{WW icon|Cesar}}{{WW icon|Derwin}}{{WW icon|Peanut}}{{WW icon|Purrl}}{{WW icon|Tabby}} | | style="width:100px;"| {{WW icon|Amelia}}{{WW icon|Anabelle}}{{WW icon|Baabara}}{{WW icon|Bill}}{{WW icon|Cesar}}{{WW icon|Derwin}}{{WW icon|Peanut}}{{WW icon|Purrl}}{{WW icon|Tabby}} | ||
|} | |} | ||
| − | + | {{TabHeader|House Model #19 (C)}} | |
| − | |||
{| cellpadding=5px | {| cellpadding=5px | ||
|- style="vertical-align:top;" | |- style="vertical-align:top;" | ||
| Line 907: | Line 929: | ||
| style="width:100px;"| {{WW icon|Aurora}}{{WW icon|Blaire}}{{WW icon|Joey}}{{WW icon|Moe}}{{WW icon|Rocco}}{{WW icon|Samson}} | | style="width:100px;"| {{WW icon|Aurora}}{{WW icon|Blaire}}{{WW icon|Joey}}{{WW icon|Moe}}{{WW icon|Rocco}}{{WW icon|Samson}} | ||
|} | |} | ||
| − | + | {{TabHeader|House Model #20 (D)}} | |
| − | |||
{| cellpadding=5px | {| cellpadding=5px | ||
|- style="vertical-align:top;" | |- style="vertical-align:top;" | ||
| Line 939: | Line 960: | ||
| style="width:100px;"| {{WW icon|Buck}}{{WW icon|Filbert}}{{WW icon|Kabuki}}{{WW icon|Monty}}{{WW icon|Pate}}{{WW icon|Roald}}{{WW icon|Rod}}{{WW icon|Ruby}} | | style="width:100px;"| {{WW icon|Buck}}{{WW icon|Filbert}}{{WW icon|Kabuki}}{{WW icon|Monty}}{{WW icon|Pate}}{{WW icon|Roald}}{{WW icon|Rod}}{{WW icon|Ruby}} | ||
|} | |} | ||
| − | + | {{TabEnd}} | |
| − | |||
</div> | </div> | ||
===Items and objects=== | ===Items and objects=== | ||
| − | <gallery> | + | <gallery class=sprite> |
| − | OaktreeWW.png|Oak [[ | + | OaktreeWW.png|Oak [[tree]] |
| − | AppleTreeWW.png|Apple | + | AppleTreeWW.png|Apple tree |
| − | CherryTreeWW.png|Cherry | + | CherryTreeWW.png|Cherry tree |
| − | OrangeTreeWW.png|Orange | + | OrangeTreeWW.png|Orange tree |
| − | PeachtreeWW.png|Peach | + | PeachtreeWW.png|Peach tree |
| − | PearTreeWW.png|Pear | + | PearTreeWW.png|Pear tree |
| − | WildWorldOakStump.png|Oak | + | WildWorldOakStump.png|Oak tree stump |
| − | CoconutTreeWW.png|Coconut | + | CoconutTreeWW.png|Coconut tree |
| − | Cedar Sapling WW Sprite.png| | + | Cedar Sapling WW Sprite.png|{{I|Cedar sapling|WW}} |
| − | Four-Leaf Clover WW Sprite.png|Four- | + | Four-Leaf Clover WW Sprite.png|{{I|Four-leaf clover|WW}} |
| − | Flower Bag WW Sprite.png|[[Flower | + | Flower Bag WW Sprite.png|[[Flower]] bag |
| − | Accessory WW Sprite.png|[[Accessory]] | + | Accessory WW Sprite.png|[[Clothing#Accessories and headwear|Accessory]] |
| − | Hat WW Sprite.png|[[Hat]] | + | Hat WW Sprite.png|[[Clothing#Accessories and headwear|Hat]] |
| − | Helmet WW Sprite.png|Helmet | + | Helmet WW Sprite.png|[[Clothing#Accessories and headwear|Helmet]] |
| − | Top WW Sprite.png|[[Top]] | + | Top WW Sprite.png|[[Clothing#Tops|Top]] |
| − | Umbrella WW Sprite.png|[[Umbrella]] | + | Umbrella WW Sprite.png|[[Clothing#Umbrellas|Umbrella]] |
Acorn WW Sprite.png|[[Acorn]] | Acorn WW Sprite.png|[[Acorn]] | ||
| − | Apple WW Sprite.png| | + | Apple WW Sprite.png|{{I|Apple|WW}} |
| − | Cherry WW Sprite.png| | + | Cherry WW Sprite.png|{{I|Cherry|WW}} |
| − | Coconut WW Sprite.png| | + | Coconut WW Sprite.png|{{I|Coconut|WW}} |
| − | Orange WW Sprite.png| | + | Orange WW Sprite.png|{{I|Orange|WW}} |
| − | Peach WW Sprite.png| | + | Peach WW Sprite.png|{{I|Peach|WW}} |
| − | Pear WW Sprite.png| | + | Pear WW Sprite.png|{{I|Pear|WW}} |
| − | Axe WW Sprite.png| | + | Axe WW Sprite.png|{{I|Axe|WW}} |
| − | Golden Axe WW Sprite.png|Golden | + | Golden Axe WW Sprite.png|{{I|Golden axe|WW}} |
| − | Fishing Rod WW Sprite.png| | + | Fishing Rod WW Sprite.png|{{I|Fishing rod|WW}} |
| − | Golden Rod WW Sprite.png|Golden | + | Golden Rod WW Sprite.png|{{I|Golden rod|WW}} |
| − | Net WW Sprite.png| | + | Net WW Sprite.png|{{I|Net|WW}} |
| − | Golden Net WW Sprite.png|Golden | + | Golden Net WW Sprite.png|{{I|Golden net|WW}} |
| − | Shovel WW Sprite.png| | + | Shovel WW Sprite.png|{{I|Shovel|WW}} |
| − | Slingshot WW Sprite.png| | + | Slingshot WW Sprite.png|{{I|Slingshot|WW}} |
| − | Golden Slingshot WW Sprite.png|Golden | + | Golden Slingshot WW Sprite.png|{{I|Golden slingshot|WW}} |
| − | Golden Shovel WW Sprite.png|Golden | + | Golden Shovel WW Sprite.png|{{I|Golden shovel|WW}} |
| − | Timer WW Sprite.png| | + | Timer WW Sprite.png|{{I|Timer|WW}} |
| − | Watering Can WW Sprite.png| | + | Watering Can WW Sprite.png|{{I|Watering can|WW}} |
| − | Tool Box WW Sprite.png|Tool | + | Tool Box WW Sprite.png|Tool |
| − | Golden Tool Box WW Sprite.png|Golden | + | Golden Tool Box WW Sprite.png|Golden tool |
Wallpaper WW Sprite.png|[[Wallpaper]] | Wallpaper WW Sprite.png|[[Wallpaper]] | ||
Aircheck WW Sprite.png|[[Aircheck]] | Aircheck WW Sprite.png|[[Aircheck]] | ||
Beehive WW Sprite.png|[[Beehive]] | Beehive WW Sprite.png|[[Beehive]] | ||
| − | Bug Container WW Sprite.png|Bug | + | Bug Container WW Sprite.png|Bug container |
Carpet WW Sprite.png|[[Carpet]] | Carpet WW Sprite.png|[[Carpet]] | ||
| − | Conch WW Sprite.png|Conch | + | Conch WW Sprite.png|{{I|Conch|WW}} |
| − | Coral WW Sprite.png|Coral | + | Coral WW Sprite.png|{{I|Coral|WW}} |
| − | Scallop WW Sprite.png|Scallop | + | Scallop WW Sprite.png|{{I|Scallop|WW}} |
Furniture WW Sprite.png|[[Furniture]] | Furniture WW Sprite.png|[[Furniture]] | ||
Fossil WW Sprite.png|[[Fossil]] | Fossil WW Sprite.png|[[Fossil]] | ||
| − | Identified Fossil WW Sprite.png|Fossil ( | + | Identified Fossil WW Sprite.png|Fossil (identified) |
| − | Item Box WW Sprite.png|Item | + | Item Box WW Sprite.png|Item box |
| − | Key WW Sprite.png|Key | + | Key WW Sprite.png|Key (unused) |
Letter WW Sprite.png|[[Letter]] | Letter WW Sprite.png|[[Letter]] | ||
| − | Note in a Bottle WW Sprite.png|Note in a | + | Note in a Bottle WW Sprite.png|[[Message bottle|Note in a bottle]] |
| − | Paper Bag WW Sprite.png|Paper | + | Paper Bag WW Sprite.png|Paper bag |
| − | Party Popper WW Sprite.png|Party | + | Party Popper WW Sprite.png|{{I|Party popper|WW}} |
| − | Pitfall Seed WW Sprite.png| | + | Pitfall Seed WW Sprite.png|{{I|Pitfall seed|WW}} |
| − | Roman Candle WW Sprite.png|Roman | + | Roman Candle WW Sprite.png|{{I|Roman candle|WW}} |
| − | Stationery WW Sprite.png|[[ | + | Stationery WW Sprite.png|[[Stationery]] |
| − | UFO Part WW Sprite.png|UFO | + | UFO Part WW Sprite.png|{{I|UFO part|WW}} |
</gallery> | </gallery> | ||
| Line 1,008: | Line 1,028: | ||
<gallery class="sprite"> | <gallery class="sprite"> | ||
100 Bells WW Inv Icon.png|100 [[Bell]]s | 100 Bells WW Inv Icon.png|100 [[Bell]]s | ||
| − | 1,000 Bells WW Inv Icon.png|1,000 | + | 200 Bells WW Inv Icon.png|200 Bells |
| − | 30,000 Bells WW Inv Icon.png|30,000 [[ | + | 300 Bells WW Inv Icon.png|300 Bells |
| − | 99,000 Bells WW Inv Icon.png|99,000 | + | 400 Bells WW Inv Icon.png|400 Bells |
| − | + | 500 Bells WW Inv Icon.png|500 Bells | |
| − | Accessory WW Inv Icon.png| | + | 600 Bells WW Inv Icon.png|600 Bells |
| − | + | 700 Bells WW Inv Icon.png|700 Bells | |
| − | Acorn WW Inv Icon.png| | + | 800 Bells WW Inv Icon.png|800 Bells |
| − | Small Acorn WW Inv Icon.png|Small | + | 900 Bells WW Inv Icon.png|900 Bells |
| − | Large Acorn WW Inv Icon.png|Large | + | 1,000 Bells WW Inv Icon.png|1,000 Bells |
| − | Round Acorn WW Inv Icon.png|Round | + | 2,000 Bells WW Inv Icon.png|2,000 Bells |
| − | Rotten Acorn WW Inv Icon.png|Rotten | + | 3,000 Bells WW Inv Icon.png|3,000 Bells |
| − | + | 4,000 Bells WW Inv Icon.png|4,000 Bells | |
| − | Apple WW Inv Icon.png | + | 5,000 Bells WW Inv Icon.png|5,000 Bells |
| + | 6,000 Bells WW Inv Icon.png|6,000 Bells | ||
| + | 7,000 Bells WW Inv Icon.png|7,000 Bells | ||
| + | 8,000 Bells WW Inv Icon.png|8,000 Bells | ||
| + | 9,000 Bells WW Inv Icon.png|9,000 Bells | ||
| + | 11,000 Bells WW Inv Icon.png|11,000 Bells | ||
| + | 12,000 Bells WW Inv Icon.png|12,000 Bells | ||
| + | 13,000 Bells WW Inv Icon.png|13,000 Bells | ||
| + | 14,000 Bells WW Inv Icon.png|14,000 Bells | ||
| + | 15,000 Bells WW Inv Icon.png|15,000 Bells | ||
| + | 16,000 Bells WW Inv Icon.png|16,000 Bells | ||
| + | 17,000 Bells WW Inv Icon.png|17,000 Bells | ||
| + | 18,000 Bells WW Inv Icon.png|18,000 Bells | ||
| + | 19,000 Bells WW Inv Icon.png|19,000 Bells | ||
| + | 21,000 Bells WW Inv Icon.png|21,000 Bells | ||
| + | 22,000 Bells WW Inv Icon.png|22,000 Bells | ||
| + | 23,000 Bells WW Inv Icon.png|23,000 Bells | ||
| + | 24,000 Bells WW Inv Icon.png|24,000 Bells | ||
| + | 25,000 Bells WW Inv Icon.png|25,000 Bells | ||
| + | 26,000 Bells WW Inv Icon.png|26,000 Bells | ||
| + | 27,000 Bells WW Inv Icon.png|27,000 Bells | ||
| + | 28,000 Bells WW Inv Icon.png|28,000 Bells | ||
| + | 29,000 WW Inv Icon.png|29,000 Bells | ||
| + | 30,000 Bells WW Inv Icon.png|30,000 Bells | ||
| + | 31,000 Bells WW Inv Icon.png|31,000 Bells | ||
| + | 32,000 Bells WW Inv Icon.png|32,000 Bells | ||
| + | 33,000 Bells WW Inv Icon.png|33,000 Bells | ||
| + | 34,000 Bells WW Inv Icon.png|34,000 Bells | ||
| + | 35,000 Bells WW Inv Icon.png|35,000 Bells | ||
| + | 36,000 Bells WW Inv Icon.png|36,000 Bells | ||
| + | 37,000 Bells WW Inv Icon.png|37,000 Bells | ||
| + | 38,000 Bells WW Inv Icon.png|38,000 Bells | ||
| + | 39,000 Bells WW Inv Icon.png|39,000 Bells | ||
| + | 40,000 Bells WW Inv Icon.png|40,000 Bells | ||
| + | 41,000 Bells WW Inv Icon.png|41,000 Bells | ||
| + | 42,000 Bells WW Inv Icon.png|42,000 Bells | ||
| + | 43,000 Bells WW Inv Icon.png|43,000 Bells | ||
| + | 44,000 Bells WW Inv Icon.png|44,000 Bells | ||
| + | 45,000 Bells WW Inv Icon.png|45,000 Bells | ||
| + | 46,000 Bells WW Inv Icon.png|46,000 Bells | ||
| + | 47,000 Bells WW Inv Icon.png|47,000 Bells | ||
| + | 48,000 Bells WW Inv Icon.png|48,000 Bells | ||
| + | 49,000 Bells WW Inv Icon.png|49,000 Bells | ||
| + | 50,000 Bells WW Inv Icon.png|50,000 Bells | ||
| + | 51,000 Bells WW Inv Icon.png|51,000 Bells | ||
| + | 52,000 Bells WW Inv Icon.png|52,000 Bells | ||
| + | 53,000 Bells WW Inv Icon.png|53,000 Bells | ||
| + | 54,000 Bells WW Inv Icon.png|54,000 Bells | ||
| + | 55,000 Bells WW Inv Icon.png|55,000 Bells | ||
| + | 56,000 Bells WW Inv Icon.png|56,000 Bells | ||
| + | 57,000 Bells WW Inv Icon.png|57,000 Bells | ||
| + | 58,000 Bells WW Inv Icon.png|58,000 Bells | ||
| + | 59,000 Bells WW Inv Icon.png|59,000 Bells | ||
| + | 60,000 Bells WW Inv Icon.png|60,000 Bells | ||
| + | 61,000 Bells WW Inv Icon.png|61,000 Bells | ||
| + | 62,000 Bells WW Inv Icon.png|62,000 Bells | ||
| + | 63,000 Bells WW Inv Icon.png|63,000 Bells | ||
| + | 64,000 Bells WW Inv Icon.png|64,000 Bells | ||
| + | 65,000 Bells WW Inv Icon.png|65,000 Bells | ||
| + | 66,000 Bells WW Inv Icon.png|66,000 [Bells | ||
| + | 67,000 Bells WW Inv Icon.png|67,000 Bells | ||
| + | 68,000 Bells WW Inv Icon.png|68,000 Bells | ||
| + | 69,000 Bells WW Inv Icon.png|69,000 Bells | ||
| + | 70,000 Bells WW Inv Icon.png|70,000 [Bells | ||
| + | 71,000 Bells WW Inv Icon.png|71,000 Bells | ||
| + | 72,000 Bells WW Inv Icon.png|72,000 Bells | ||
| + | 73,000 Bells WW Inv Icon.png|73,000 Bells | ||
| + | 74,000 Bells WW Inv Icon.png|74,000 Bells | ||
| + | 75,000 Bells WW Inv Icon.png|75,000 Bells | ||
| + | 76,000 Bells WW Inv Icon.png|76,000 Bells | ||
| + | 77,000 Bells WW Inv Icon.png|77,000 Bells | ||
| + | 78,000 Bells WW Inv Icon.png|78,000 Bells | ||
| + | 79,000 Bells WW Inv Icon.png|79,000 Bells | ||
| + | 80,000 Bells WW Inv Icon.png|80,000 [Bells | ||
| + | 81,000 Bells WW Inv Icon.png|81,000 Bells | ||
| + | 82,000 Bells WW Inv Icon.png|82,000 Bells | ||
| + | 83,000 Bells WW Inv Icon.png|83,000 Bells | ||
| + | 84,000 Bells WW Inv Icon.png|84,000 Bells | ||
| + | 85,000 Bells WW Inv Icon.png|85,000 Bells | ||
| + | 86,000 Bells WW Inv Icon.png|86,000 Bells | ||
| + | 87,000 Bells WW Inv Icon.png|87,000 Bells | ||
| + | 88,000 Bells WW Inv Icon.png|88,000 Bells | ||
| + | 89,000 Bells WW Inv Icon.png|89,000 Bells | ||
| + | 90,000 Bells WW Inv Icon.png|90,000 Bells | ||
| + | 91,000 Bells WW Inv Icon.png|91,000 Bells | ||
| + | 92,000 Bells WW Inv Icon.png|92,000 Bells | ||
| + | 93,000 Bells WW Inv Icon.png|93,000 Bells | ||
| + | 94,000 Bells WW Inv Icon.png|94,000 Bells | ||
| + | 95,000 Bells WW Inv Icon.png|95,000 Bells | ||
| + | 96,000 Bells WW Inv Icon.png|96,000 Bells | ||
| + | 97,000 Bells WW Inv Icon.png|97,000 Bells | ||
| + | 98,000 Bells WW Inv Icon.png|98,000 Bells | ||
| + | 99,000 Bells WW Inv Icon.png|99,000 Bells | ||
| + | Accessory WW Inv Icon.png|Accessory | ||
| + | Acorn WW Inv Icon.png|{{I|Acorn|WW}} | ||
| + | Small Acorn WW Inv Icon.png|{{I|Small acorn|WW}} | ||
| + | Large Acorn WW Inv Icon.png|{{I|Large acorn|WW}} | ||
| + | Round Acorn WW Inv Icon.png|{{I|Round acorn|WW}} | ||
| + | Rotten Acorn WW Inv Icon.png|{{I|Rotten acorn|WW}} | ||
| + | Apple WW Inv Icon.png|Apple | ||
Cherry WW Inv Icon.png|Cherry | Cherry WW Inv Icon.png|Cherry | ||
Coconut WW Inv Icon.png|Coconut | Coconut WW Inv Icon.png|Coconut | ||
| Line 1,026: | Line 1,145: | ||
Peach WW Inv Icon.png|Peach | Peach WW Inv Icon.png|Peach | ||
Pear WW Inv Icon.png|Pear | Pear WW Inv Icon.png|Pear | ||
| − | Axe WW Inv Icon.png| | + | Axe WW Inv Icon.png|Axe |
Cracked Axe WW Icon.png|Axe (damaged) | Cracked Axe WW Icon.png|Axe (damaged) | ||
Cracked Axe WW Icon 2.png|Axe (damaged) | Cracked Axe WW Icon 2.png|Axe (damaged) | ||
| − | Golden Axe WW Inv Icon.png|Golden | + | Golden Axe WW Inv Icon.png|Golden axe |
| − | Fishing Rod WW Inv Icon.png| | + | Fishing Rod WW Inv Icon.png|Fishing rod |
| − | Golden Rod WW Inv Icon.png|Golden | + | Golden Rod WW Inv Icon.png|Golden rod |
| − | Net WW Inv Icon.png| | + | Net WW Inv Icon.png|Net |
| − | Golden Net WW Inv Icon.png|Golden | + | Golden Net WW Inv Icon.png|Golden net |
| − | Shovel WW Inv Icon.png| | + | Shovel WW Inv Icon.png|Shovel |
| − | Golden Shovel WW Inv Icon.png|Golden | + | Golden Shovel WW Inv Icon.png|Golden shovel |
| − | Slingshot WW Inv Icon.png| | + | Slingshot WW Inv Icon.png|Slingshot |
| − | Golden Slingshot WW Inv Icon.png|Golden | + | Golden Slingshot WW Inv Icon.png|Golden slingshot |
| − | Timer WW Inv Icon.png| | + | Timer WW Inv Icon.png|Timer |
| − | Watering Can WW Inv Icon.png| | + | Watering Can WW Inv Icon.png|Watering can |
| − | Golden Can WW Inv Icon.png|Golden | + | Golden Can WW Inv Icon.png|Golden can |
| − | Boot WW Inv Icon.png| | + | Boot WW Inv Icon.png|{{I|Boot|WW}} |
| − | Empty Can WW Inv Icon.png|Empty | + | Empty Can WW Inv Icon.png|{{I|Empty can|WW}} |
| − | Old Tire WW Inv Icon.png|Old | + | Old Tire WW Inv Icon.png|{{I|Old tire|WW}} |
| − | Conch WW Inv Icon.png | + | Conch WW Inv Icon.png|Conch |
Coral WW Inv Icon.png|Coral | Coral WW Inv Icon.png|Coral | ||
| − | Dall's Top WW Inv Icon.png|Dall's | + | Dall's Top WW Inv Icon.png|{{I|Dall's top|WW}} |
| − | Pearl Oyster WW Inv Icon.png|Pearl | + | Pearl Oyster WW Inv Icon.png|{{I|Pearl oyster|WW}} |
| − | Porceletta WW Inv Icon.png|Porceletta | + | Porceletta WW Inv Icon.png|{{I|Porceletta|WW}} |
| − | Sand Dollar WW Inv Icon.png|Sand | + | Sand Dollar WW Inv Icon.png|{{I|Sand dollar|WW}} |
Scallop WW Inv Icon.png|Scallop | Scallop WW Inv Icon.png|Scallop | ||
| − | White Scallop WW Inv Icon.png|White | + | White Scallop WW Inv Icon.png|{{I|White scallop|WW}} |
| − | Jacob's Ladder WW Inv Icon.png| | + | Jacob's Ladder WW Inv Icon.png|{{I|Jacob's ladder|WW}} |
| − | Dandelion WW Icon.png| | + | Dandelion WW Icon.png|{{I|Dandelion]] |
| − | Dandelion Puff WW Icon.png|Dandelion | + | Dandelion Puff WW Icon.png|{{I|Dandelion puff|WW}} |
| − | Four-Leaf Clover WW Inv Icon.png | + | Four-Leaf Clover WW Inv Icon.png|Four-leaf clover |
| − | Flower Bag WW Inv Icon.png| | + | Flower Bag WW Inv Icon.png|Flower bag |
| − | Sapling WW Inv Icon.png| | + | Sapling WW Inv Icon.png|Sapling |
| − | Cedar Sapling WW Inv Icon.png|Cedar | + | Cedar Sapling WW Inv Icon.png|Cedar sapling |
| − | Turnips WW Icon.png| | + | Turnips WW Icon.png|10 {{I|Turnips|WW}} |
| − | Red Turnips WW Icon.gif| | + | 20 Turnips WW Inv Icon.png|20 turnips |
| − | Party Popper WW Inv Icon.png | + | 30 Turnips WW Inv Icon.png|30 turnips |
| − | Roman Candle WW Inv Icon.png|Roman | + | 40 Turnips WW Inv Icon.png|40 turnips |
| − | Carpet WW Inv Icon.png | + | 50 Turnips WW Inv Icon.png|50 turnips |
| + | 60 Turnips WW Inv Icon.png|60 turnips | ||
| + | 70 Turnips WW Inv Icon.png|70 turnips | ||
| + | 80 Turnips WW Inv Icon.png|80 turnips | ||
| + | 90 Turnips WW Inv Icon.png|90 turnips | ||
| + | 100 Turnips WW Inv Icon.png|100 turnips | ||
| + | Red Turnips WW Icon.gif|{{I|Red turnip|WW}} | ||
| + | Party Popper WW Inv Icon.png|Party popper | ||
| + | Roman Candle WW Inv Icon.png|Roman candle | ||
| + | Carpet WW Inv Icon.png|Carpet | ||
Carpet Delivery WW Icon.png|Carpet (delivery) | Carpet Delivery WW Icon.png|Carpet (delivery) | ||
Gyroid WW Inv Icon.png|[[Gyroid]] | Gyroid WW Inv Icon.png|[[Gyroid]] | ||
| − | Fossil WW Inv Icon.png| | + | Fossil WW Inv Icon.png|Fossil |
Identified Fossil WW Icon.png|Fossil (identified) | Identified Fossil WW Icon.png|Fossil (identified) | ||
| − | Furniture WW Inv Icon.png| | + | Furniture WW Inv Icon.png|Furniture |
| − | Hat WW Inv Icon.png| | + | Hat WW Inv Icon.png|Hat |
| − | Helmet WW Inv Icon.png| | + | Helmet WW Inv Icon.png|Helmet |
| − | Top WW Inv Icon.png| | + | Top WW Inv Icon.png|Top |
| − | Umbrella WW Inv Icon.png| | + | Umbrella WW Inv Icon.png|Umbrella |
| − | Wallpaper WW Inv Icon.png| | + | Wallpaper WW Inv Icon.png|Wallpaper |
Wallpaper Delivery WW Icon.png|Wallpaper (delivery) | Wallpaper Delivery WW Icon.png|Wallpaper (delivery) | ||
| − | Medicine WW Inv Icon.png| | + | Medicine WW Inv Icon.png|{{I|Medicine|WW}} |
| − | Note in a Bottle WW Inv Icon.png | + | Note in a Bottle WW Inv Icon.png|Note in a bottle |
| − | Pitfall Seed WW Inv Icon.png|Pitfall | + | Pitfall Seed WW Inv Icon.png|Pitfall seed |
Present WW Inv Icon.png|[[Present]] | Present WW Inv Icon.png|[[Present]] | ||
Present Delivery WW Icon.png|Present (delivery) | Present Delivery WW Icon.png|Present (delivery) | ||
| − | UFO Part WW Inv Icon.png|UFO | + | UFO Part WW Inv Icon.png|UFO part |
| − | Stationery WW Icon.png| | + | Stationery WW Icon.png|Stationery |
</gallery> | </gallery> | ||
| Line 1,100: | Line 1,228: | ||
Superhero Show WW1.gif|Cartoons | Superhero Show WW1.gif|Cartoons | ||
Superhero Show WW2.png|Cartoons | Superhero Show WW2.png|Cartoons | ||
| − | Off Air Show WW.gif|Off- | + | Off Air Show WW.gif|Off-air static |
| − | Off Air Test WW NA.png|Off- | + | Off Air Test WW NA.png|Off-air test pattern (North America) |
| − | Off Air Test WW PAL.png|Off- | + | Off Air Test WW PAL.png|Off-air test pattern (Europe) |
| − | Off Air Test WW JP.png|Off- | + | Off Air Test WW JP.png|Off-air test pattern (Japan) |
</gallery> | </gallery> | ||
| Line 1,109: | Line 1,237: | ||
<gallery class=sprite> | <gallery class=sprite> | ||
Home Menu WW Icon.png|Home Menu icon | Home Menu WW Icon.png|Home Menu icon | ||
| + | WW Home Menu Icon Wii U NA.png|North American [[Wii U]] Virtual Console icon | ||
| + | WW Home Menu Icon Wii U EU.png|European Wii U Virtual Console icon | ||
| + | WW Home Menu Icon Wii U JP.png|Japanese Wii U Virtual Console icon | ||
</gallery> | </gallery> | ||
| Line 1,114: | Line 1,245: | ||
{{Image|section|note=Needs more screenshots of the final game (see [[:Category:Wild World screenshots]])|date=August 31, 2020}} | {{Image|section|note=Needs more screenshots of the final game (see [[:Category:Wild World screenshots]])|date=August 31, 2020}} | ||
<gallery> | <gallery> | ||
| − | + | WW Title Screen.png|Title screen | |
WW Title Screen Japan.png|Title screen (Japan) | WW Title Screen Japan.png|Title screen (Japan) | ||
WW Title Screen Europe.png|Title screen (Europe) | WW Title Screen Europe.png|Title screen (Europe) | ||
| Line 1,122: | Line 1,253: | ||
===Pre-release=== | ===Pre-release=== | ||
<gallery> | <gallery> | ||
| − | + | WW Beta 4.jpg | |
| + | WW Beta Pockets 2.jpg | ||
| + | WW Beta Pockets 3.jpg | ||
</gallery> | </gallery> | ||
====E3 2004==== | ====E3 2004==== | ||
<gallery> | <gallery> | ||
| − | + | WW Beta 1.jpg | |
| − | + | WW Design E3 2004.jpg | |
| − | + | WW Pockets E3 2004.jpg | |
| + | WW Typing E3 2004.jpg | ||
| + | WW Typing 2 E3 2004.jpg | ||
</gallery> | </gallery> | ||
| Line 1,141: | Line 1,276: | ||
WW Museum Exterior E3 2005.jpg | WW Museum Exterior E3 2005.jpg | ||
WW Pockets E3 2005.jpg | WW Pockets E3 2005.jpg | ||
| + | </gallery> | ||
| + | |||
| + | ==Videos== | ||
| + | ===Promotional videos=== | ||
| + | <gallery widths=320px heights=200px> | ||
| + | WW Gameplay E3 2004.mp4|The first gameplay footage of {{WW|short|nolink}}, shown at E3 2004 | ||
| + | WW Gameplay E3 2005.mp4|Gameplay footage shown at E3 2005 | ||
</gallery> | </gallery> | ||
[[Category:Game galleries]] | [[Category:Game galleries]] | ||
[[Category:Animal Crossing: Wild World]] | [[Category:Animal Crossing: Wild World]] | ||
Latest revision as of 03:22, April 21, 2024
This is a gallery for any images related to Animal Crossing: Wild World.
Logos[edit]

English logo

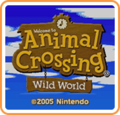
English logo (in-game)

Early English logo (E3 2005)

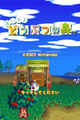
Japanese logo

Japanese logo (in-game)

Korean logo

Box art and media[edit]
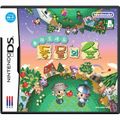
Japanese box art (front)

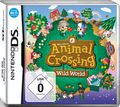
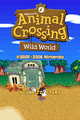
North American box art (front)
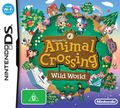
Australian box art (front)
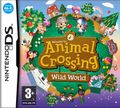
European box art (front)
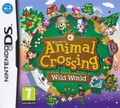
European box art (re-rated; front)
German box art (front)
Korean box art (front)
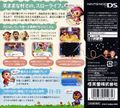
Japanese box art (back)
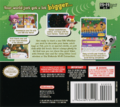
North American box art (back)
European box art (back)

North American box art (spine)
Wii U eShop icon
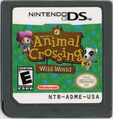
North American Game Card
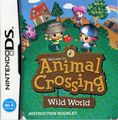
North American instruction booklet
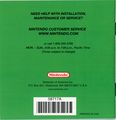
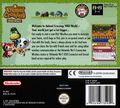
North American instruction booklet (back)
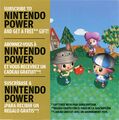
Nintendo Power flyer


Artwork[edit]
Players[edit]


Special characters[edit]

Mr. Resetti


Villagers[edit]


Locations[edit]

A House


Other artwork[edit]

Artwork for the game cover
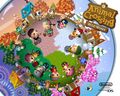
A wallpaper depicting all seasons

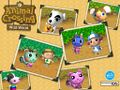
Nintendo Power postcards


Nintendo Badge Arcade


Sprites and models[edit]
Special characters[edit]
Mr. Resetti (The Roost)

Tom Nook (Nook 'n' Go)
Tom Nook (Nookway)

Tom Nook (Nookington's)

Tortimer


_WW_Model.png)


_WW_Model.png)
_WW_Model.png)
_WW_Model.png)
_WW_Model.png)

_WW_Model.png)

Villagers[edit]


Houses[edit]
|
|


|
|


|
|


|
|


|
|


|
|


|
|


|
|


|
|


|
|


|
|


|
|


|
|


|
|


|
|


|
|


|
|


|
|


|
|


|
|


Items and objects[edit]

Oak tree

Apple tree

Cherry tree

Orange tree

Peach tree

Pear tree

Oak tree stump

Coconut tree

Flower bag

Tool

Golden tool

Bug container

Fossil (identified)

Item box

Key (unused)

Paper bag


Icons[edit]

100 Bells

200 Bells

300 Bells

400 Bells

500 Bells

600 Bells

700 Bells

800 Bells

900 Bells

1,000 Bells

2,000 Bells

3,000 Bells

4,000 Bells

5,000 Bells

6,000 Bells

7,000 Bells

8,000 Bells

9,000 Bells

11,000 Bells

12,000 Bells

13,000 Bells

14,000 Bells

15,000 Bells

16,000 Bells

17,000 Bells

18,000 Bells

19,000 Bells

21,000 Bells

22,000 Bells

23,000 Bells

24,000 Bells

25,000 Bells

26,000 Bells

27,000 Bells

28,000 Bells

29,000 Bells

30,000 Bells

31,000 Bells

32,000 Bells

33,000 Bells

34,000 Bells

35,000 Bells

36,000 Bells

37,000 Bells

38,000 Bells

39,000 Bells

40,000 Bells

41,000 Bells

42,000 Bells

43,000 Bells

44,000 Bells

45,000 Bells

46,000 Bells

47,000 Bells

48,000 Bells

49,000 Bells

50,000 Bells

51,000 Bells

52,000 Bells

53,000 Bells

54,000 Bells

55,000 Bells

56,000 Bells

57,000 Bells

58,000 Bells

59,000 Bells

60,000 Bells

61,000 Bells

62,000 Bells

63,000 Bells

64,000 Bells

65,000 Bells

66,000 [Bells

67,000 Bells

68,000 Bells

69,000 Bells

70,000 [Bells

71,000 Bells

72,000 Bells

73,000 Bells

74,000 Bells

75,000 Bells

76,000 Bells

77,000 Bells

78,000 Bells

79,000 Bells

80,000 [Bells

81,000 Bells

82,000 Bells

83,000 Bells

84,000 Bells

85,000 Bells

86,000 Bells

87,000 Bells

88,000 Bells

89,000 Bells

90,000 Bells

91,000 Bells

92,000 Bells

93,000 Bells

94,000 Bells

95,000 Bells

96,000 Bells

97,000 Bells

98,000 Bells

99,000 Bells

Accessory

Apple

Cherry

Coconut

Orange

Peach

Pear

Axe

Axe (damaged)

Axe (damaged)

Golden axe

Fishing rod

Golden rod

Net

Golden net

Shovel

Golden shovel

Slingshot

Golden slingshot

Timer

Watering can

Golden can

Conch

Coral

Scallop

Dandelion]]

Four-leaf clover

Flower bag

Sapling

Cedar sapling

10 Turnips

20 turnips

30 turnips

40 turnips

50 turnips

60 turnips

70 turnips

80 turnips

90 turnips

100 turnips

Party popper

Roman candle

Carpet

Carpet (delivery)

Fossil

Fossil (identified)

Furniture

Hat

Helmet

Top

Umbrella

Wallpaper

Wallpaper (delivery)

Note in a bottle

Pitfall seed

Present (delivery)

UFO part

Stationery
Question/character icons[edit]

Name
TV shows[edit]

Comedy

Cartoons

Cartoons

Off-air static

Off-air test pattern (North America)

Off-air test pattern (Europe)

Off-air test pattern (Japan)


Miscellaneous[edit]

Home Menu icon

North American Wii U Virtual Console icon

European Wii U Virtual Console icon

Japanese Wii U Virtual Console icon
Screenshots[edit]
Further details: Needs more screenshots of the final game (see Category:Wild World screenshots)
Further details: Needs more screenshots of the final game (see Category:Wild World screenshots)
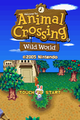
Title screen
Title screen (Japan)
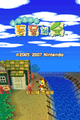
Title screen (Europe)
Title screen (Korea)


Pre-release[edit]


E3 2004[edit]


E3 2005[edit]


Videos[edit]
Promotional videos[edit]
The first gameplay footage of Wild World, shown at E3 2004
Gameplay footage shown at E3 2005