Museum
| ||||||
 The museum in Animal Crossing: New Horizons 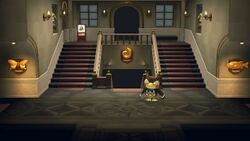 The museum's foyer in Animal Crossing: New Horizons | ||||||
| Music (New Horizons) | ||||||
|---|---|---|---|---|---|---|
| Function | Building | |||||
| Services | Bug, fish, sea creature,[nb 2] fossil, and artwork exhibits Observatory[nb 3] The Roost[nb 4] | |||||
| Staff | Blathers Celeste[nb 1] | |||||
| Opening Hours | All day | |||||
| Main appearances | ||||||
|
| ||||||
| Other appearances | ||||||
Names in other languages
博物館
박물관 Museo Museum
博物馆
Musée Museo Museum
博物館 Musée Museo Музей | ||||||
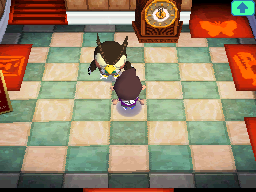
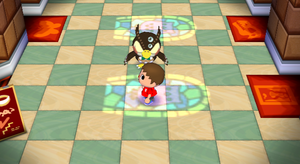
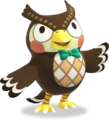
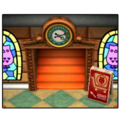
The museum is a building in the Animal Crossing series where items can be donated. Introduced in Animal Crossing, it is an establishment for the collection and display of bugs, fish, sea creatures, artwork, and fossils. The curator, an owl named Blathers, accepts donations, assesses fossils, and identifies fake artwork. Upon donation, Blathers generally tells the player facts about the donated item.
Appearances[edit]
In Animal Crossing[edit]
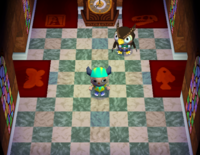
The museum makes its first appearance in Doubutsu no Mori+, and is also present in Animal Crossing. At the museum, the player can donate any bugs, fish, fossils, or paintings that they find. In the case of fossils, however, the player must send any unidentified fossils to the Farway Museum, as Blathers, the museum curator, is unable to identify fossils himself. For each donation, the museum is divided into various sections pertaining to whatever category the donation falls under, either as bugs, fish, fossils, or paintings. Once the player donates everything for one section, Blathers will congratulate the player for completing it. On the other hand, if everything from every exhibit is donated, than the player will receive a Museum Model to congratulate their hard work.
The bug exhibit is one room. At the back of the room, there are around five to seven summer themed trees that have beetles and cicadas on them, once each are donated. In the middle, there is a lot of flowers, a pond and a tree, containing ladybugs and butterflies when they are donated. At the bottom area there is a pile of leaves, a big rock and a single tree that contain grasshoppers, crickets, and a few other bugs. If the player donates a mosquito or a cockroach, both will be seen moving freely in the exhibit, either flying around or scuttling around the floor, respectively.
The fish exhibit is relatively small compared to future installments, as it is only one room containing six tanks for pond, river and freshwater fish. If a frog is donated, it can be seen croaking on top of a lily pad in the topmost tank to the right. In the very back of the exhibit, there is one big tank containing seawater fish.
The painting exhibit is one room, containing many aisles of paintings. The pathway to each row of paintings curves and twists.
The fossil exhibit is, once again, in one room. The larger fossils, such as the T-Rex, are placed haphazardly and in nonlinear lines. The smaller fossils, such as amber and an ammonite, are in a line near the entrance.
In Wild World[edit]
The museum returns in Animal Crossing: Wild World, with several new additions. The museum now features a second floor and basement that contain an observatory and a café known as The Roost, respectively. In addition, Blathers is now able to identify fossils himself. Other than these new additions, the museum in Wild World has the same function as Animal Crossing.
The bug exhibits are split into two rooms. Butterflies are in the first room, and so are all the bugs that live on palm trees, under rocks, and in the ground. Pondskaters will also appear in this room. All grass-bound bugs and bugs that live on trees are in the second room. The cockroach, once donated, skitters on the floor of the first room.
The fish section divides into two rooms. All river, pond, lake, and waterfall fish are kept in two tanks within the first room, while all sea fish are kept in one large tank in the second room located to the north of the first.
The painting exhibit is almost the same as in Animal Crossing, except there are more twists and turns.
The fossil exhibit contains two rooms, featuring smaller fossils in both rooms.
If a player is to move out of a town but has donated something to the museum, when another player checks the exhibit list, it will say it was donated by So-And-So instead of the previous player's name.
In City Folk[edit]
The museum appears once again in Animal Crossing: City Folk, featuring redesigned exhibits from its predecessor. Other than this, no major changes are made.
The bug exhibit is one big room divided into three levels. The first level has all the butterflies, located near the entrance with insects that can be found near or in water. The second level, which is connected to the first by a small slope, is set up like a small wooded area. The rafflesia, a large flower that appears in a town when there are too many weeds, is next to the slope. The third level, which is also connected by a small slope to the second level, is open planned, with trees surrounding the wall at the top of the room with a few heat lamps.
The fish exhibit is one large room. Most sea fish, including the hammerhead shark, are found in a very large tank that spans across the entire northern part of the room. Small sea fish, like the surgeonfish, are kept in a long, tube-shaped tank in the southeast corner of the room. Most small river fish, like the guppy, are in the southwest corner of the room in a similar tank. All other river, pond, lake, and waterfall fish, like the carp and char, are kept in the middle of the room in two tanks.
The paintings exhibit is split up into two rooms; a main room and a back room. Most paintings are displayed in the main room. In the back room, there is a single row of paintings along the wall of the room. The rope divider in the middle of the room guards the famous painting once it is donated.
The fossil exhibit of the museum is composed of two rooms and floors. Smaller fossils are kept upstairs in the second room.
In New Leaf[edit]
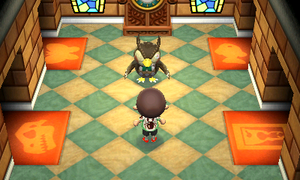
The museum returns once more in Animal Crossing: New Leaf, being given an extensive makeover from previous installments. For instance, the player can now donate multiple items at once, although they will not get a reaction from Blathers if this is done. Furthermore, each exhibit gives more specific details on a specific item on display, replacing Blathers's monologues in previous games, although City Folk already gave descriptions to completed fossils.
In New Leaf, the museum no longer features the Observatory or The Roost. At the beginning of the game, the museum consists of only a single floor, although a second story can be constructed as a public works project and The Roost can also be built as a public works project, though as its own building outside of the museum. With this expansion, Celeste will operate a gift shop selling unique furniture, tools, wallpaper and carpets, and will also rent out four different exhibition spaces for 10,000 Bells each. The second floor also contains lockers that can access a player's storage space. Outside the entrance to the museum is a board that lists every exhibit and their donors, and the paintings section has been expanded to encompass sculptures as well.
The bug exhibit is divided into three separate rooms. The first is a wide space with a variety of flowers and a small pond. This room houses most butterflies, the snail, the hermit crab, and various ground-dwelling bugs such as the pill bug. The second room contains a central tree stump and a few flowers surrounded by oak and cedar trees. It houses the dragonflies, mantises, most beetles, the monarch butterfly, the walking leaf, and the walking stick. The final room has a central rafflesia, several stumps, and is surrounded by oak and palm trees. This room houses beetles found on palm trees, the cicadas, the birdwing butterfly, the centipede, the fly, and the flea.
The fish exhibit is also divided into three rooms focused on sea creatures, surface-dwelling saltwater fish, and freshwater fish. The deep-sea room contains one big tank and three smaller tanks, while the saltwater room houses a single tank that curves around the wall and some stools in the corner to observe the fish. The freshwater room holds two long tanks and two circular tanks in opposite corners. Overall, the exhibit in New Leaf houses fewer tanks than in City Folk, but they are much larger.
In New Horizons[edit]
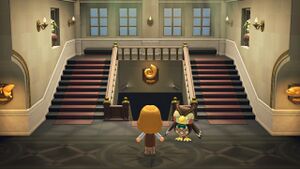
The museum returns once again in Animal Crossing: New Horizons; however, it is not available from the start. First, the player needs to donate 5 creatures to Tom Nook in the Resident Services. Once they have done so, Tom Nook will get a call from Blathers to set up the tent. Soon after, he gives the tent to the player, who then needs to place it somewhere on the island. The next day, Blathers will have set up a tent on the spot chosen by the player. The player will have to donate 10 more items in order for the museum to be built. The museum will be opened in two days (including the construction in the next day).
This new museum initially had three sections (for fish, bugs, and fossils). As of the version 1.2.0 update, the art wing has been added; this initially required purchasing a piece of art from Redd and showing it to Blathers, but as of the 2.0.0 update, it is automatically unlocked once the museum is built. The 2.0.0 update also reintroduces the Roost, which is built into the top-left corner of the museum, and is unlocked by finding Brewster on one of Kapp'n's boat tour islands.
Like in New Leaf, multiple items can be donated, and multiple fossils assessed, at once. Blather's monologues return for individually given bugs, fish, and fossils, but details about art are provided in each exhibit.
The museum additionally receives a radical redesign, being much more elaborate and closer in style to real-life western museums compared to earlier incarnations. The lobby no longer carries over the simplistic design that had been in place since Animal Crossing, instead featuring a new interior based more closely on that of antiquated urban institutional centers.
Like in New Leaf, the bug wing consists of three separate rooms, but each is far more elaborate. The first room is massive, divided into four levels, and contains a waterfall that flows down into a pond, the river separating the exhibits. The lowest level contains a glass partition to view aquatic insects in the pond, as well as carp and koi swimming around. The second level has several tree stumps and logs, as well as a giant tree. These display the cicadas, most beetles, the wasp, the bagworm, the spider, the Atlas moth, and the great purple emperor. The third level has a small patch of land with flowers, palm trees, and a bench. It houses the stink bugs, the mantis, and the honeybee. The fourth level is above the waterfall, and shows the dragonflies and several beetles. A large tree leaking sap stands in the upper-right corner: at night, the beetles gather on it to fight, with the losing beetle returning to its daytime spot. A number of butterflies from the second room can be seen, as well as donated fish.
The second room is brightly lit with a large fountain in the center. It houses most butterflies, the snail, the ladybug, and the Madagascan sunset moth. If donated to the fish wing, a frog can be seen on lily pads in the fountain. The final room contains exhibits with unique biomes, as well as a laboratory that houses the fly, the flea, the mosquito (which unlike previous games is contained and cannot bite the player), and the paper kite butterfly. A DNA model can be seen next to the fly tank, alluding to the common use of fruit flies in real-world genetic studies (thanks to their relatively simple genomes and high breeding rate). Activating the camera while next to the fly tank and panning up and to the left reveals a random bug resting either on the outside wall or on the lab's upper cabinets. A trail of ants can be seen crawling between their exhibit and a platter of coffee and sugar.
The fish gallery remains divided into three different rooms, this time organized by freshwater fish, and depth for the saltwater fish. Initially bare, these tanks are filled with plants and rock formations as more fish are donated. In the freshwater room, a figure-eight shaped tank contains small, mostly colorful fish. Next to this tank is a large pond housing various fish, the crawfish, the frog (and tadpole), and the snapping turtle. Along the back wall are three tanks connected by waterfalls, each housing river fish found at each altitude. In the right corner is a huge tank that houses the jungle freshwater fish. The deeper saltwater fish exhibit contains two colossal tanks. The first tank houses fish encountered in the open sea, while the second holds deep-water fish and is accentuated with a submarine and diving suit display.
The room for shallower saltwater fish has three floors, with its largest tank tall enough to span the bottom two. This has a T-shaped tunnel with a staircase to view its fish from different angles. The second floor also has a separate tank for the sea butterfly and an icicle display representing the real-life species' arctic habitat. The third floor holds a third tank for coral-reef fish.
The fossil exhibit is expanded to three rooms, with smaller, non-tetrapod fossils in the first room, dinosaurs and other pre-Cenozoic land animals in the second, and Cenozoic fossils in the last. A model of the asteroid responsible for the K-Pg extinction event hangs in the upper-left corner of the second room, with a smaller model of the asteroid's impact in the lower-right. Furthermore, throughout the exhibit, lines are drawn on the floor between fossils which roughly correspond to a proposed evolutionary tree, culminating in a glass display showing how these fossils represent the evolutionary ancestry of the game's various villager species, with an empty spot for the player to stand in to complete the image (doing so is purely cosmetic).
Staff[edit]
Blathers
(Museum Curator)
Gallery[edit]
Further details: Needs images of each area of the museum in Wild World and New Horizons especially.
Further details: Needs images of each area of the museum in Wild World and New Horizons especially.
Artwork[edit]
Sprites[edit]
Logo
(Animal Crossing)Map icon
(Animal Crossing)Logo
(City Folk)Logo
(New Leaf)Map icon
(New Horizons)
Screenshots[edit]
Exterior[edit]
Blathers's tent in New Horizons
Foyer[edit]
An early foyer found in the leaked source code of Doubutsu no Mori
Bug exhibit[edit]
First room in Animal Crossing: New Horizons
Fish exhibit[edit]
Fossil exhibit[edit]
Art exhibit[edit]
Music[edit]
Animal Crossing
(fossil exhibit)Animal Crossing: New Horizons
(art exhibit)Animal Crossing: New Horizons
(bug exhibit)Animal Crossing: New Horizons
(bug exhibit)Animal Crossing: New Horizons
(bug exhibit)Animal Crossing: New Horizons
(fish exhibit)Animal Crossing: New Horizons
(fish exhibit)Animal Crossing: New Horizons
(fish exhibit)Animal Crossing: New Horizons
(fossil exhibit)Animal Crossing: New Horizons
(fossil exhibit)Animal Crossing: New Horizons
(fossil exhibit)Animal Crossing: New Horizons
(fossil exhibit)
See also[edit]
Notes[edit]
| Locations | ||||||||||||||||||||||||
|---|---|---|---|---|---|---|---|---|---|---|---|---|---|---|---|---|---|---|---|---|---|---|---|---|
| ||||||||||||||||||||||||
| Animal Crossing: Wild World | ||||||||||||||||||||||
|---|---|---|---|---|---|---|---|---|---|---|---|---|---|---|---|---|---|---|---|---|---|---|
| ||||||||||||||||||||||
| Animal Crossing: City Folk | ||||||||||||||||||||||
|---|---|---|---|---|---|---|---|---|---|---|---|---|---|---|---|---|---|---|---|---|---|---|
| ||||||||||||||||||||||
| Animal Crossing: New Horizons | |||||||||||||||||||||||||||||||
|---|---|---|---|---|---|---|---|---|---|---|---|---|---|---|---|---|---|---|---|---|---|---|---|---|---|---|---|---|---|---|---|
| |||||||||||||||||||||||||||||||
| Gekijōban Doubutsu no Mori | |||||||||||
|---|---|---|---|---|---|---|---|---|---|---|---|
|
